Angular – Add dynamic data to your blog using a Spring Boot backend and MariaDB

240831 – 0902
Intro
In my previous post, I showed how one can kick off building an Angular blog website, by starting with a basic “holy-grail” layout (based on Angular Material mat-grid-list tiles) and using 6 fundamental components -dynamically. For that post’s output, we have created a simple blog concept using articles or posts, where each article belongs to a specific category. So, the basic 2 “entities” for our examples will be Article(s) and Category(-es). You can find my previous post below:
and the respective repo here.
In this post, we will work on how we can consume “real” dynamic data (Categories and Articles) from the backend. We will start using local JSON data, and then we will use a real backend, implemented in Java/Spring Boot and MariaDB. Repos will be provided in each of the implementation steps.
The steps:
- Use local JSON files for categories and articles
- Update Angular front end with Data and Content Services – Observables to Signals
- Use the Spring Boot back end with MariaDB
- Adjust the front end to the Sprin Boot back end
So, let’s start doing it!
The Angular Frontend
The initial repo
Our example project will be based on the above repo. So, you can continue working on it, or you can clone the above repo and start using it. You can also find a freshly cloned repo here, so you can grab it and start following the steps below.
Using local JSON-data
Our local data
Let’s define some initial properties of our targeted entities: the Category and the Article. For this purpose, we can use 2 respective Typescript interfaces, like the ones below:
You can place them into any file/component, but I have used a specific file for them, the blogObjects.ts file, and I have placed it inside the new dbObjects folder, under the project’s src/app.
Also note, that previously, I have used the ICategory interface, as well as the ISiteMenu interface inside the NavrowComponent, but now I’ve moved them into the blogObjects.ts file. (We will see the updates of the NavrowComponent, a bit later on).
So, when we are going to access local JSON files providing data for the above entities, we expect that we will access 2 JSON files, each one containing arrays of the above objects, e.g.:
categories.json:
[
    {
      "categoryId": 999,
      "categoryTitle": "..."
    },
    . . .
]
articles.json:
[
    {
      "articleId": 999,
      "categoryId": 999,
      "articleTitle": ". . ."
      "articleContent": ". . ."
    },
    . . .
]
For our local JSON data, we are going to use the /src/assets folder. Note that, older Angular versions might have provided -by default- the src/assets folder, but now you have to create it on your own. So, create it under the project src folder.
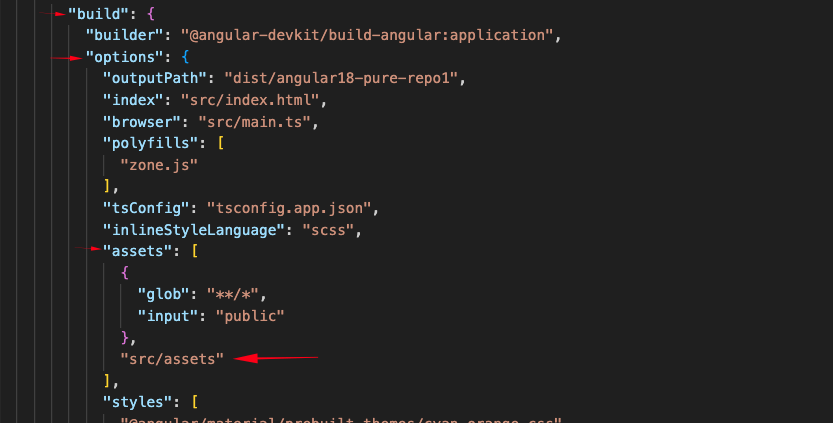
Note that in order for the “src/assets” folder to be accessible from our Angular app, it is necessary, to declare/add it at the ‘assets/ property array into the app’s angular.json file. We must do it into the ‘build’’ (and/or ‘test’) /‘options’/’assets’ section, e.g.:
You can add your own data, but for your convenience, I have prepared some demo data, that you can find, under the /src/assets folder of the project, and these data will be used here. The categories.json file is given below:
The articles.json file is a bit bigger, so I missed here, but you can find it in the updated repo below.
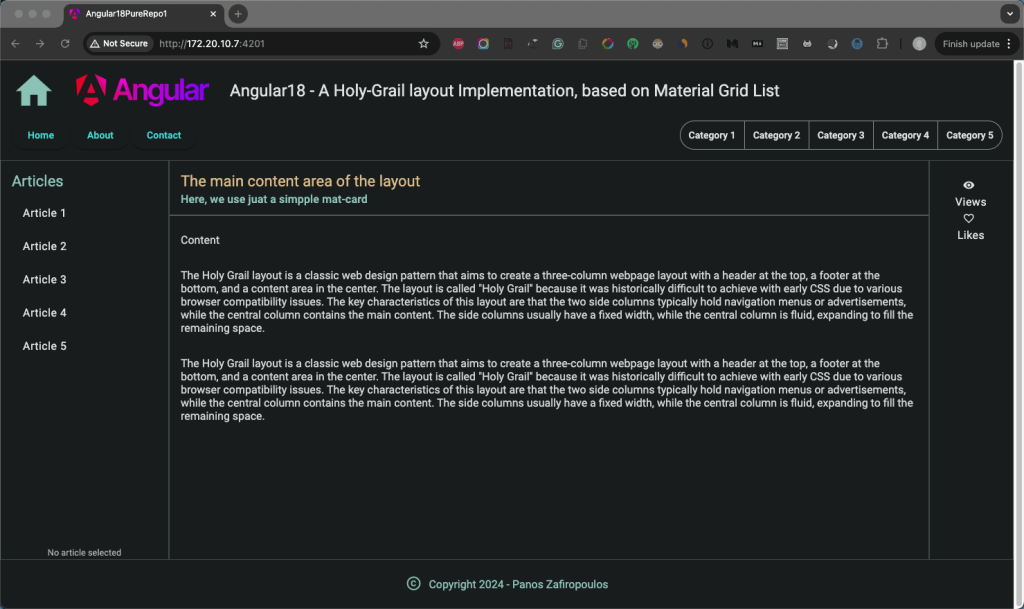
These data will actually replace the text into the mat-toggle-buttons of the 2nd menu of the NavrowComponent (Category 1, Category, 2, …), the text of the mat-list items of the LeftpaneComponent (Article 1, Article 2, …) and the title and content in the mat-card of the MainComponent.
The DataService
Now we have our data in place, we will proceed to access them. We will use a new Angular Service – the DataService component. You can create it like this:
ng g s data --skip-tests=true We will access our local data (in our DataService), using the Angular HTTP client in. Moreover, we will use the RxJS library (Reactive Extensions for JavaScript) and Observables. Note that later on, when we will use real data from a backend, we will need to make almost no changes to our DataService code. For now, as a base URL for endpoints, we will use our assets folder
Initially, we will create 2 methods in our data service: the getCategories() and the getArticles() for accessing Categories and Articles from our JSON respective files. Both of those methods return an Observable, and we will see later how we will subscribe to it and use it vis a respective Signal.
Furthermore, we have also included an error handling method -the handleError() method-, that handles any error that arises from accessing data and shows it as an alert window in the browser. No more to say, so, find the code in the data.service.ts below:
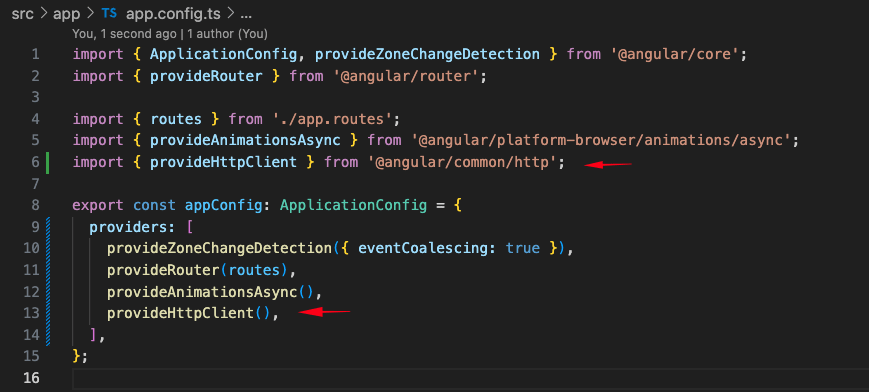
Please, don’t forget also, to import and add the HTTP into the providers array of the app.config.ts, e.g.:
Transform Observables to Signals
So, that’s it for now with the DataService. Our next task is to use it, aka to subscribe to its Observables and obtain the data. A commonly used practice is to inject the service into any “consumer” component, subscribe to the desired method’s observable, and get the corresponding data. However, here we will follow another approach, using an intermediate service -the ContentService- that will actually deal with DataService observables, make any further processing necessary, and finally provide Signals instead of Observables to any component, that is interested in.
The ContentService
As with DataService, you can create the ContentService like this:
ng g s content --skip-tests=true Let’s start by creating a public categories signal, e.g.:
public $categories = signal< ICategory[]>(this.categories); The signal will be supported by a corresponding public void method, e.g.:
  public signalCategories(): void {
    this.dataService.getCategories().subscribe((categories: ICategory[]) => {
      this.$categories.set(categories);
    });
  }
When for whatever reason the signalCategories() method is called, then the$categories signal will be updated. Initially, when the ContentService is being instantiated, we can call it once for triggering the process of fetching the data and updating the signal. So, the initial version of our ContentService becomes:
Starting Updating Components via Signals
Next in our NavrowComponent, we can stay informed about changes to the $categories signal, using an effect() function block. This is how the NavrowComponent becomes:
And the result is as we expect it:

Working similarly we can proceed and define another signal for a single category, i.e.: $category with its supported method i.e.: signalCtegory(). This method will be fired every time the user clicks on the toggle button of the navMenuItems2 in the NavrowComponent. As you might have noticed, we have already the method itemCategoryClicked() as a click handler. So, inside this method, we must just call the signalCtegory() of the content service, passing in it the category id.
  itemCategoryClicked(category: ICategory): void {
    // console.log('>===>> ' + this.componentName + ' - itemClicked', category);
    this.contentService.signalCategory(category.categoryId);
  }
The signalCtegory() of the ContentService, does not actually access the DataService (however, it could do so if for example the categories are updated often, e.g. by users, authors, etc). In our case, it only searches the $categories for a specific category id, and then updates the $category signal accordingly. The updated ContentService is given below:
Now we are ready to consume the $category signal, from a consumer component. This time the consumer will be the LeftpaneComponent. This is because we want instead of displaying the text literal ‘Articles’ used in the template of the LeftpaneComponent, to use the category title after the user clicks on a toggle button in the NavrowComponent.
So, in the same way, we did with the NavrowComponent, we will use also an analogous effect() block in the constructor of the LeftpaneComponent. The updated leftpane.component.ts:
Next, we will update the template of the LeftpaneComponent accordingly (actually we will use a ternary operation within the interpolation expression, e.g.:
  <mat-card-header>
    <mat-card-title>{{category.categoryId > 0 ? category.categoryTitle: 'Articles'}}</mat-card-title>
  </mat-card-header>
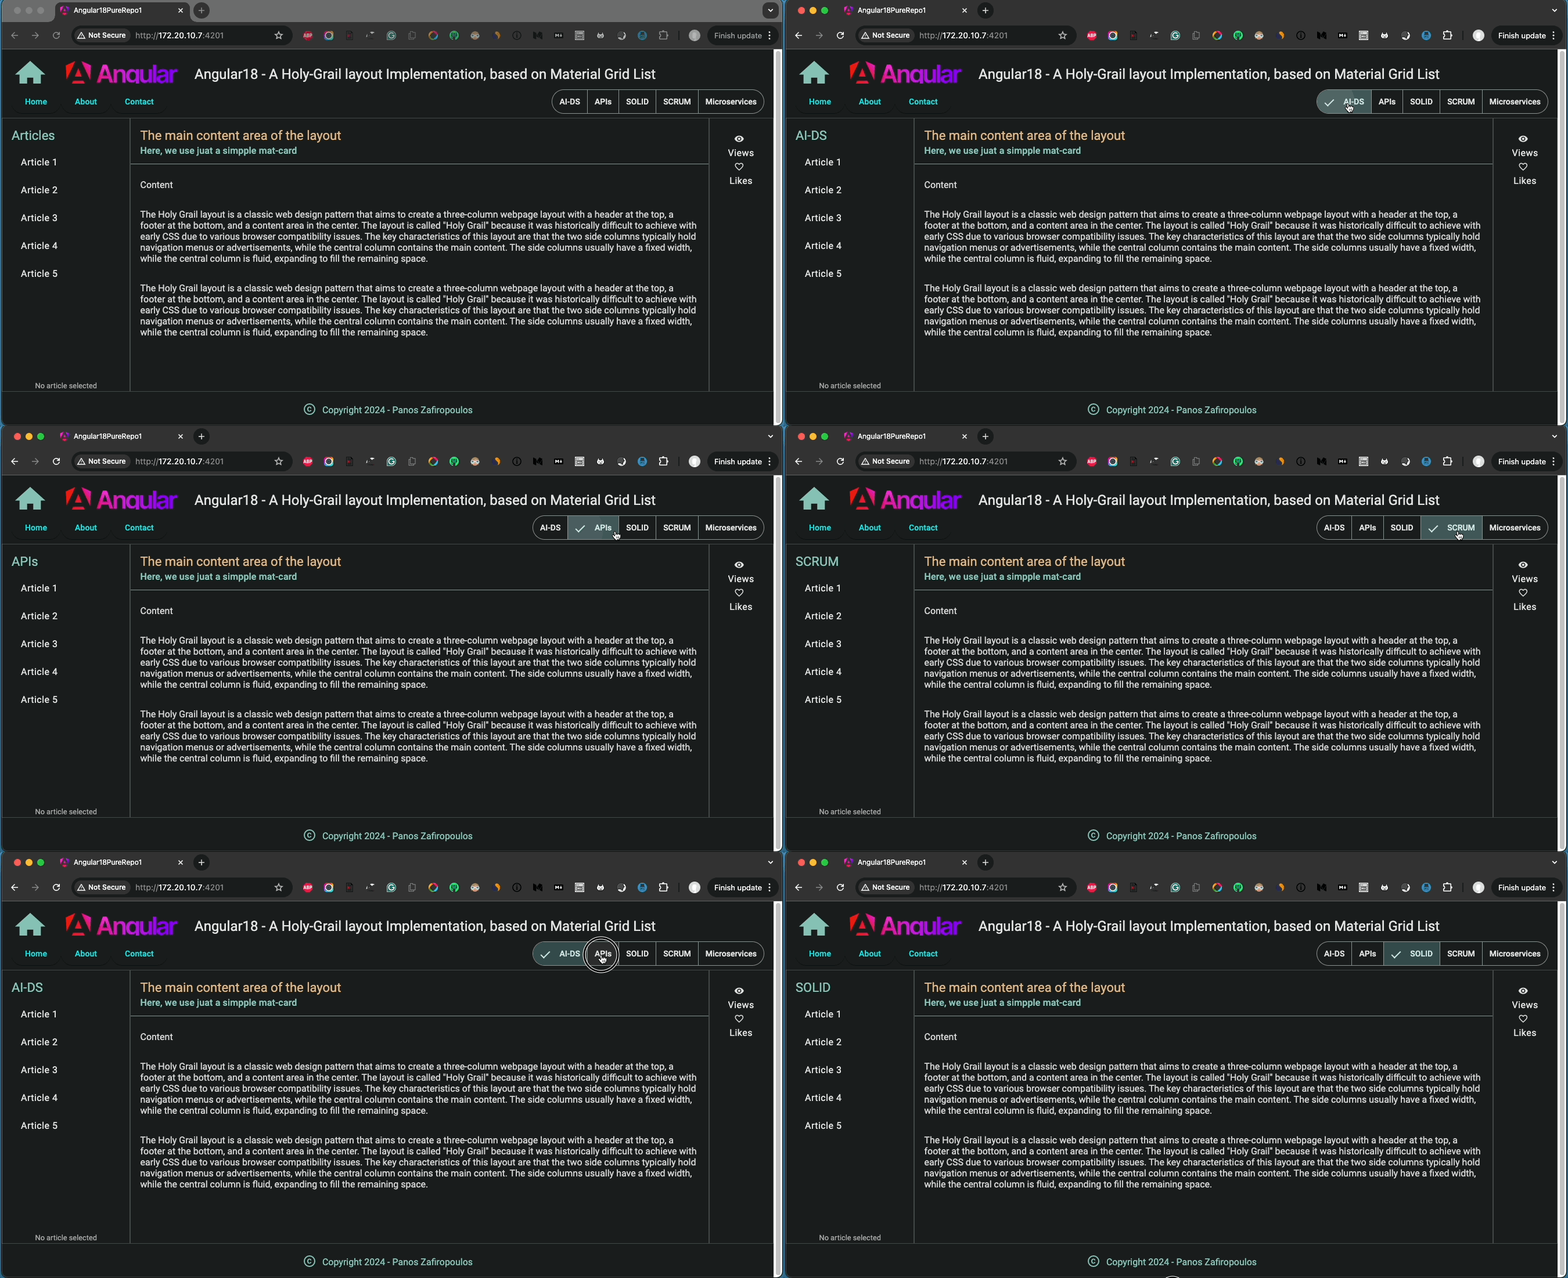
The result is given below:
Find the full update -so far- of the repo here.
Continue updating Components
So far, we have seen a couple of updates related to Categories in NavrowComponent and LeftpaneComponent. Now, we can start dealing with Articles. First, we have to update the ContentService with the appropriate signals. Our point here is to use an article signal analogously, as we did with a category signal. Still, instead of using a signal for all articles, we will use one just for the articles of a specific category, e.g.:
  public $article = signal< IArticle>({articleId: 0, categoryId: 0, articleTitle: '', articleContent:  ''});
  public $categoryArticles = signal< IArticle[]>([]);
However, since we don’t yet use a real backend, we still need to get all the articles first, and only after this to filter them for a specific category. But, for this, we can use just a private property/variable, and not a signal. Furthermore, we will also use the “supporting” methods. That said, the updated ContentService becomes:
Please note, that we also call the getAllArticles() method in the ContentService constructor, so all the articles will be available in instantiation (similarly to categories). Another important point is that we set a very initial category, the category with categoryId = 1, and consequently, we set the initial value of the signal $categoryArticles for the same category. We also do the same for setting the $article signal value to the 1st category article. This is because we want the 1st category, its articles list, and its 1st article to be preselected.
Now we are ready to update the “consumers”. We will start from the LeftpaneComponent, where very few things need to be changed. Actually, we only have to empty the listItems array and obtain its elements by adding an entry in the effect() block function in the constructor. Also, whenever the category article list is updated, we re-set the selectedItem to 0 (the 1st article of the category articles). Finally, we must fire the $article signal update whenever a mat-list-item button is clicked. See below, in the leftpane.component.ts, how we can do so:
Now we will proceed to update the MainComponent (which so far remains as it has initially been). We will make similar changes to obtain the $article signal value and use article properties (title and content) for displaying them via the component’s template. Of course, we have to remove the previous static content, as well. Find the updates below.
The main.component.ts:
The main.component.html:
Note that some -not that important- updates are made to the template of the LeftpaneComponent and to the stylesheet of the MainComponent.
You can see the result below:
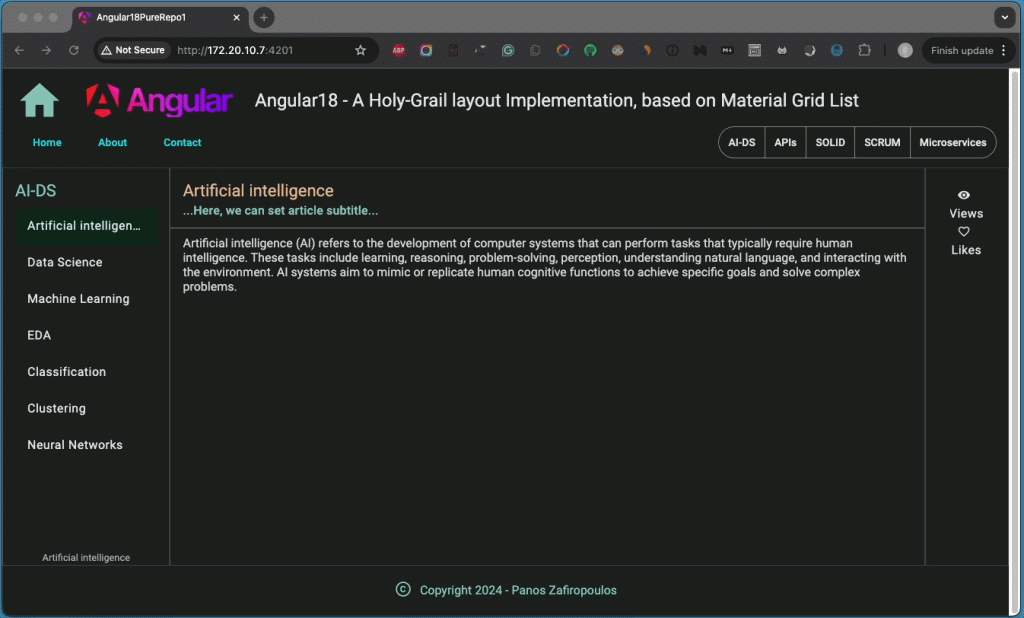
Find the updated repo here.
We stop here, temporarily, working with the front end. It’s time to see how we can use a Backend API instead of using JSON files.
The Backend – use real data via a REST API
Here, we will use a simple backend project of mine. The backend project is based on Java/Spring and MariaDB, however, you can use any other API that exposes the same endpoints.
The Database data
We will use the MariaDB database, which provides enough binary compatibility with MySQL database.
Note: If you want to start using MariDB/MySQL the following 2 posts of mine might be useful for you:

and

Before proceeding to some description of the backend project, let’s see the schema tables that we will use in a MariaDB (or MySQL) database. The name of the database we will use is ‘testblog2’, and will contain just 2 tables: the ‘testcategories’ and the ‘testarticles’.
The table create-definitions (DDLs) are given below:
Note, that we’ve also used one more column (field) in the testarticles table, for an article subtitle, which we have to also add to the IArticles interface, later on. Otherwise, they hold the same columns as the properties defined with the ICategories and IArticles interfaces we’ve used so far.
I have also created an SQL data file that one can use to insert the initial data into the tables. The data are similar to those we’ve used with respective JSON files. Below you can see part of the commands for inserting the respective data only into the testcategories table, because the part of the insert commands concerning the testarticles table is quite long, and there is no particular reason to present it here. In any case, you can see in the backend that it is provided a bit later on.
I will also show you how to drop and recreate the tables with the data, whenever you start/restart the project (and how to switch this option off), later on, but for now let’s see how we can run an SQL script from the command line.
The 1st option we can use is to do it from within the MariaDB CLI database using the ‘source’ command. You can run the ‘source’ command like this:
source ~/blog_backend_test_data.sqlwhere the ‘~/blog_backend_test_data.sql’ is the SQL script full-path-name
The 2nd option is to use an appropriate shell command that redirects (<) the SQL script full-path-name to the MariaDB connection string. An example is given below:
mysql -h localhost -P 3306 testblog2 -u user1 -ppasswu1 --skip-ssl < "~/blog_backend_test_data.sql"Now, let’s proceed to the backend project.
The backend project
I am not going to show you here, how you can build a Java/Spring Boot project. You can find dozens of related posts in Medium or elsewhere. If you visit my Medium Profile you will also find more than 15 posts/articles of mine, from simple to advanced Spring Boot-related subjects. The following 2 might be useful for beginners:

and

Now let’s see the key parts and points of our backend project.
Our backend Maven project is based on Java 17 and Spring Boot 3.3.3, and it has been initialized via Spring Initializr.
Apart from the 2 auto-created project files (by the Spring Initializr) ’ Blogbackdemo1Application.java’ and ‘ServletInitializer.java’, we have:
- The 2 classes/beans: ‘Category.java’ and ‘Article.java’
These are necessary for instantiated category and article objects respectively:
- A repository interface: ‘IPostsRepository.java’
This contains the method signatures for the repository implementation class.
- The repository implementation class ‘PostsRepository.java’.
This is where we define our JdbcTemplate SQL queries and access the real data from MariaDB database tables.
- The PostsController.java class.
As you can see, we have defined 5 methods, that are called by the API Controller. Our API Controller is implemented in the PostsController.java class, and it exposes the following GET endpoints (all public – no security yet):
For categories:
/categories – returns all categories
/categories/categoryId/<id> – returns the category with categoryId = <id>
For Articles:
/articles – returns all articles
/articles/categoryId/<id> – returns the articles for a specific category with categoryId = <id>
/articles/articleId/<id> – returns the article with articleId = <id>
Each of the endpoints is handled by a method handler which in turn, calls the respective repository method to fetch the data from the database:
The URL base path of the endpoints is ‘/blogapi’, and it is provided in the ‘application.properties’ file, as the value of the server.servlet.context-path property. So, for instance, if you want to get all the categories e.g. via Postman, you can use the following full URL: http://localhost:8080/blogapi/categories
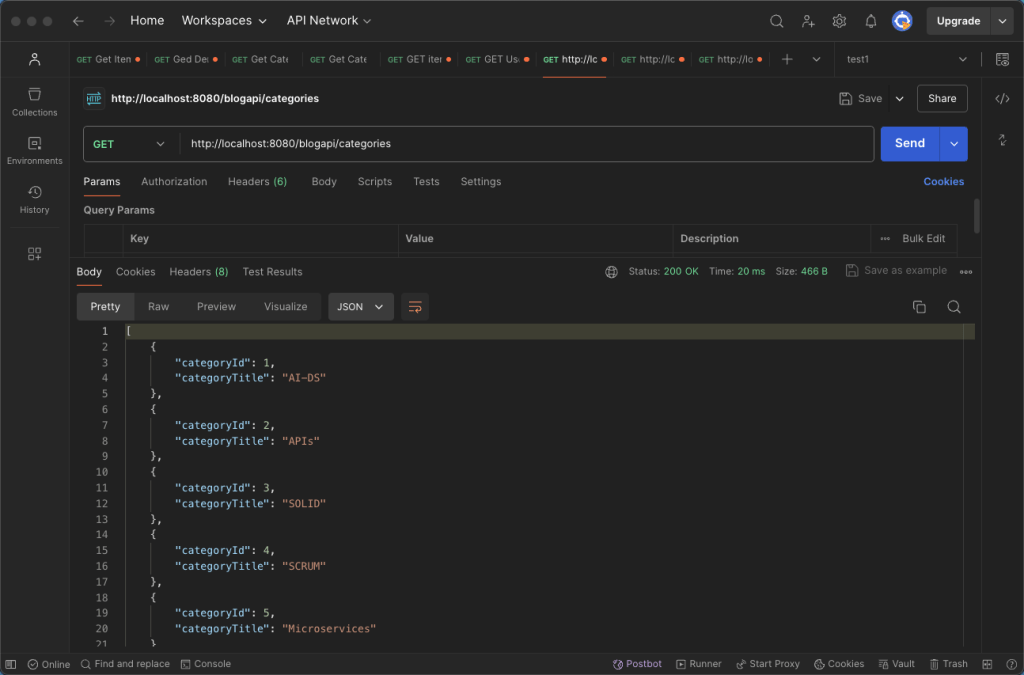
- The application.properties file.
In the application.properties file, we have defined the values of some fundamental application properties, such as MariaDB connection parameters, and the API base path. The last 3 properties define if and how the SQL scripts provided into the ‘src/main/resources’ (classpath) folder will be loaded during the start-up process. Note that the very 1st time you ran the project you might want to switch to the ‘always’ value of the ‘spring.sql.init.mode’ property. Doing so, the tables are (re)created and the data are inserted into them. Switch it to ‘never’ again after a successful result, when you want normally continue working on the project.
- The schema.sql is given below:
You can also find the data.sql in the src/main/resources folder of the project repo. A noticeable difference to the data used in the ‘articles.json’ file, is that the strings used for articleContent for a TEXT field in MariaDB/MySQL can contain break lines, however, this is not acceptable in JSON. Note that other characters can be used with the MariaDB/MySQL database, but this is the subject of the next post.
- The WebConfig.java class.
Last, but not least, in the WebConfig.java class, I have provided a simple implementation for switching off the CORS protection, when you access the backend from a frontend from the same host:
Find the backend project final repo here.
Now let’s go back to the Angular project for some necessary adjustments.
Final adjustments to Angular Frontend
We start by adding the articleSubTitle property in the IArticle interface into the blogObjects.ts file. Subsequently, we must update all the initial values we have assigned into any Article instance in our code, i.e.: ContentService and MainComponent. In the main.component.html template, we have also to change the literal text in the mat-card-subtitle tag with the {{ article.articleSubTitle}}.
However, the most important updates must be made to the DataService and thus, to ContentService.
Apart from adjusting the DataService to the real backend endpoints than the ones used for local JSON files, we have to add the missing data accessing methods for:
- getCategory(): requesting a specific category (by its categoryId),
- getArticle(): requesting a specific article (by its articleId), and
- getCategoryArticles(): requesting the article of a specific category (by categoryId)
The getCategories() and the getArticles() methods are remained almost unchanged.
The updated DataService becomes:
Recall, that in the ContentService, only 2 methods had access to the 2 corresponding methods of the DataService. The signalCategories() and the getAllArticles(). The rest of the methods and signals were based on those 2 methods. This is due to the fact, that our data were actually static, in JSON files. Now, since our data are fully dynamic and coming out from a real database, keeping this same tactic is not appropriate. The right approach is to access the data from the backend (aka calling the respective methods in DataService) directly, instead of fetching big data arrays into memory and then searching (or filtering) them to locate a specific ID.
Also note, that we don’t need any more getting all the articles at once. This is not a good approach, especially when there is a significant number of articles. Thus, it is better to fetch only the articles needed for the specified category.
After these changes, we use just 4 signals: for categories and category, as well as for article and categoryArticles.
Below, you can see how the ContentService has been updated:
That’s it. Very few changes can be seen in the result, but this time our blog is supported by a true backend with real dynamic data, from MariaDB.
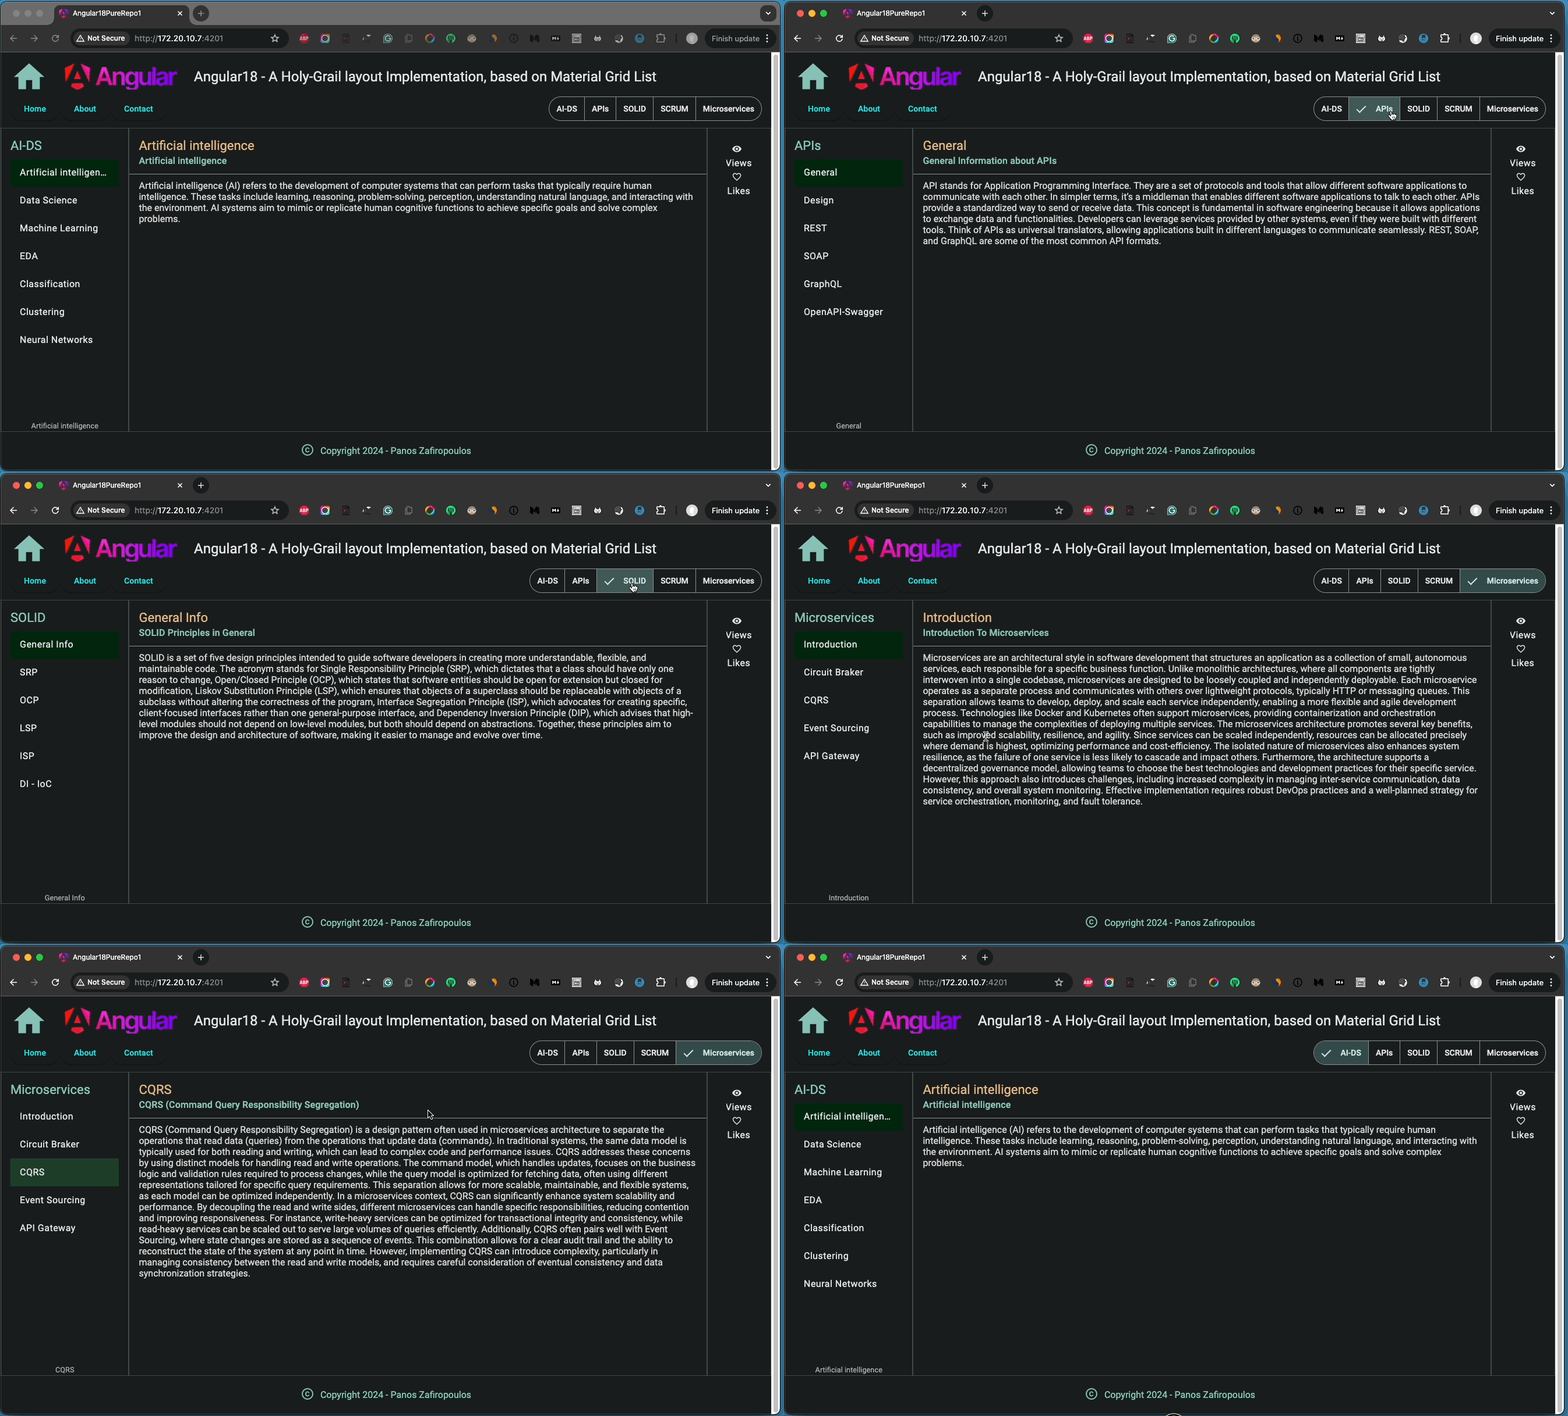
Find the frontend project final repo here.
Thank you for reading!
Next steps
In this post, we took a step ahead by shaping a very simple blog using real dynamic data from a backend project. However, there are a lot of things to be done till can be considered as a working blog site. So, stay tuned, the next post will probably be about storing and using Markdown with our blog.

