The database command-line tools you can add to your dev environment without database installation
221029
How to get, install and start using the officially supported tools for the major Databases: MariaDB/MySQL, PostgreSQL, MS SQL Server, Oracle, and MongoDB CLI without installing any database itself.
Intro
The industry is plenty of powerful GUI-based tools which are either proprietary or offered by 3rd parties. A number of them are also free-of-charge and widely used. [Find here an awesome list].
However, this post is about the command-line tools (CLI) that are officially supported by the major databases. Each one of those tools is shipped as part of the corresponding database installation package. However, here will see how we can obtain and install them as stand-alone-tools, without the respective database installation.
This might be especially convenient for anyone who works with remote or docker-running database instances, and she/he wants to log in and use the official command line interface (CLI) of that particular database.
We will go through each one of the most used databases, and we will see how we can install the respective officially supported tool for Linux/Ubuntu, macOS, and Windows. So, let’s start.

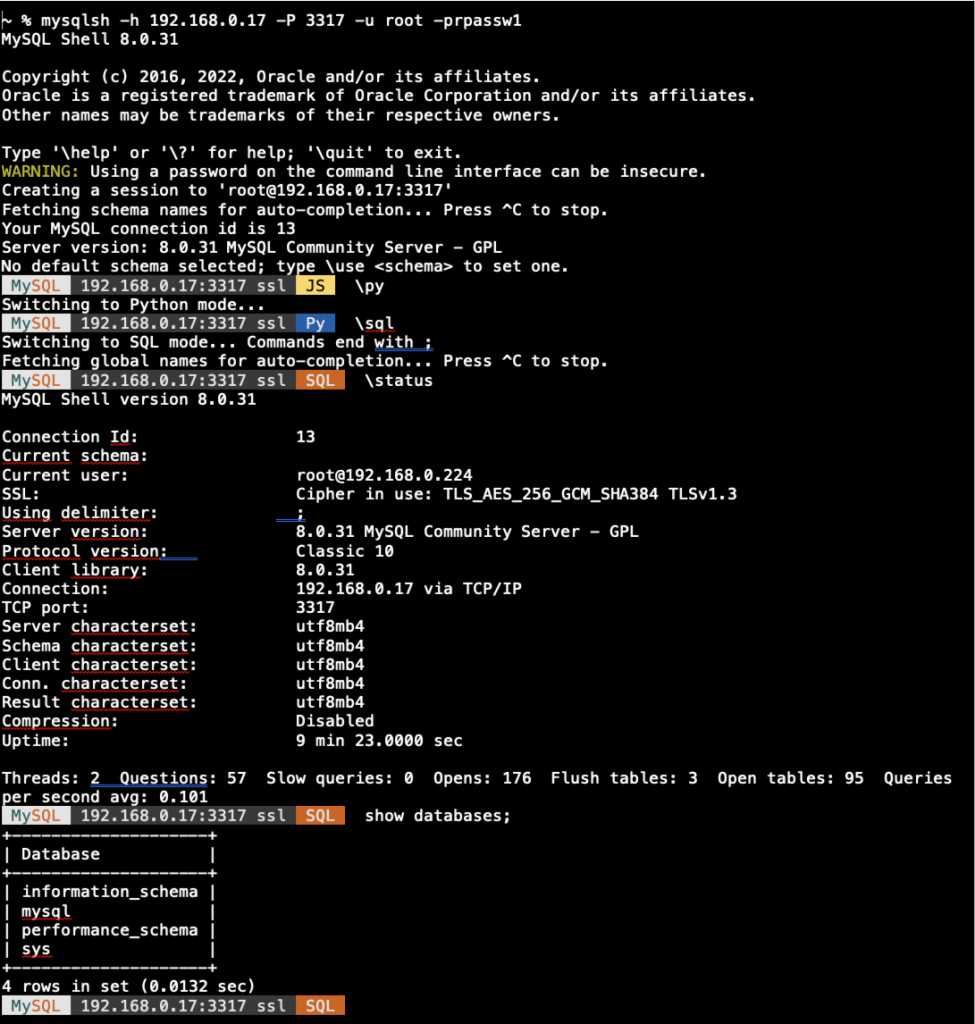
Generally, the default name of the shell command used by MySQL is ‘mysqlsh‘. The tool goes beyond just SQL command execution and offers us more powerful scripting capabilities for JavaScript and Python. The default is the JavaScript mode. You can switch the modes by using one of the CLI commands: \sql, \py, and \js.
Ubuntu
Visit the official download page and select the suitable for you Debian package:
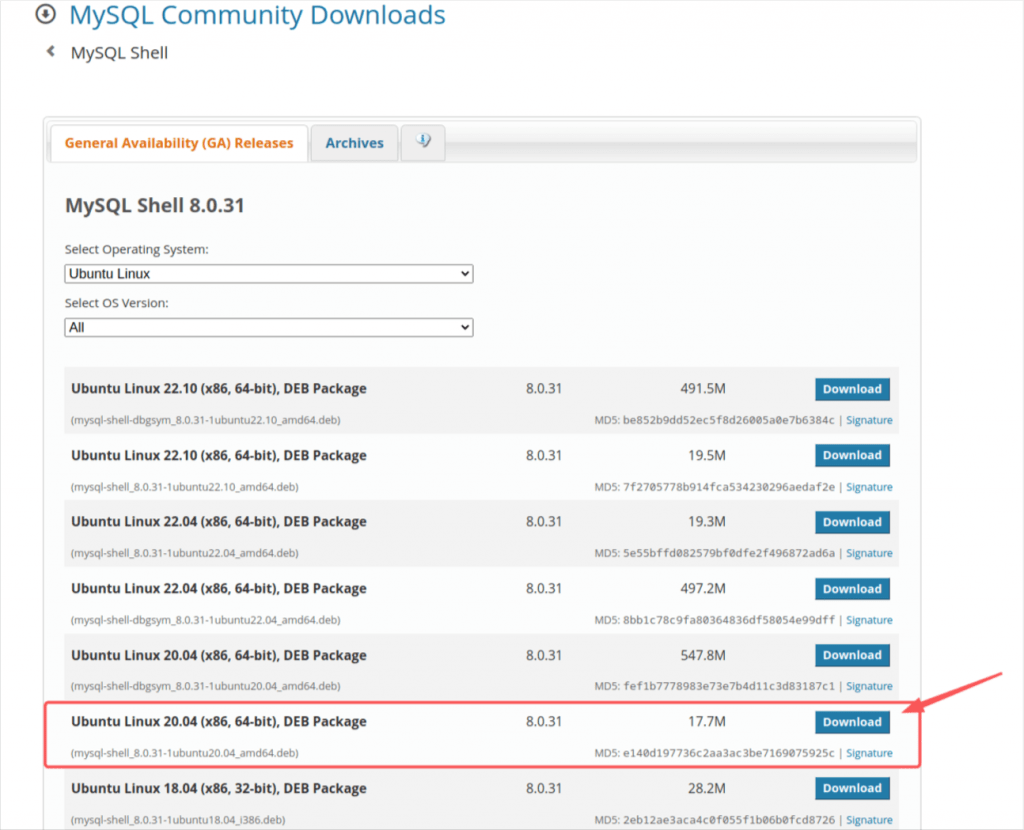
For instance, for Ubuntu 20.04 version, you have to download the ‘mysql-shell_8.0.31-1ubuntu20.04_amd64.deb‘ file. Then install it using the apt package manager:
sudo apt install $HOME/Downloads/mysql-shell_8.0.31-1ubuntu20.04_amd64.deb
After the installation you can check it works:
~$ mysqlsh -V
mysqlsh   Ver 8.0.31 for Linux on x86_64 - for MySQL 8.0.31 (MySQL Community Server (GPL))
~$
macOS
The installation for a Mac is pretty similar. You just select the appropriate DMG/TAR file for your Mac, e.g. if you have an M1 chip, then you should select an installation file for ARM, 64-bit.
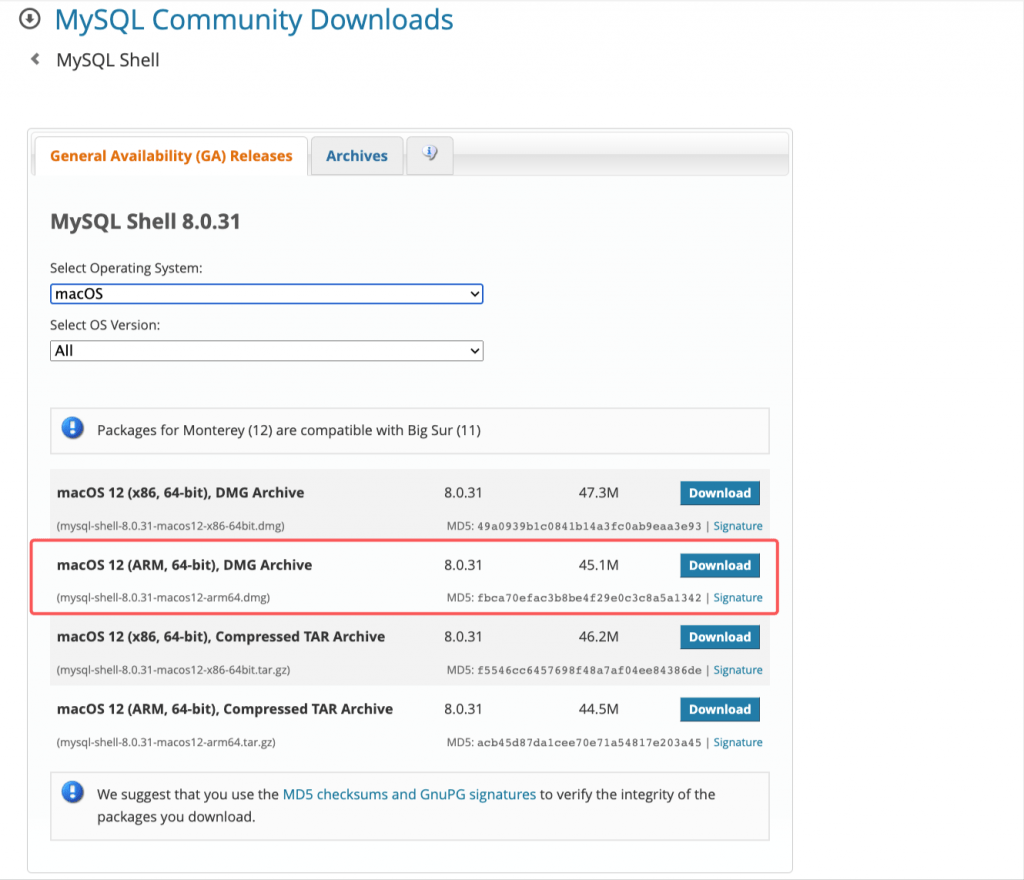
For our case here we’ve downloaded the ‘mysql-shell-8.0.31-macos12-arm64.dmg‘ file. Then you can install it in your system, following the step-by-step guided installation.
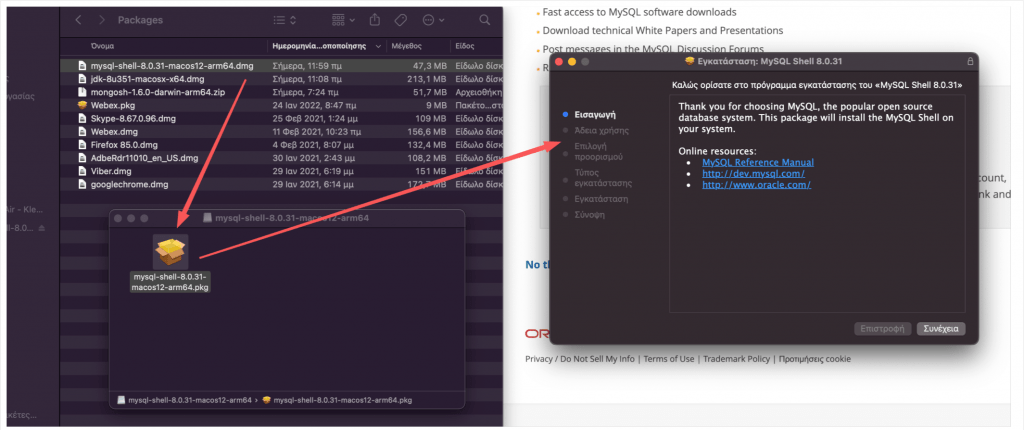
After a successful installation you can check it:
~ % mysqlsh -V
mysqlsh   Ver 8.0.31 for macos12 on arm64 - for MySQL 8.0.31 (MySQL Community Server (GPL))
~ %
You can also connect to a running Mysql/MariaDB instance:
Windows
In an analogous manner, for a Windows PC you can either download an .msi installation file or a .zip compressed file via the official download page:
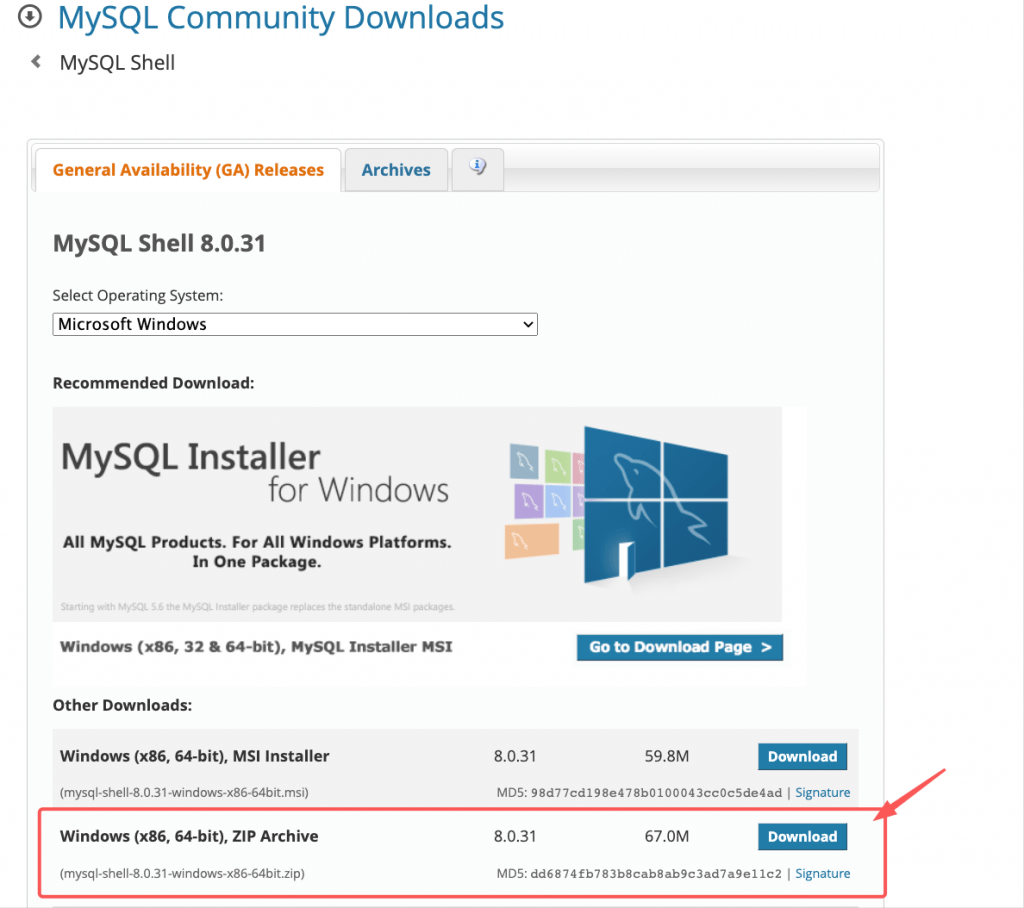
Here I decided to download the ‘mysql-shell-8.0.31-windows-x86-64bit.zip‘ file. The compressed file contains the whole necessary folder structure and you have to unzip it in your preferable location/folder.

After that you run the myslsh using the full-pathname or you can add the /bin subfolder to your PATH variable, i.e.:
C:\> PATH=%PATH%;<...your/path/here/...>
C:\> mysqlsh -V
mysqlsh   Ver 8.0.31 for Win64 on x86_64 - for MySQL 8.0.31 (MySQL Community Server (GPL))
C:\>
That’s it for mysqlsh CLI tool of MySQL. You can read more in the official documentation here. Let’s proceed to see what is offered by MariaDB.

MariaDB’s CLI tool is traditionally used to use the ‘mysql‘ name. However, this seems to change. From MariaDB 10.4.6, mariadb is available as a symlink to mysql, and from MariaDB 10.5.2, mariadb is the binary name of the command-line client and mysql is the symlink. The tool is not as powerful as the one offered by MySQL, but it does the job in a compatible way for just SQL commands execution.
Ubuntu
You can access the official MariaDB command-line client page here:
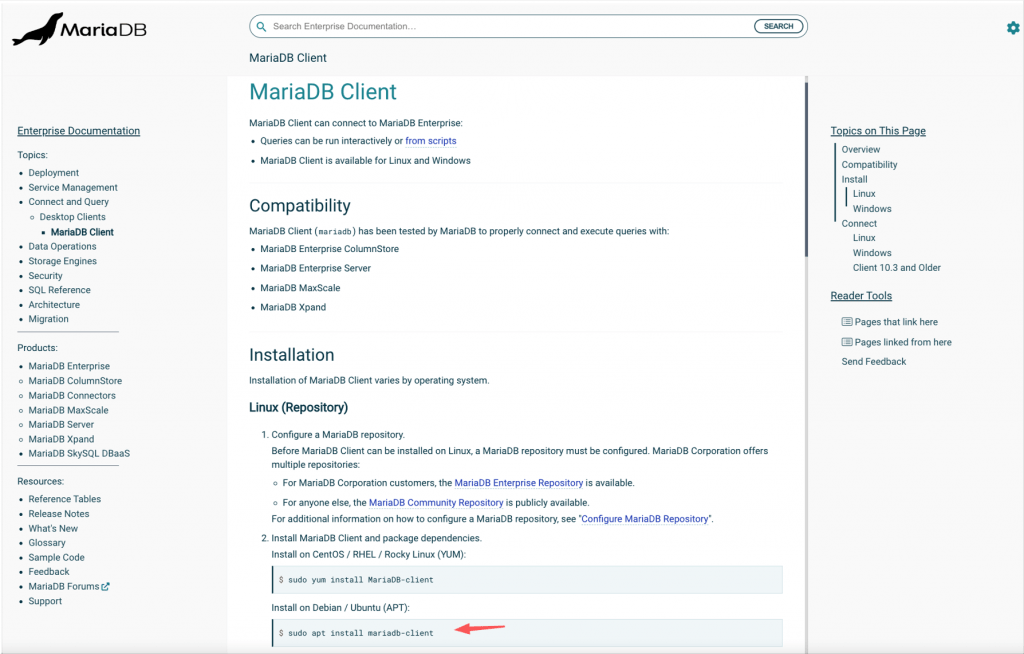
Actually, for a Linux installation, there is nothing to download. You can just use your apt package manager to install the MariaDB mysql client:
sudo apt install mariadb-client
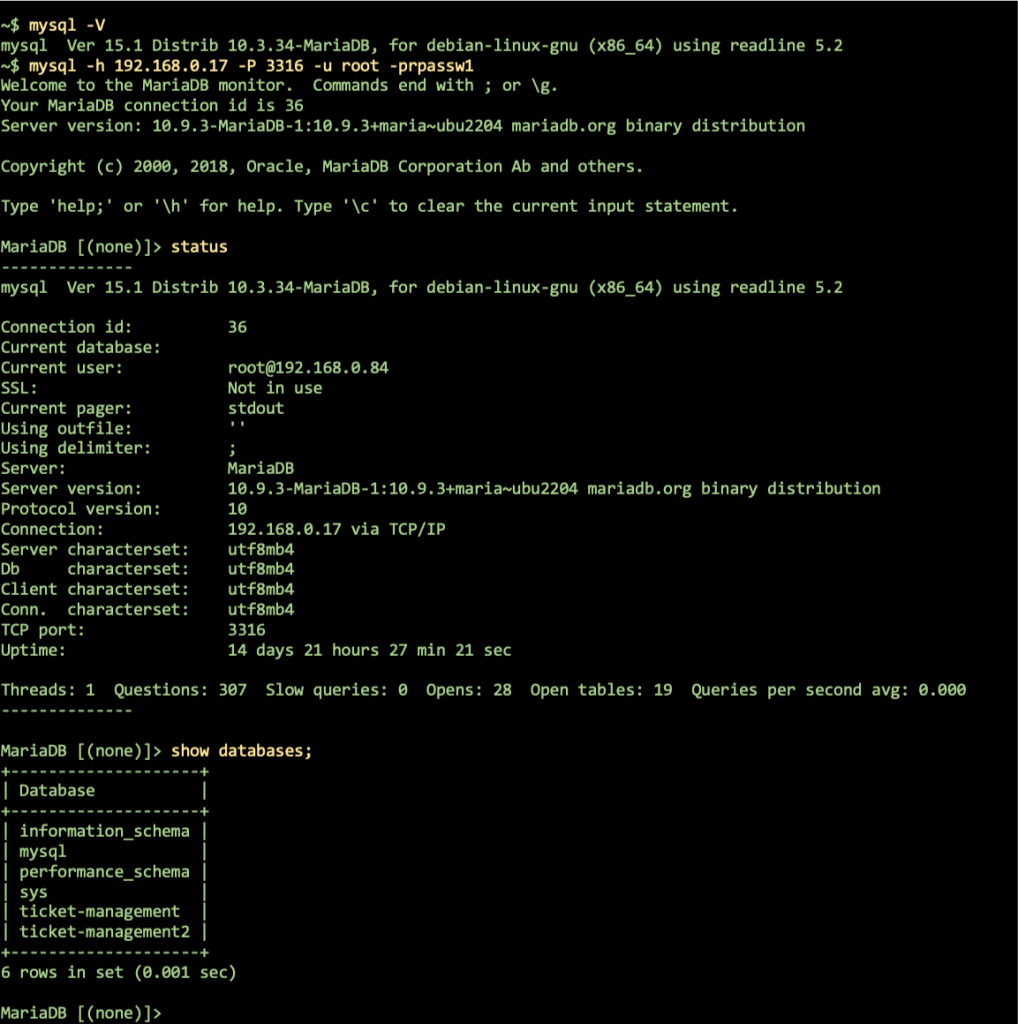
After a successful installation, you can check it and connect to a running MariaDB (or MySQl) instance:
~ $ mysql -V
mysql  Ver 15.1 Distrib 10.3.34-MariaDB, for debian-linux-gnu (x86_64) using readline 5.2
~ $
macOS
Unfortunately, (unlike Linux/Debian/Ubuntu and Windows)) MariaDB does not provide the mysql/mariadb CLI tool as a stand-alone installation on a macOS computer. So, one either has to install the full MariaDB database (using the Homebrew package manager) or use the MySQL Shell provided by MySQL.
Windows
Here again, we have 2 options. We can either download the Windows .msi installer, or we can just download the .zip file. Note, that if you decide to download the .msi installer, this includes the whole MariaDB installation files, so during the installation of the .msi installer, only “Client programs” should be selected. Here, our selection is the .zip file which also includes all the MariaDB executables. However, we will use it just to extract the necessary executable for the CLI tool (the mysql.exe).
You can get the compressed .zip file at the official download page and select the suitable for you Debian package:
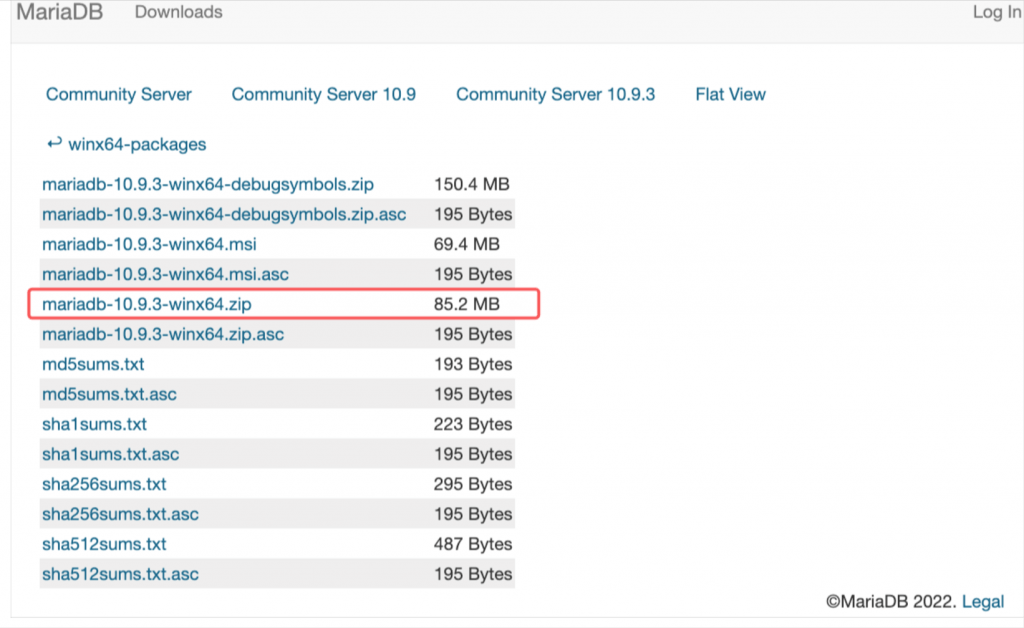
After you have downloaded the ‘mariadb-10.9.3-winx64.zip‘ file, use your preferred unzip tool (WinZip) to locate the /bin folder which contains all the executables for MariaDB. Then locate just the mysql.exe and extract it to your chosen folder.

Again, you can run the mysl.exe by using its full pathname or you can add its containing folder to your PATH variable and test it (similarly to the mysqlsh):
C:\> PATH=%PATH%;<...your/folder-path/here/...>
C:\> mysql -V
mysql  Ver 15.1 Distrib 10.9.3-MariaDB, for Win64 (AMD64), source revision 50c6090107d582a39e5be018c9fb4f40202210f9
C:\>
Read more about the MariaDB mysql tool here.
That’s it, let’s proceed to the Postgres CLI tool.

PostgreSQL provides the ‘psql‘ command which is its interactive terminal tool.
Ubuntu
Use the apt package manager to install it, by installing the postgesql-client:
~$ sudo apt install postgresql-client
After a successful installation you can check it:
~$ psql --version
psql (PostgreSQL) 12.12 (Ubuntu 12.12-0ubuntu0.20.04.1)
~$
macOS
For a macOS system, you can obtain the LibPQ PostgreSQL client API (C-Library) set of tools. The psql is part of that set of tools. The libpq can be installed via Homebrew, (however, in some cases, you might find that it has been already installed).
First we have to install it:
~$ brew install libpq
Then we can add the binaries’ folder to our Path:
~$ brew link — force libpq
Finally you can test it:
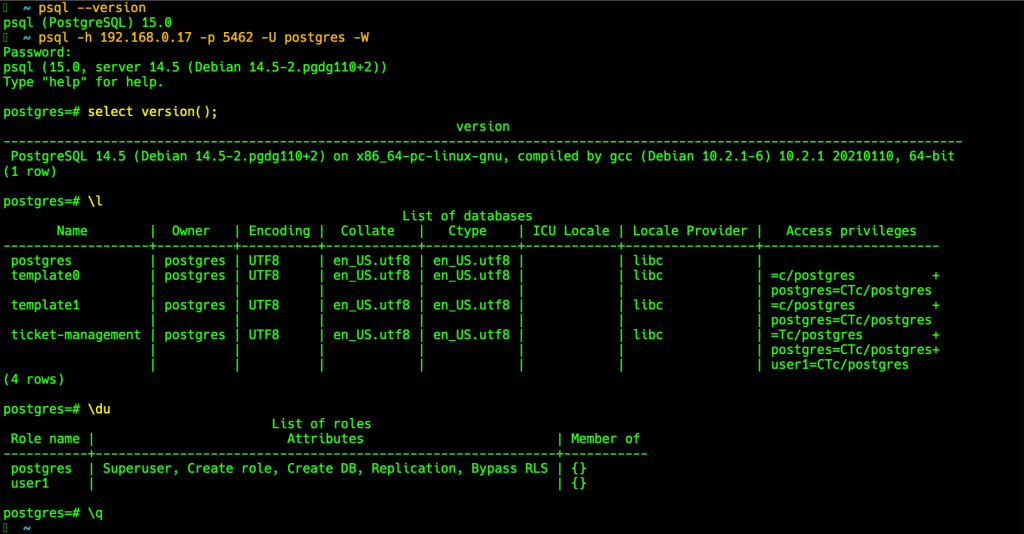
➜  ~ psql --version
psql (PostgreSQL) 15.0
➜  ~ psql -h 192.168.0.17 -p 5462 -U postgres -W
Password:
psql (15.0, server 14.5 (Debian 14.5-2.pgdg110+2))
Type "help" for help.

postgres=#
Windows
Following the official documentation here, about Windows installers, we can download the compressed (.zip) file with all PostgreSQL binaries, provided by the EDB, here (EDB: Major contributor to last 16 major versions of PostgreSQL (Rel 8.2 – 15))
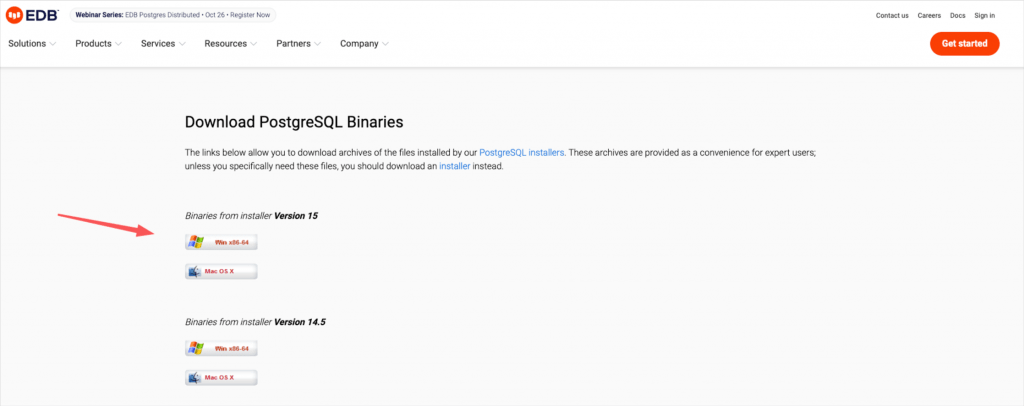
The file downloaded in our case was the ‘postgresql-15.0-1-windows-x64-binaries.zip‘. Similar to what did with the CLI tools of previous cases when we downloaded .zip files, is to locate the binaries we are interested in. Here, the .zip file contains just the psql folder. You can extract it entirely as a subfolder in a preferred location. However, since we want just the psql tool, it is better to extract only the psql.exe file as well as the libraries (the .dll) files that are necessary for it. All the required files are shown below:

Then you can run the psql.exe by using its full pathname or you can add its containing folder to your PATH variable and test it:
C:\> PATH=%PATH%;<...your/folder-path/here/...>
C:\>
C:\> psql --version
psql (PostgreSQL) 15.0
C:\> psql -h 192.168.0.17 -p 5462 -U postgres -W
Password:
psql (15.0, server 14.5 (Debian 14.5-2.pgdg110+2))
Type "help" for help.

postgres=#
Read more about psql tool here.
Now let’s proceed to the MS SQL Server tool.

Microsoft’s SQL Server provides the sqlcmd CLI tool.
Ubuntu
Accessing the official download and installation page here, you will find all the necessary instructions to install it in an Ubuntu system.
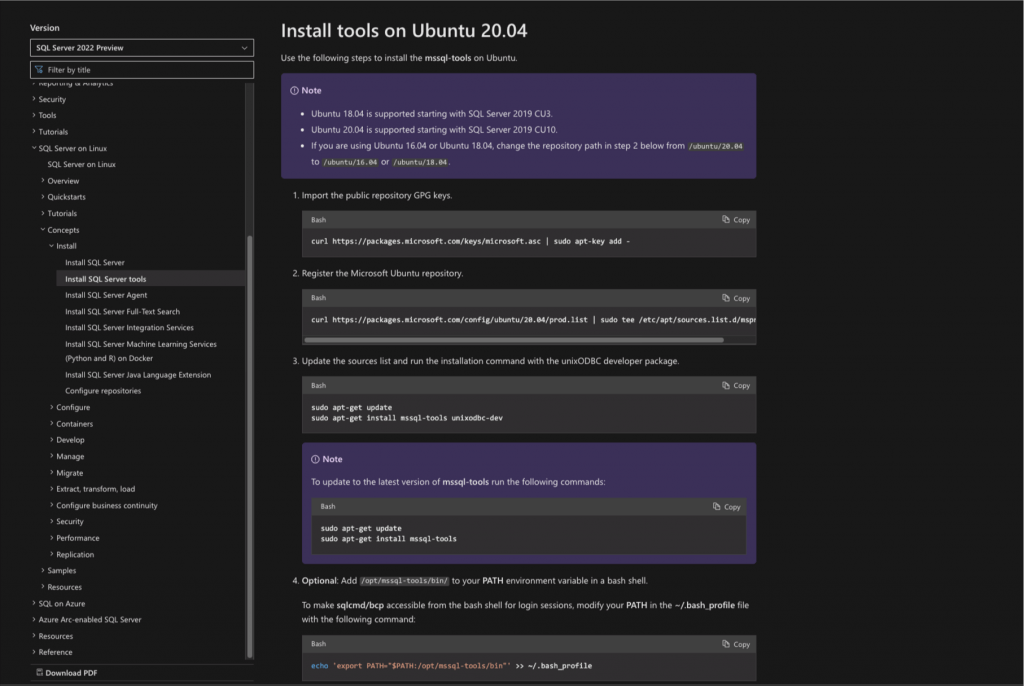
This actually includes the following 3 main steps:
Import the public repository GPG keys.
curl https://packages.microsoft.com/keys/microsoft.asc | sudo apt-key add -
Register the Microsoft Ubuntu repository.
curl https://packages.microsoft.com/config/ubuntu/20.04/prod.list | sudo tee /etc/apt/sources.list.d/msprod.list
Update the sources list and run the installation command.
sudo apt-get update
sudo apt-get install mssql-tools
All the binaries are installed in the /opt/mssql-tools/bin folder, so, after the installation, you can also add the bin folder to your PATH environment variable. e.g.:
~$ export PATH=$PATH:/opt/mssql-tools/bin
Finally, you can check it:
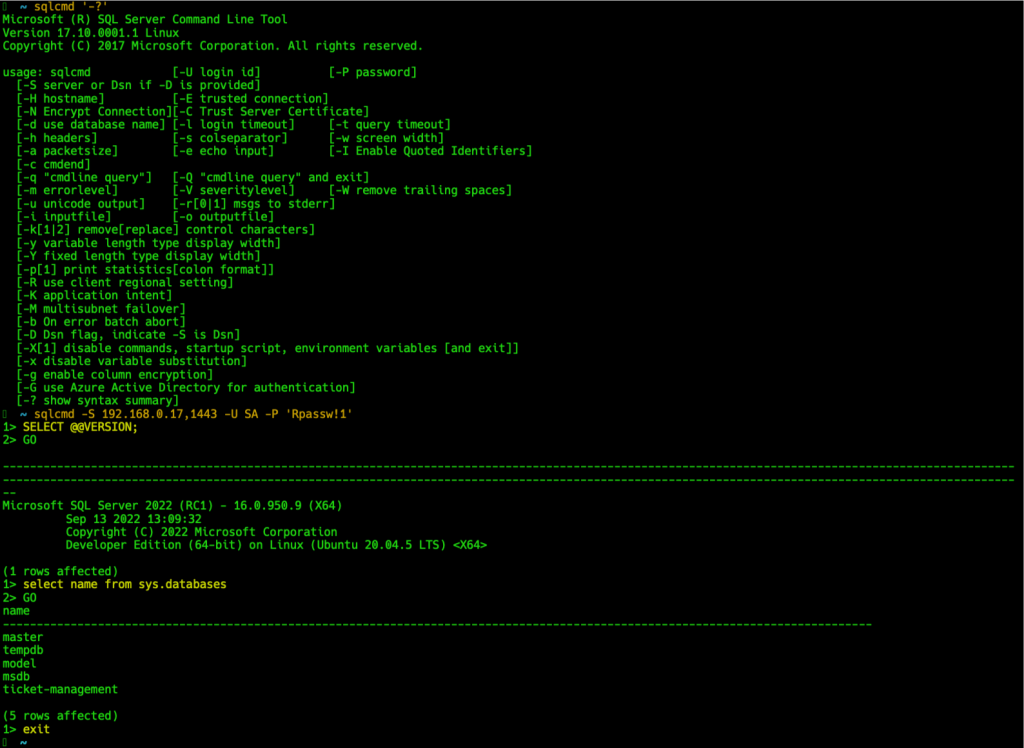
sqlcmd '-?'
macOS
Currently, Microsoft promotes installing mysql-tools (and the included sqlcmd CLI tool) using the pip package manager. [Note: pip is an installer used for installing and managing Python software packages and libraries]. However, I prefer using the Homebrew instead, as in the initial announcement [see here].

So, you can use the following commands as it is described here:
~ % brew tap
~ % brew install mssql-tools
After that you can test it:
~ % sqlcmd '-?'
Windows
For windows, you have to download the respective installer – .msi file. Find it here:
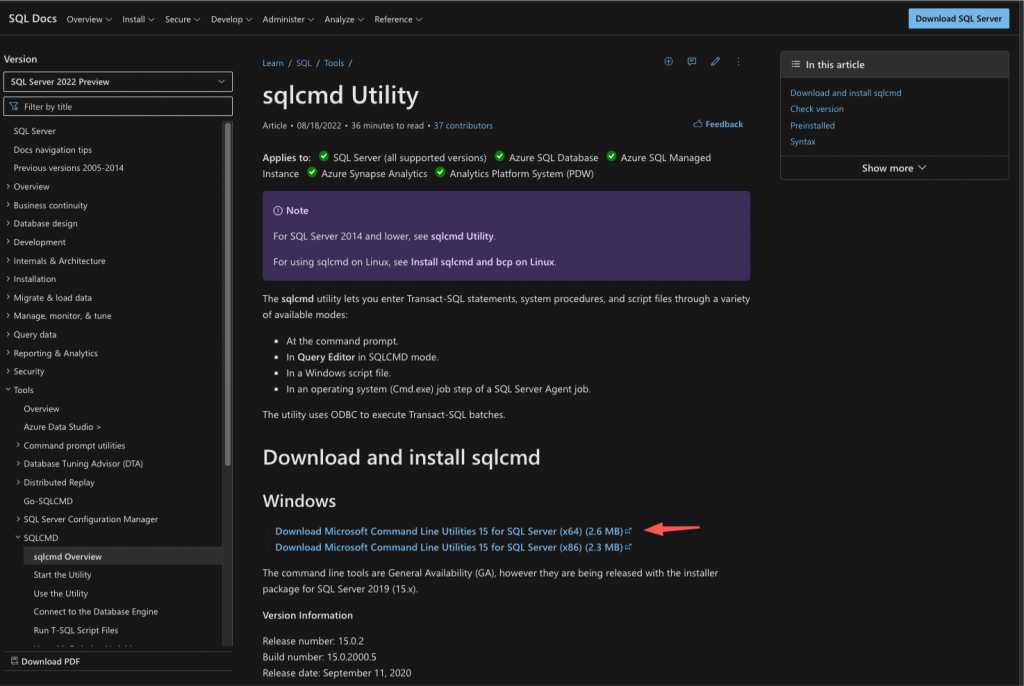
Note: SQLcmd installation requires that you have had Microsoft ODBC Driver 17 for SQL Server installed in your PC before it.
The downloaded installer is the ‘MsSqlCmdLnUtils.msi‘ file, so run it and follow the instructions. After the installation you can check it:
C:\> sqlcmd -?
Read more about the sqlcmd tool here.
Next, we have to see how we can install and start using the command-line tool of Oracle.

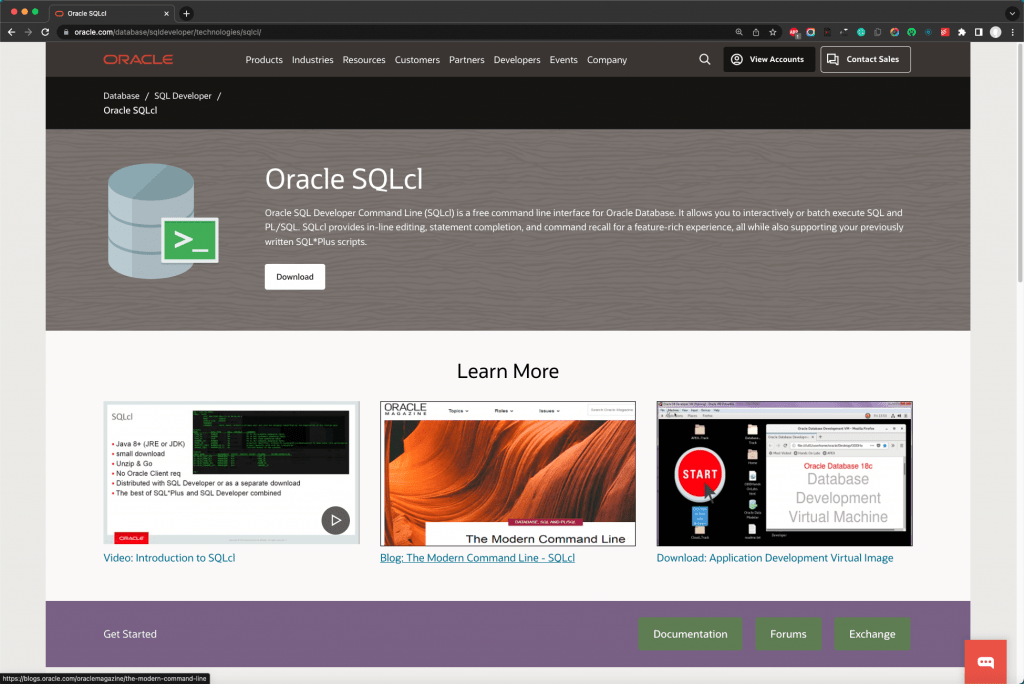
Oracle command line tool is the SQLcl Developer Command Line Interface. This is a Java-based utility so the way one installs and uses it is quite similar to any operating system has JRE installed.
You can download by visiting the official download page here.
The next page after clicking the Download button on the above page, prompts you to download the latest version available. On the date I was writing this post the latest version was the ‘Version 22.3.1.285.1825 – October 18, 2022’ as you can see below:
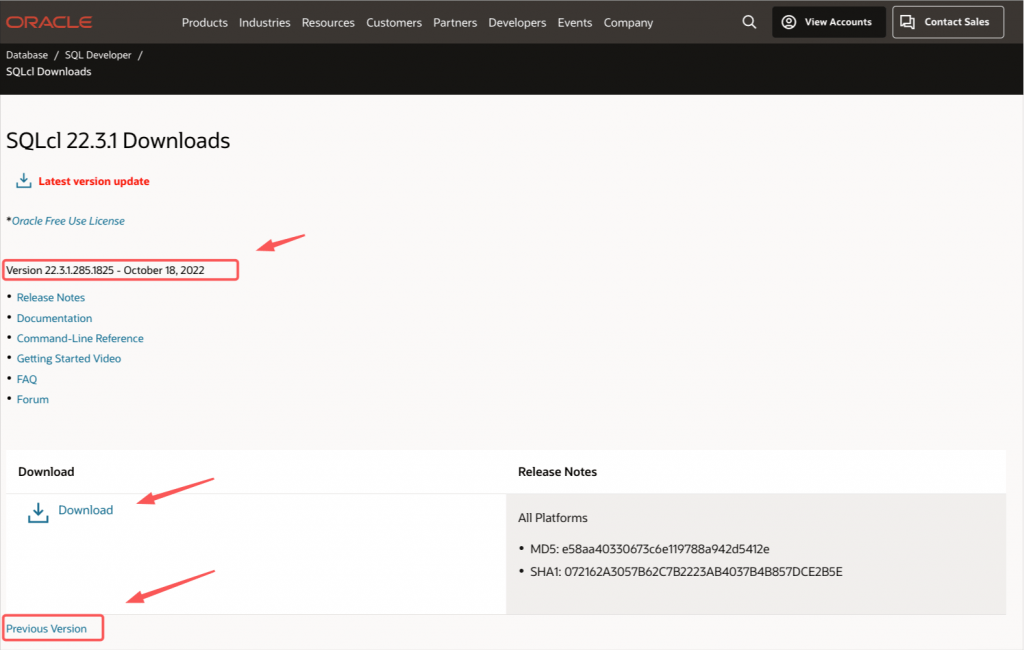
However, if in your system you use an older Java version, e.g.: Java 8, then you can download a previous SQLcl version that is compatible with Java 8. To do so, you have to click on the Previous Version at the left of the bottom of the download window, as you can see above. here we are going to get the version that is compatible with Java 8 JRE.
The “oldest” available version which requires just Java 8 (JRE 1.8) and above, is the sqlcl version 21.4.1. (Version 21.4.1.17.1458 – January 19, 2022). [See the release notes here].
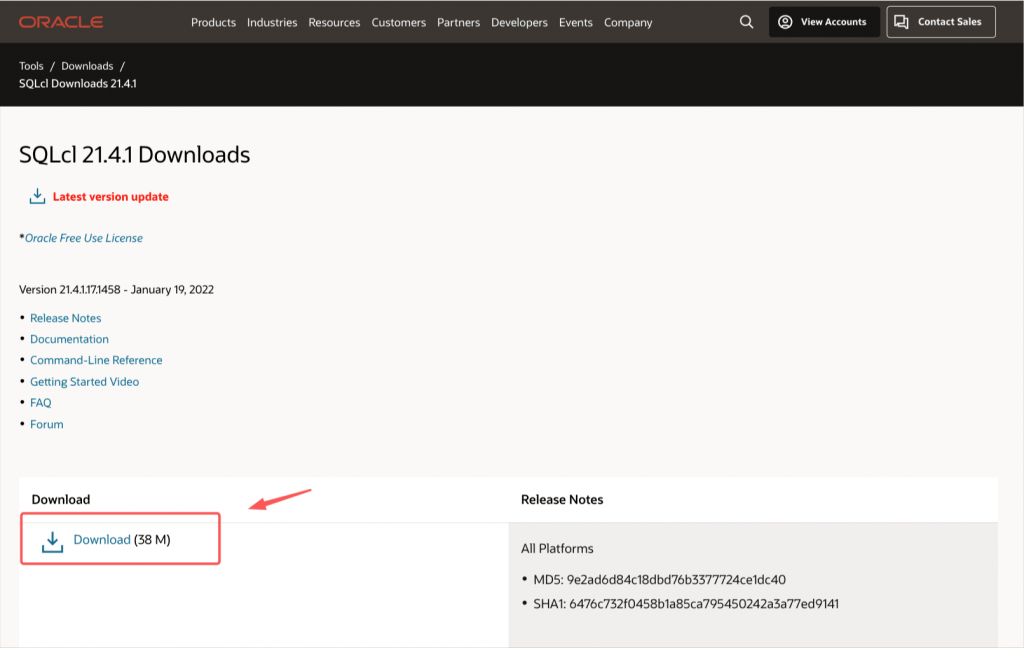
by clicking the Download button you get a .zip file named ‘sqlcl-21.4.1.17.1458.zip‘. It contains just the sqlcl folder where all the necessary files are included.
Ubuntu
For an Ubuntu system, an appropriate location to uncompress that .zip file and extract the sqlcl folder is under the /opt folder:
As you can see the, /bin subfolder contains the executables sql (for Unix/Linux base systems) and sql.exe (for Windows systems). As a good practice, I always create a symlink for the sql to sqlcl, avoiding any future confusion about other SQL command concepts:
~$ ln -s /opt/sqlcl/bin/sql /opt/sqlcl/bin/sqlcl
Next we can add the /opt/sqlcl/bin to our bash profile:
~$ export PATH=$PATH:/opt/sqlcl/bin
Finally we can test it:
~$ sqlcl -V
SQLcl: Release 21.4.1.0 Production Build: 21.4.1.17.1458
~$
macOS
In a macOS system, we can use a similar approach and uncompress the /sqlc folder from the downloaded .zip file to a subfolder into the /Library/Java/ folder, where the Java JDKs are also placed by default. Again we can also create a symlink but this time we can put it inside the /usr/local/bin folder which is already included in our system PATH.
~% sudo ln -s /Library/Java/sqlcl/bin/sql /usr/local/bin/sqlcl
Thats it! You can test it:

Windows
In the same way in a Windows system, we can extract the /sqlc folder from the downloaded .zip file to a subfolder we prefer, and after that, we can add it to our %PATH% and test it:
C:> PATH=%PATH%;<…your-sqlcl-folder-path-here…>
C:>
C:> sqlcl -V
SQLcl: Release 20.2.0.0 Production Build: 20.2.0.174.1557

C:\>
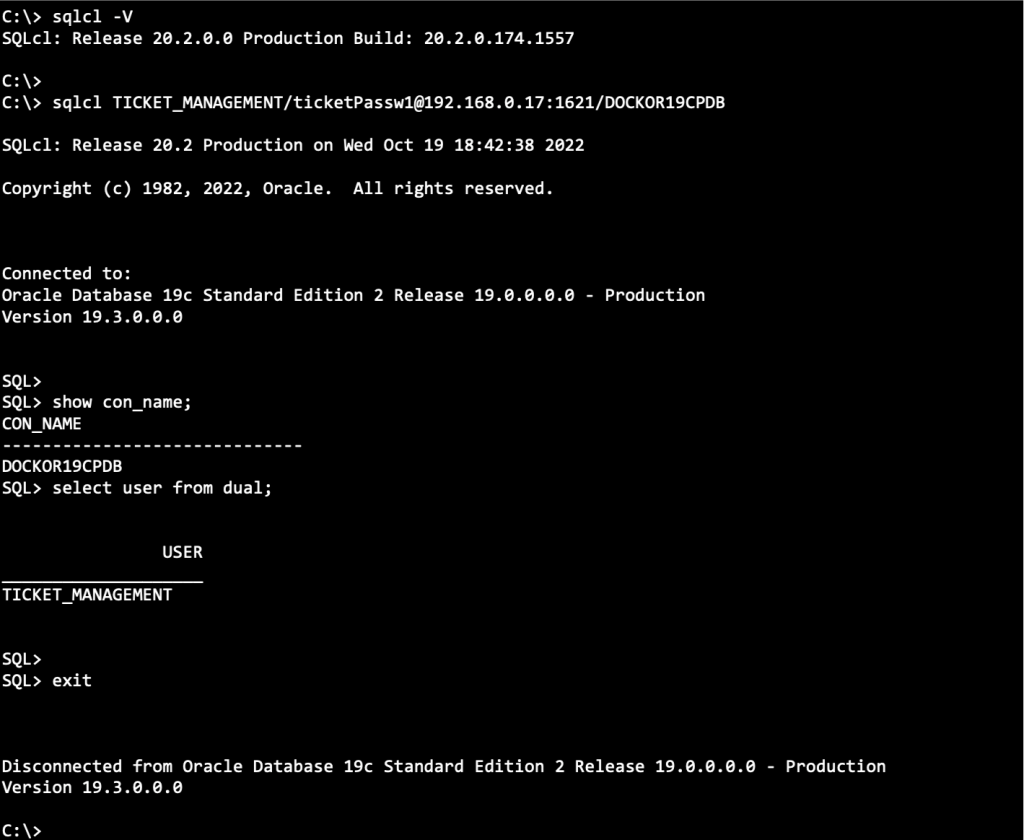
Read more about how to work with the sqlcl here.
Now it’s time to see how we can install and start using the MongoDB command line tool.

The mongosh is the official MongoDB Shell. This is “The quickest way to connect, configure, query, and work with your MongoDB database. It acts as a command-line client of the MongoDB server”.
Visit the official download page here. According to the system you are using it guides you for the appropriate download file
Ubuntu
For a Debian/Ubuntu 64-bit system, you have to download the ‘mongodb-mongosh_1.6.0_amd64.deb‘ file.
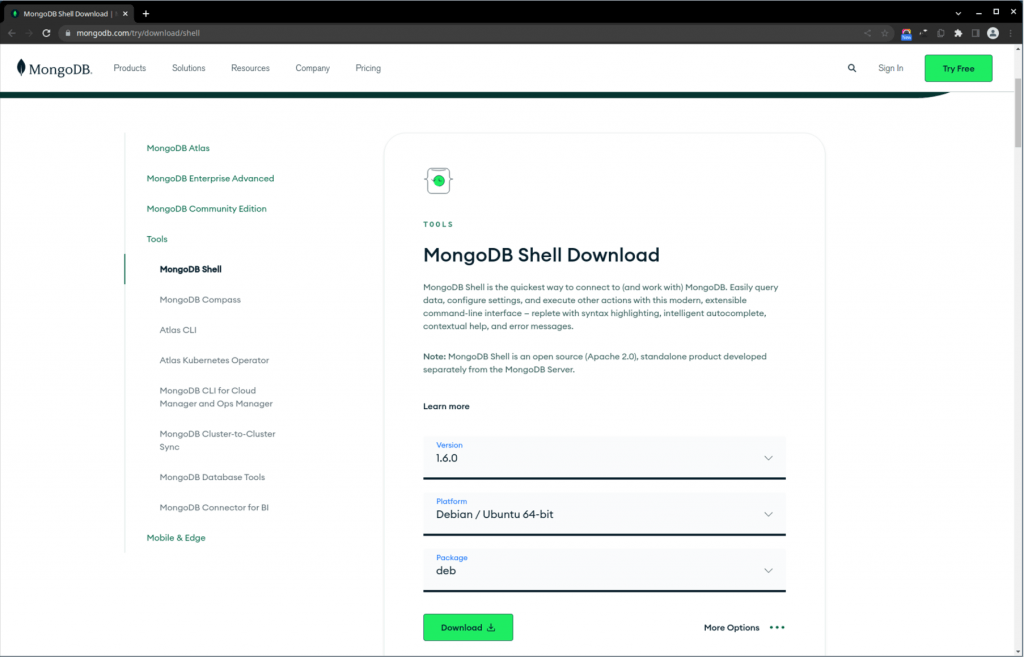
Nothing special here. Install it using your apt package manager:
~$ sudo apt install $HOME/Downloads/mongodb-mongosh_1.6.0_amd64.deb
After the installation you can test it by asking the version:
~$ mongosh -version
1.6.0
~$
and even by connecting to a running MongoDB instance:
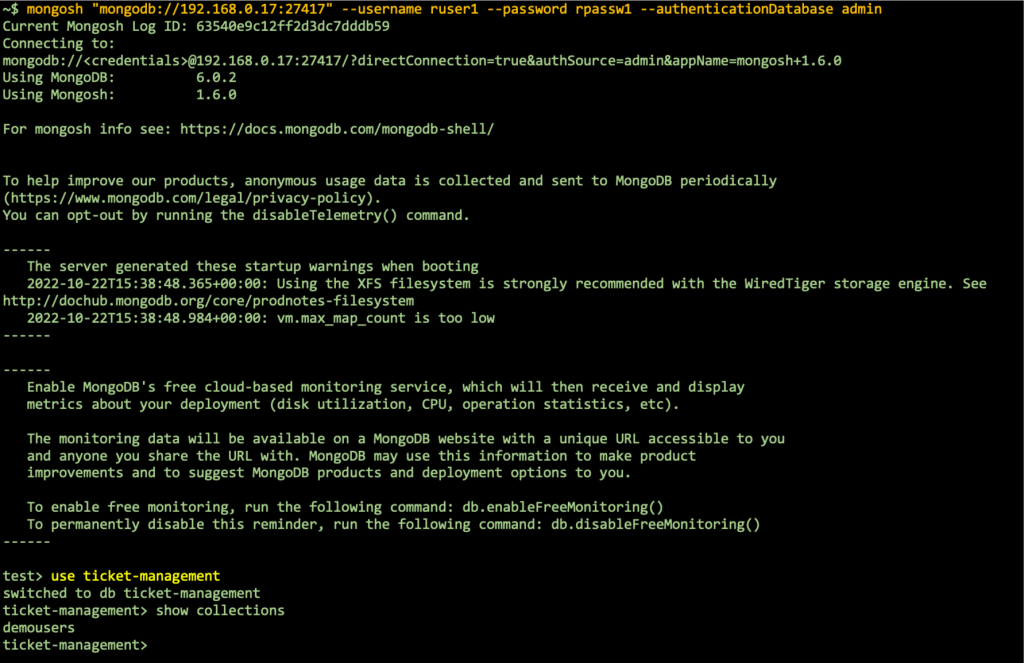
macOS
For a macOS system, you have to download the ‘mongosh-1.6.0-darwin-x64.zip‘ compressed file:
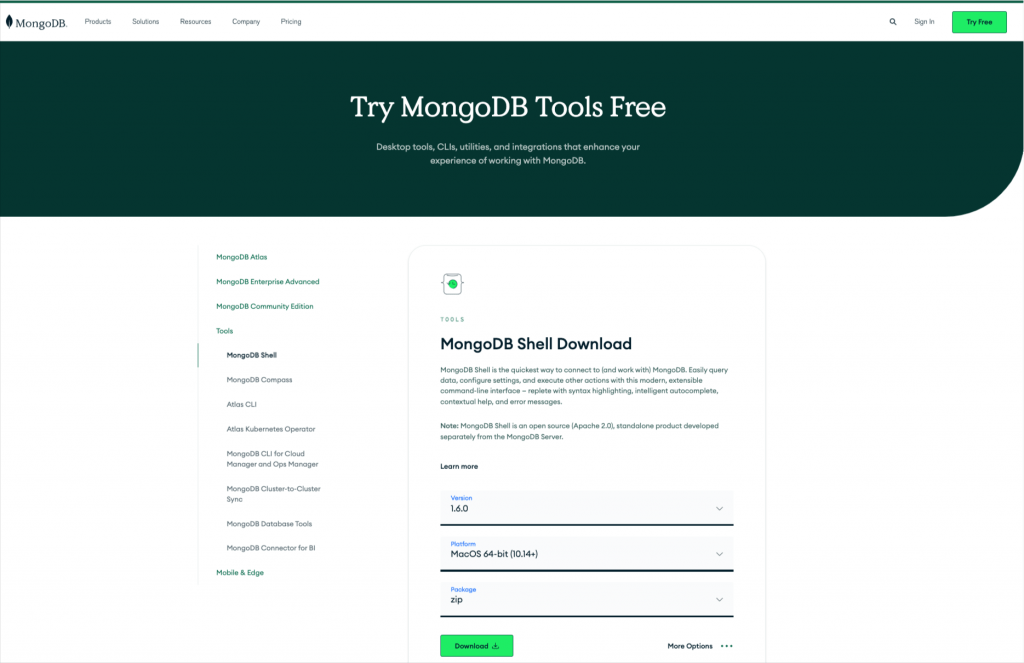
The .zip package file contains just a compressed folder with name: ‘mongosh-1.6.0-darwin-x64‘. It contains the /bin subfolder with the mongosh – the mongo shell executable, as well as the shared library mongosh_crypt_v1, and the manual page file ‘mongosh.1.gz’ that can be viewed using the man command line utility, and their respective licensing files. An appropriate location to extract the folder could be considered the /usr/local folder:
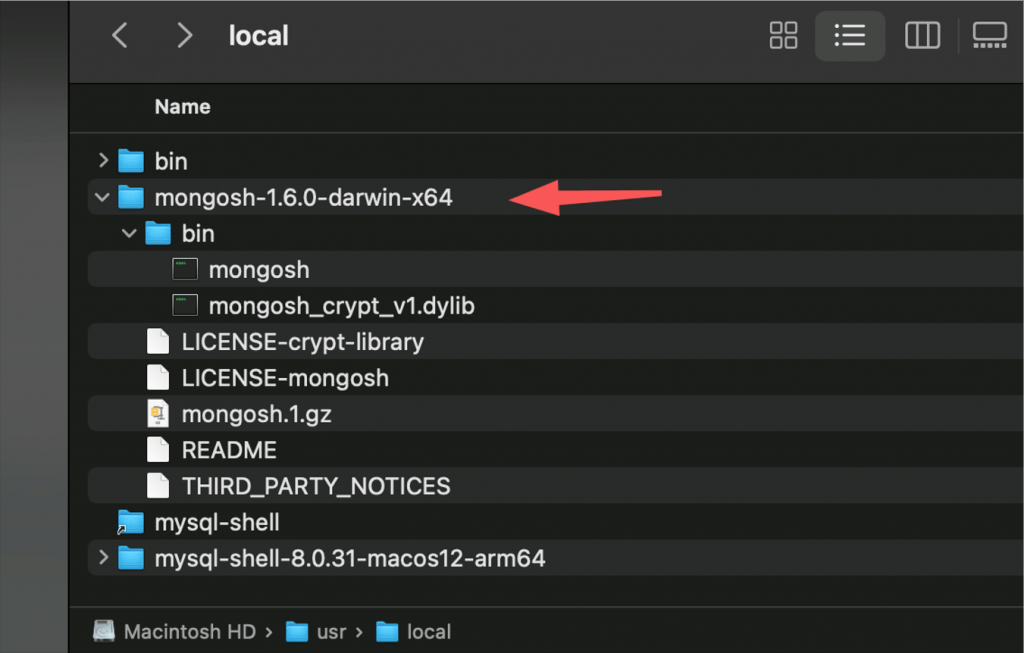
After the extraction we can create a symlink for the mongosh, so it will be accesible from our $PATH:
~% sudo ln -s /usr/local/mongosh-1.6.0-darwin-x64/bin/mongosh /usr/local/bin/mongosh
That’s it. Let’s test it:
~% mongosh -version
1.6.0
~%
Use it also to connect to an Atlas cluster:

Windows
Same game for Windows, as well. Download the ‘mongosh-1.6.0-win32-x64.zip‘ file and extract its content (the ‘mongosh-1.6.0-win32-x64‘ folder) into your preferred location.
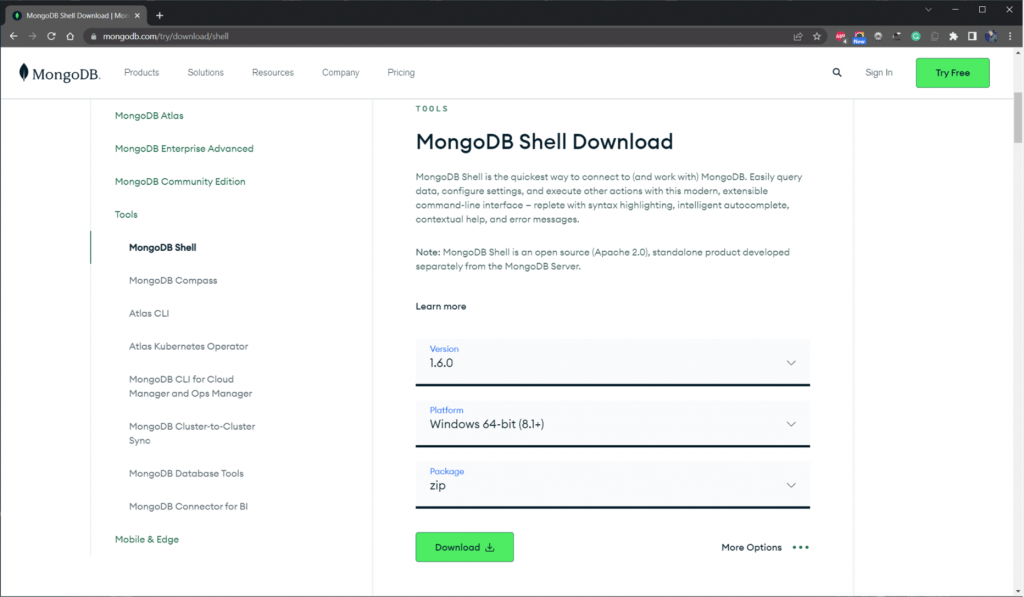
After that, we can add it to our %PATH% and test it (The mongosh.exe is located inside the /bin subfolder):
C:> PATH=%PATH%;<…your-mongosh-1.6.0-win32-x64/bin-folder-path-here…>
C:>
C:> mongosh -version
1.6.0

C:\>
No more!
That’s it all! If you wish keep this post for future reference.
Thanks for reading and stay tuned!
