
Angular: Revise the frontend project to incorporate Markdown content support for your blog site

241014 – 1101
Intro
In this post, we will continue developing a blog site based on Angular (frontend), Spring Boot (backend), and MariaDB as our database. Actually, this post is the 5th sequel of a series of posts on the subject. The previous ones are listed below:
1. Angular: Use Tiles to implement a Holy-Grail layout for your blog
2. Angular: Add dynamic data to your blog using a Spring Boot backend and MariaDB
3. Containerize and automate the deployment of a 3-tier full-stack project
4. Angular: Update the frontend project and add HTML content support for your blog site
In this post, we will explore how to incorporate Markdown content into our blog. As you may already know, Markdown is a lightweight markup language widely used in modern blogging platforms because of its simplicity and readability. It was created to provide a more accessible alternative to HTML, enabling writers to format their text without the need for complicated tags or coding. With straightforward syntax, like using **bold** for emphasis or # for headings, writers can effortlessly enhance the structure and appearance of their content.
One of the main reasons Markdown is favored in today’s blogging world is its versatility. It can be converted into HTML, ensuring compatibility with most content management systems (CMS), while still being easy to read in its original format. This feature makes it particularly beneficial for both developers and those who may not have a technical background.
To get a better understanding of Markdown, you might want to check out ‘The Markdown Guide’, and/or access the ‘Only Markdown Cheatsheet you need’.
Tools you can use to work Markdown files
There are various tools available for working with Markdown files. Here’s a rundown of some options you can explore and choose from.
Standalone Markdown Editors
There are a lot of them out there, however some well-known free editors are listed below:
Typora (Windows, macOS, Linux) which offers a clean, distraction-free interface with live preview, making it a popular choice for Markdown editing. It also supports multiple export formats and has extensive theme options for customization.
MarkText (Windows, macOS, Linux) – An open-source, cross-platform Markdown editor with a focus on simplicity and a live preview feature. It supports GitHub-flavored Markdown, making it perfect for developers.
Ghostwriter (Windows, Linux) which is a minimalist Markdown editor with a focus mode, live HTML preview, and integrated spellcheck. It’s ideal for users looking for a distraction-free writing environment.
macOS only: MWeb (paid after 14-days try), MacDown (Open source) and are also an option for Mac OS users only.
Online tools
There is also a plethora of On-line Markdown editors, e.g.: StackEdit, Dillinger, Markdown Live Preview, and Markable, just to name some of them.
Browser extensions to extract Web page content as Markdown text/file.
If you want to extract web page content as Markdown text or files, there are many browser extensions to consider. My personal favorite for Chrome is the free Web2Markdown extension, which can recognize Gist code-blocks and convert them into Markdown fenced code blocks. It also allows you to save the transformed content as a file.
Extensions to VS Code
The list of VS Code extensions for Markdown is extensive. Some of the most popular ones include: Markdown Preview Enhanced, Markdown All in One, Markdown Editor, and markdownlint.
Converters
There are a lot of tools and solutions that one can use to convert an MS Word document to Markdown. For instance, you can use some tools like:
- an MS Word plug-in, like writage (paid after 14-day try)
- an on-line tool (e.g.: word2md, wordize, vertopal, etc. ) or
- the pandoc free conversion tool (or any similar tool) to convert an MS Word .docx document to a Markdown file.
It’s important to remember that most of these tools typically provide a straightforward Markdown conversion. For the best results, your MS Word document should utilize paragraph styles, such as Headings (Heading 1, Heading 2, etc.). Thus, the Markdown file you get may need some additional adjustments or edits.
Storing Markdown text in your database
Files vs. database
When it comes to saving/storing Markdown data for a blog, we can select one of the 2 main options, we have also seen in the previous post regarding using HTML content. So, we can either keep separate Markdown files located in an accessible folder or store the Markdown text in database tables. For the purposes of this post, we will store Markdown text using the MariaDB database, the same way we’ve done with HTML content in the previous post. Our choice for a table column type, is again the ‘MEDIUMTEXT’ type, a TEXT-based type which can store up to 16MB. Storing Markdown encoded text in a database table column, also allows us to use other columns, dedicated to holding necessary metadata, such as titles, slugs, dates, etc.
When we need to manually insert Markdown text in the database using SQL commands such as INSERT or UPDATE, Markdown syntax characters like *, _, #, and [ do not need to be escaped for SQL purposes because they are not reserved in SQL syntax. However, some special characters, that might be included in the Markdown text, like Single Quotes (‘), Double Quotes (“), Backslashes (\), and Backticks (“) must be escaped, otherwise we’re likely to run into problems and failures.
For your convenience, I’ve prepared a Bash script that escapes the aforementioned special characters. The script reads the Markdown content from an ‘input’ file, escapes the characters, and outputs the escaped string to the ‘output’ file.
Here is the Bash ‘escape_mark.sh’ script:
The script actually, replaces Single Quotes (‘) with two single quotes (”) to avoid issues in SQL strings. The Backslashes (\) are escaped as double backslashes (\\) to retain the literal backslash in SQL. The Double Quotes (“) are escaped as \” for SQL compatibility (optional but can be useful). And finally, the Backticks (“) are escaped with a single backslash (\“) to avoid conflicts if the SQL environment treats backticks as identifiers.
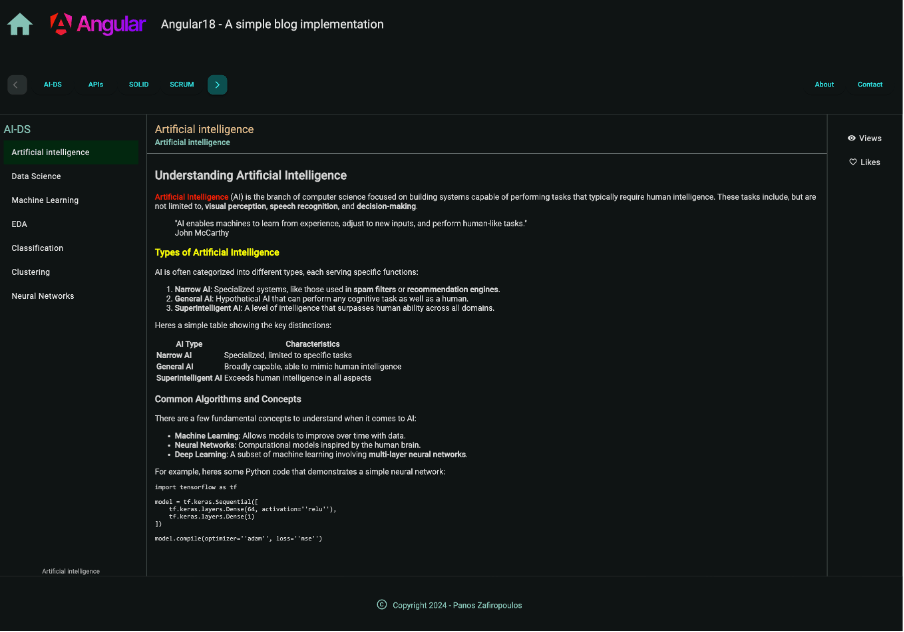
The following is an example Markdown file named ‘AI.md’ that I have escaped with the above script to the output ‘AIesc.txt’. Then I updated the 1st record of the ‘testblog2’ table in our database.
The AI.md file:
## Understanding Artificial Intelligence
<span style="color: red">**Artificial Intelligence**</span>
(AI) is the branch of computer science focused on building systems capable of performing tasks that typically require human intelligence. These tasks include, but are not limited to, **visual perception**, **speech recognition**, and **decision-making**.
> "AI enables machines to learn from experience, adjust to new inputs, and perform human-like tasks."
> — John McCarthy
### <span style="color: yellow">Types of Artificial Intelligence</span>
AI is often categorized into different types, each serving specific functions:
1. **Narrow AI**: Specialized systems, like those used in **spam filters** or **recommendation engines**.
2. **General AI**: Hypothetical AI that can perform any cognitive task as well as a human.
3. **Superintelligent AI**: A level of intelligence that surpasses human ability across all domains.
Here’s a simple table showing the key distinctions:
| AI Type | Characteristics |
|------------------|--------------------------------------------------------|
| **Narrow AI** | Specialized, limited to specific tasks |
| **General AI** | Broadly capable, able to mimic human intelligence |
| **Superintelligent AI** | Exceeds human intelligence in all aspects |
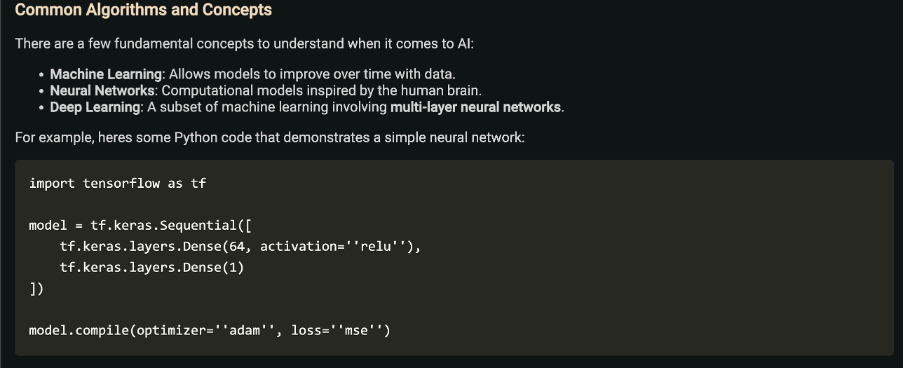
### Common Algorithms and Concepts
There are a few fundamental concepts to understand when it comes to AI:
- **Machine Learning**: Allows models to improve over time with data.
- **Neural Networks**: Computational models inspired by the human brain.
- **Deep Learning**: A subset of machine learning involving **multi-layer neural networks**.
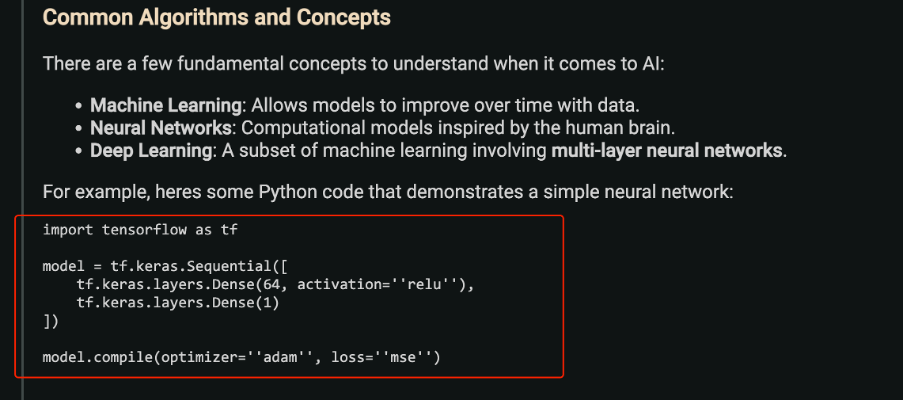
For example, here’s some Python code that demonstrates a simple neural network:
```python
import tensorflow as tf
model = tf.keras.Sequential([
tf.keras.layers.Dense(64, activation='relu'),
tf.keras.layers.Dense(1)
])
model.compile(optimizer='adam', loss='mse')
(A bit, later on, we will see how this content can be rendered to HTML step-by-step).
Now it’s time to see what are some of the Markdown libraries that we can use, and what is our preferred one.
Libraries that can be used with Angular for Markdown rendering
There are many Markdown libraries available that work well with Angular. These libraries help us take Markdown syntax and turn it into HTML for use in our Angular apps. Essentially, a Markdown library takes care of converting Markdown text—like headings, bold text, lists, and links—into HTML that can be easily displayed on the web. This is super useful for showing dynamic content in blogs, documentation, or note-taking applications. Here are some popular Markdown libraries you might want to check out:
A good Markdown Rendering Library should have several important features, including:
- Parsing and Rendering Markdown: It should be able to take Markdown syntax (like # Heading or **bold**) and turn it into the right HTML elements (<h1>, <strong>) so that it can be shown on a web page.
- Customization: Many libraries let you customize the HTML that gets rendered. This means you can add your own CSS classes, include extra features like syntax highlighting for code blocks, or change how certain Markdown elements look.
- Security: They usually come with security measures, like cleaning up HTML to stop cross-site scripting (XSS) attacks, and making sure that only safe content is shown.
- Integration: A good Markdown rendering library should work well with Angular components, which can be done through a directive or a service.
Coding
Now that we’ve had a brief introduction to the Markdown ecosystem, let’s dive into some coding!
👉The initial repos
The outcome repo from my previous post “Angular: Update the frontend project and add HTML content support for your blog site” will be used as the basis for further development for our Angular frontend. However, I’ve created the initial commit for the new repository for this post, where Agular has been upgraded to 18.2.10, and Typescript to 5.5.4. You can check it out here.
The backend Spring Boot repository remains unchanged since it was featured in the post titled “Containerize and automate the deployment of a 3-tier full-stack project.” You can find it here.
Working with Angular Frontend
My selection for this post is the ngx-markdown library. The ngx-markdown library is actually a wrapper library that is based on the marked library and also can be optionally combined with:
- Prism.js for language syntax highlight
- Emoji-Toolkit for emoji support
- KaTeX for math expression rendering
- Mermaid for diagrams and charts visualization
- Clipboard.js to copy code blocks to the clipboard
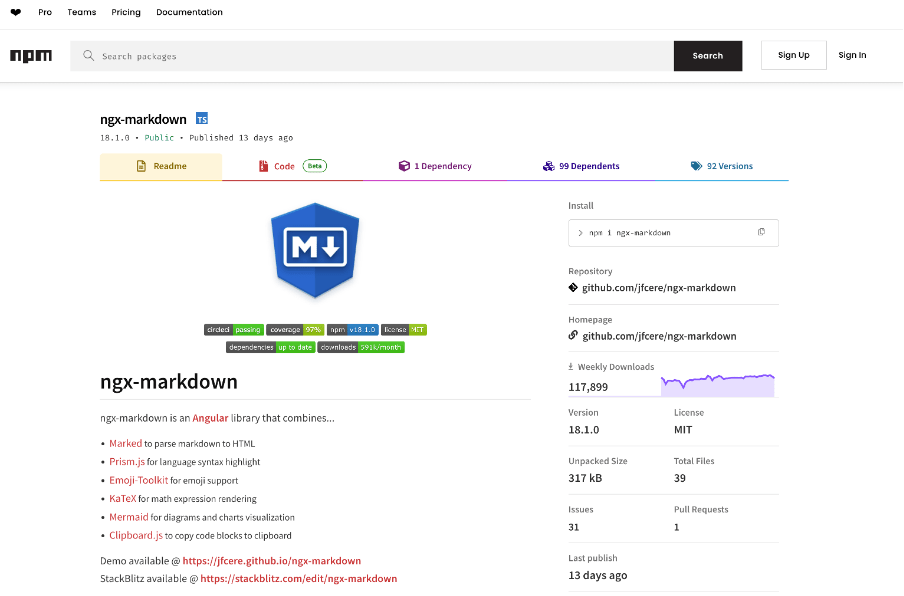
So, let’s start, by first installing the ngx-markdown library:
npm i ngx-markdownThis installs the latest version 18.1.0 as you can see in the package.json file.
. . .
  "ngx-markdown": "^18.1.0",
. . .
👉 Find the updated repo in this commit with ngx-markdown 18.1.0 installed.
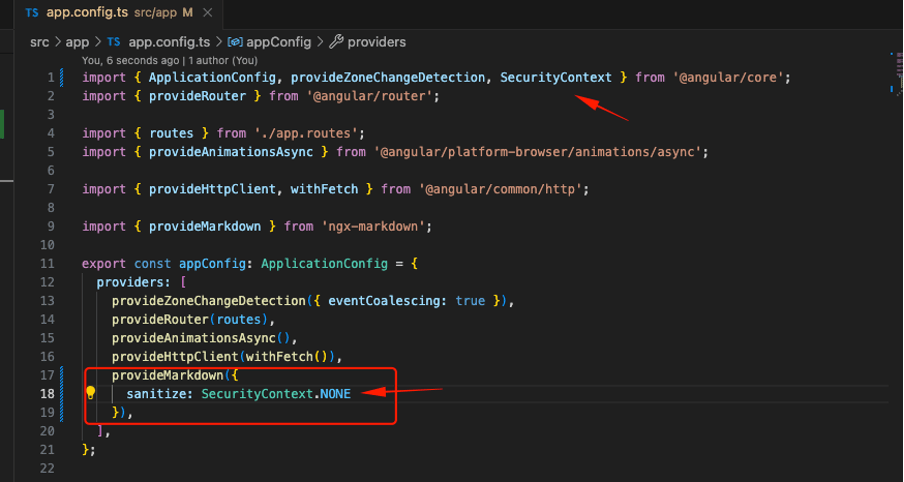
Next, we must declare the ngx-markdown in the app.config.ts file, like this:
This is required in order to provide the MarkdownComponent and MarkdownPipe to our standalone components and to inject the MarkdownService.
Starting from ngx-markdown version 9.0.0, sanitization is automatically enabled. It utilizes Angular’s DomSanitizer with SecurityContext.HTML to avoid XSS vulnerabilities. The SecurityContext level can be changed using the sanitize property when configuring MarkdownModule.
After its declaration, we are ready to parse Markdown text in any (standalone) component of our app. For this purpose, we have to add the basic MarkdownModule into the imports section of the component we wish, and use it in its template.
Here is how we can declare it MainComponent class:
and use it in the component’s template:
or instead of a <div>, we can use the <markdown> tag:
Below you can see what the updated article looks like:
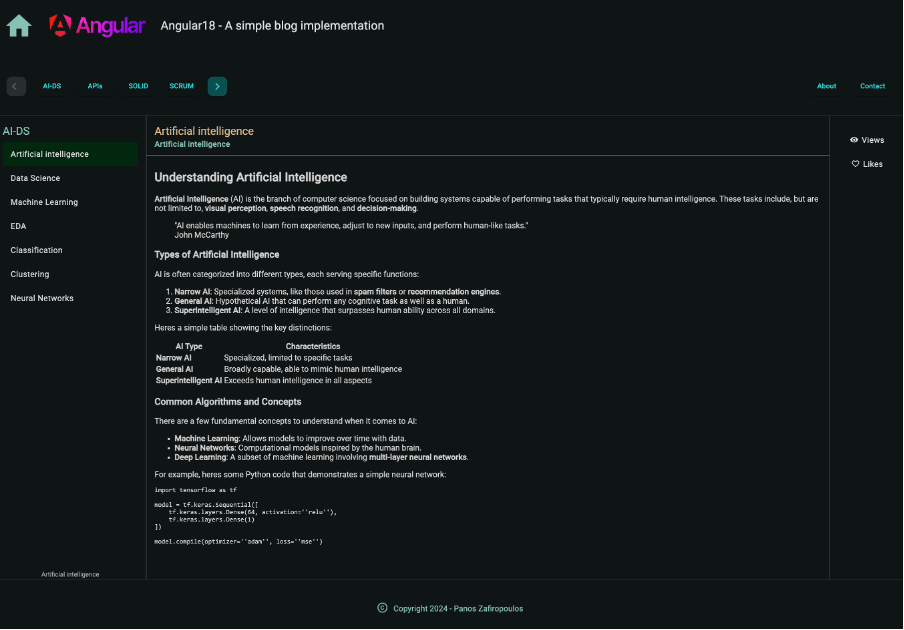
HTML tags are included, but not rendered. This is again because sanitization is enabled. So, we have to un-sanitize the safe content. As we have said, the sanitization is automatically enabled in ngx-markdown (version 9.0.0, and afterward), however, the SecurityContext level can be changed. We can change it either globally, or locally (at Component level).
Globally, means to configure the Markdown service in the app.config.ts file:
. . .
provideMarkdown ({
sanitize: SecurityContext.NONE
7}) ,
. . .
At the component level, we can add the [disableSanitizer] optional directive in the component the template:
[disableSanitizer]="true"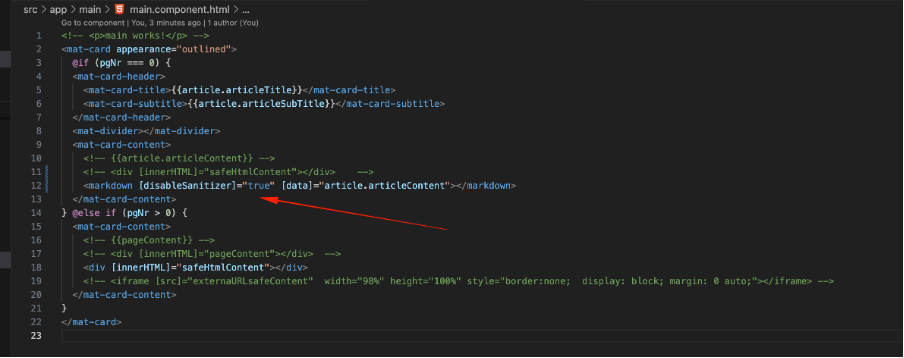
After that, the HTML content is rendered as expected:
Please, also note, that any existing pure HTML content, is also rendered OK.
Applying custom styling inside <markdown> tag (ngx-markdown)
Besides adding inline styles directly to some HTML tags in the Markdown content, we can also apply custom styles through the component stylesheet, specifically the main.component.scss file in our situation. To do this, we can utilize the ::ng-deep pseudo-class to override styles in child components. Although it appears that the ::ng-deep pseudo-class is not deprecated anymore (Angular 18 and afterward), it should really be limited to a specific component and its child components, otherwise violates the Angular’s view encapsulation. This practically means we should only use it alongside the :host special CSS selector.
For instance, suppose we want to align horizontally at center any image in Markdown content. Initially, it is aligned to the left:

Now, we can align it (and any other image included into Markdown content displayed via MainComponent), by adding the following style in the main.component.scss file:
In the same way we can apply also other CSS rules. For instance, when we want to apply specific color to headings, we can use the following style:
In the result below, you can see this works pretty well:

👉 Find the updated repo in this commit.
Code block Syntax Highlighting
If you take a closer look at the example article, you’ll notice that there’s a code block written in Python. However, the snippet above doesn’t have any syntax highlighting.
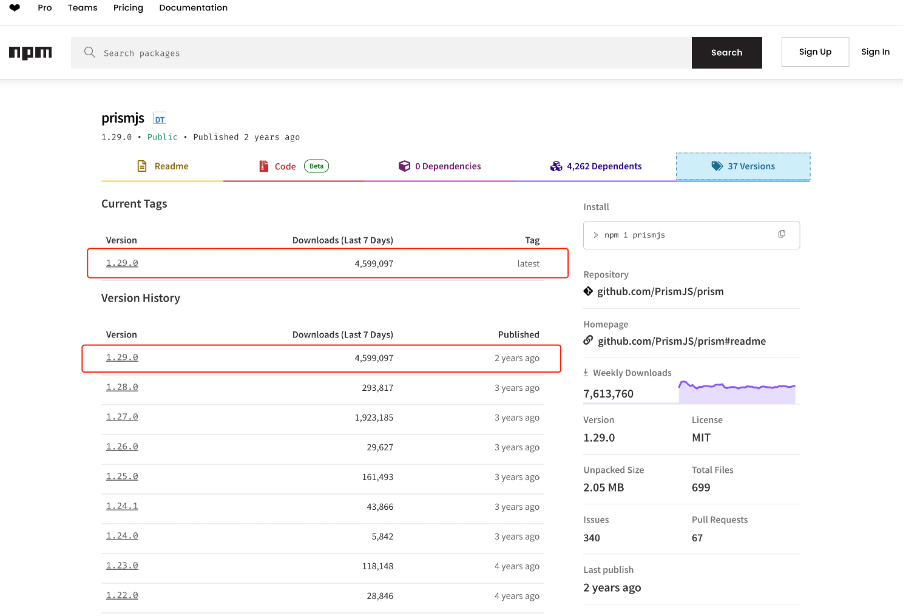
To add some color and highlight the important parts of the code, we can install and use the Prism.js library, which works well with ngx-markdown for syntax highlighting. The latest version of prismjs is the 1.29.0:
To add Prism.js library to your package.json use the following command:
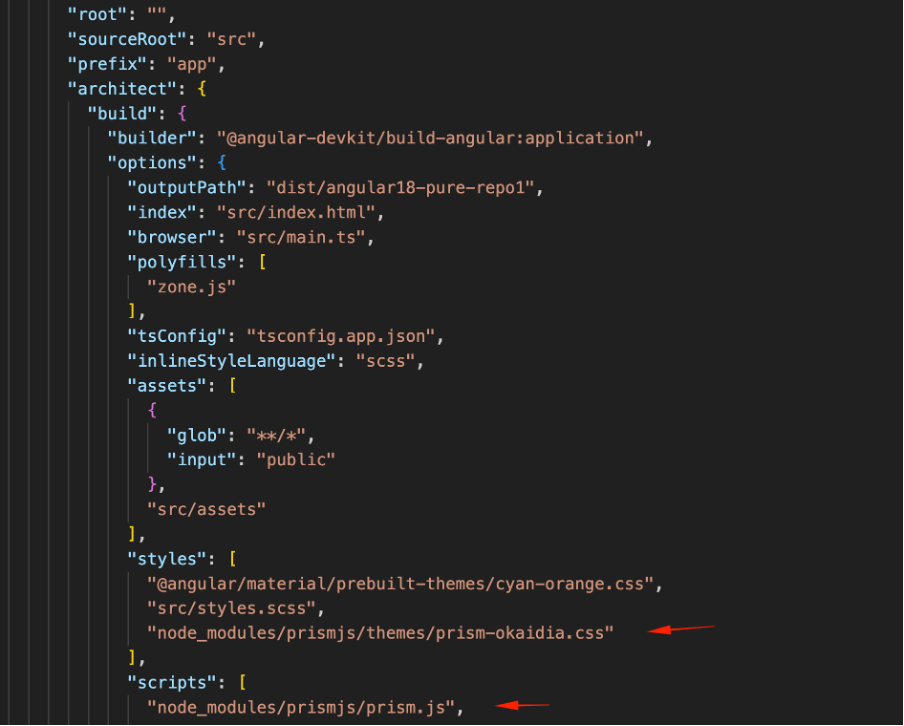
npm i prismjsAfter the installation, we must update the angular.json file. First,
First, we have to add the prism.js core library (the node_modules/prismjs/prism.js file) into the scripts array of the angular.json. Next, we must select a basic highlight CSS theme, from node_modules/prismjs/themes directory. There, you can choose one of the many options provided:
- prism-coy.css
- prism-coy.min.css
- prism-dark.css
- prism-dark.min.css
- prism-funky.css
- prism-funky.min.css
- prism-okaidia.css
- prism-okaidia.min.css
- prism-solarizedlight.css
- prism-solarizedlight.min.css
- prism-tomorrow.css
- prism-tomorrow.min.css
- prism-twilight.css
- prism-twilight.min.css
- prism.css
- prism.min.css
Then the selection (ours is the ‘okaida’ theme) should be added at the style array as you can see below:
The code block shown below has been traced, and its background color has been altered. However, we still don’t have any actual syntax highlighting:
The last thing we need to do is include the syntax files for the specific languages we want to use in our Markdown code blocks. In this situation, just adding the Python syntax file will do the trick:
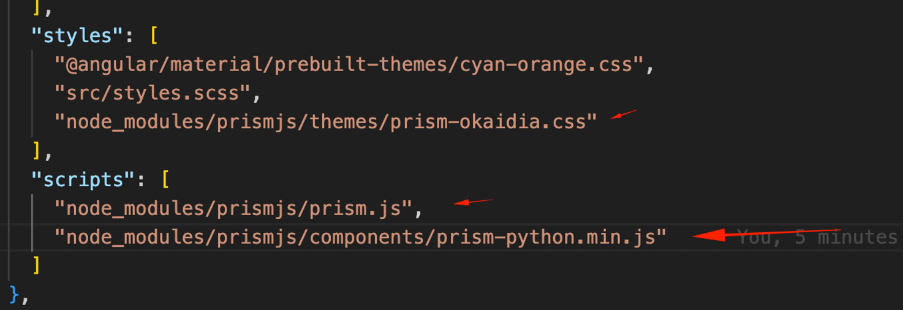
However, probably you will need also to add more language-specific syntax files. So below is the part of the angular.json file, with the changes we made to it, including support for most of the commonly used languages:
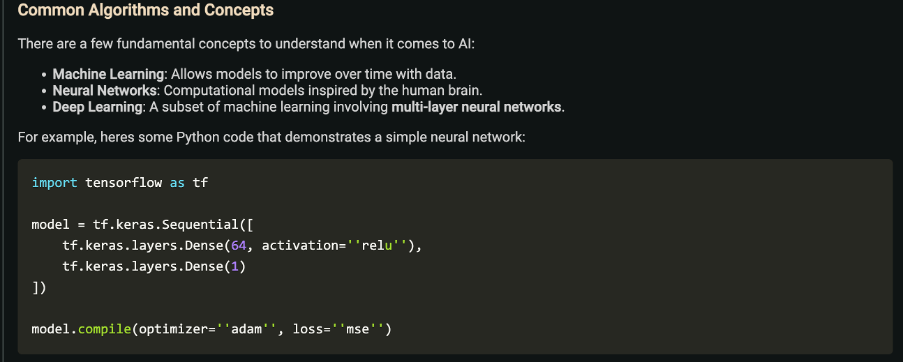
The outcome is quite impressive:
Using ngx-markdown MarkedOptions
The last reference in this post, about ngx-markdown library, is about some general Markdown options the library offers us. You can dig deeper into this subject here, and you can also find the list of the provided options here. Selected options can be provided with the MARKED_OPTIONS injection token via the markedOptions, using the provideMarkdown function in the app.config.ts file, e.g.:
The options selected above are explained briefly below:
- gfm: The Markdown contents follow the approved GitHub Flavored Markdown (GFM) specification.
- breaks: Adds <br> on a single line break. This mimics GitHub’s behavior in comments, but not in rendered markdown files. It requires gfm to be set to true.
- pedantic: It aims to comply with the original markdown.pl as closely as possible.
MarkedOptions also provides a renderer property that enables you to customize how tokens are rendered throughout your entire application. For example, you can create a factory function to change the default rendering of blockquote tokens by incorporating a CSS class for personalized styling.
Moreover, ngx-markdown can work seamlessly with the other libraries we’ve mentioned earlier, such as:
- Emoji-Toolkit for emoji support
- KaTeX for math expression rendering
- Mermaid for diagrams and charts visualization
- Clipboard.js to copy code blocks to the clipboard
While a comprehensive overview of ngx-markdown() isn’t the focus of this post, you can always refer to the official documentation for an in-depth exploration of all the features this library offers.
Conclusions
Many well-known platforms, such as WordPress, Jekyll, and Ghost, in addition to Medium, support Markdown. This feature enables users to concentrate on creating content without the hassle of complex formatting guidelines.
The increasing popularity of Markdown in blogging can also be linked to its portability and compatibility with version control systems like Git, which makes it perfect for collaborative content creation. Its straightforward and minimalist design fits seamlessly with the demands of contemporary blog sites, where efficiency, clarity, and user-friendliness are essential.
Particularly, in this post, we explored several key topics:
- We discussed various tools available for working with Markdown content, including standalone editors, online platforms, browser extensions, VS Code add-ons, and converters.
- We also covered how to save and store Markdown text in our database, along with a Bash script example to demonstrate how to escape special characters.
- Additionally, we referenced some popular Markdown libraries suitable for Angular projects, ultimately choosing the ngx-markdown library, which can be enhanced with several related libraries.
- We looked at the practical implementation of the ngx-markdown library, focusing on rendering Markdown to HTML correctly by disabling DOM sanitization and applying custom styles at the component level.
- Lastly, we incorporated the Prisma.js library for code block syntax highlighting and discussed how to utilize some ngx-markdown MarkedOptions.
That’s it! We did it once more!
👉 You can check out the final commit of the repository here.
I hope you had a great time.
Keep an eye out for more updates as we continue our adventure in building our Angular blog (URL slugs, and other goodies are coming soon!)