wxWidgets with C++ on Linux

230610
Intro to wxWidgets cross-platform GUI library. Step-by-step guidance to start working with.
A few words about wxWidgets
Developing desktop GUI apps (compared to web-based apps) is not that popular today, however, there are a plethora of cases that they are still applicable. Moreover, having a GUI interface in an app is quite attractive for learners and newcomers.
wxWidgets is one of the oldest GUI (since 1992!) and well-known libraries written in C++, which is primarily used for desktop apps. Qt -its main competitor- is considered the leading cross-platform application and UI framework. Of course, there are also others worth mentioning GUIs, such as Dear ImGui, FLTK, and Ultimate U++ that one can use with C++ (and/or other languages). However, I think wxWidgets, is a good approach for someone who wants to play around with C++ and also, wants a full-free solution and native look for her/his simple GUI demands.
Using a cross-platform GUI library such as wxWidgets, one can have the same codebase for applications targeting Windows, macOS, and Linux (as well as other platforms). Moreover, wxWidgets also provide language bindings for several different languages, such as Python, Perl, Ruby, and many others. Furthermore, unlike other cross-platform toolkits, wxWidgets gives applications a truly native look and feel because it uses the platform’s native API rather than emulating the GUI.
In this post, we will take the steps of installing and starting using wxWidgets libraries. Actually, we will take the source code of the officially provided “Hello World” program and will go step-by-step through it. Finally, as a ‘bonus’ we will see how we can set up VS Code with the minimum necessary settings for starting working with C++ and wxWidgets.
So, let’s start.
Installation
Prerequisites
A Linux system. Examples given in this post are tested on both: an x86-64 Intel/i386) bare-metal Ubuntu system (22.04.2 LTS), and an aarch64 Fedora (Fedora release 38) running on Parallels on a macOS (Apple Silicon M1 based).
Example commands are given for both Ubuntu and Fedora when they are different or when it is necessary. Example outputs are given only for Ubuntu.
GNU essential tools
GNU Compiler Collection should have been installed on your system. It is most likely that your distro has already preinstalled it already.
You can check the version of the GNU C++ (g++) compiler installed in your system like that:
$ g++ --version
or
$ g++ -v
For instance, the output should look like the following:
GNU Binutils should have also been installed. Most of required tools can be installed via package bundle:
Debian/Ubuntu-based
$ sudo apt install build-essential
(Red Hat/Fedora-based)
$ sudo dnf groupinstall 'Development Tools'
You can list all GNU Binutils apps installed via:
$ dpkg -L binutils | grep "/usr/bin/" | xargs -i sh -c "{} --version"
Or in a more concise and formatted manner:
$ sh <(dpkg -L binutils | awk '/bin\// {print $0 " --version"}') | grep Binutils | sort -u | column -t
(Red Hat/Fedora-based)
$ rpm -ql binutils | grep /usr/bin
The output looks like:
Moreover, the gdb – the GNU source-level debugger, is in a separate package bundle. gdb supports C, C++, D, Objective-C, Fortran, Java, OpenCL C, Pascal, assembly, Modula-2, Go, and Ada.
Debian/Ubuntu-based
$ sudo apt install gdb
(Red Hat/Fedora-based)
$ sudo dnf install gdb
You can check about the GNU gdb version, using the following command:
$ gdb -v
The output is similar to:
Finally, the GNU make utility is also necessary for automating the compilation process.
Note that if you want, you can read more about the make utility and makefiles in the following post of mine:
If the make utility has not yet installed in your system, you can install it via:
$ g++ -v
Debian/Ubuntu-based
$ sudo apt install make
(Red Hat/Fedora-based)
$ sudo dnf install make
You can check the version installed, via:
$ make -v
The output should be similar to:
Apart from the necessary GCC tools and other packages we saw above, we also need the GTK support libraries for development. Actually, for both GTK+2.0 and GTK+3.0 versions. These libraries are included in the libgtk2.0-dev and libgtk-3-dev packages respectively.
You can install them via:
Debian/Ubuntu-based
$ sudo apt install libgtk2.0-dev libgtk-3-dev
(Red Hat/Fedora-based)
$ sudo dnf install gtk2-devel gtk3-devel
You can also check if they are installed:
Debian/Ubuntu-based
$ sudo apt list libgtk2.0-dev libgtk-3-dev
(Red Hat/Fedora-based)
$ dnf search gtk3*
and
$ dnf search gtk2*
The output is similar to:
Now we are redy to obtain the sources and build wxWidgets libraries.
Getting the wxWidgets sources
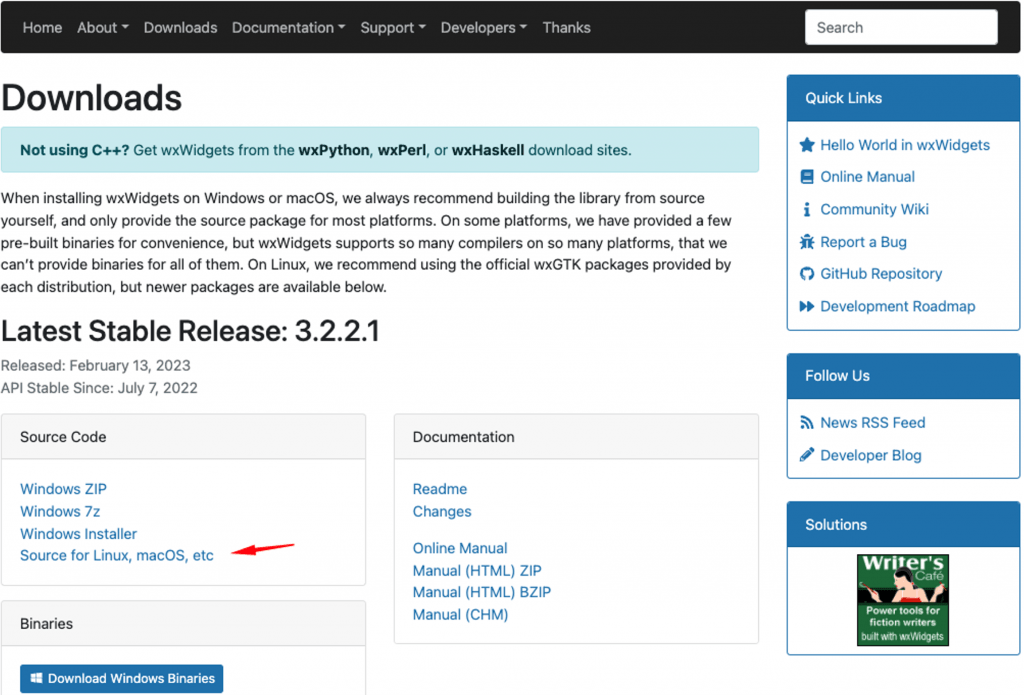
You can access the official download page, here.
Clicking on the appropriate link, you can download the comressed file ‘wxWidgets-3.2.2.1.tar.bz2’, which contains the wxWidgets-<version> source folder. In our case this is ‘wxWidgets-3.2.2.1’. So decompress it somewhere ii your system, jump in it and open your terminal there.
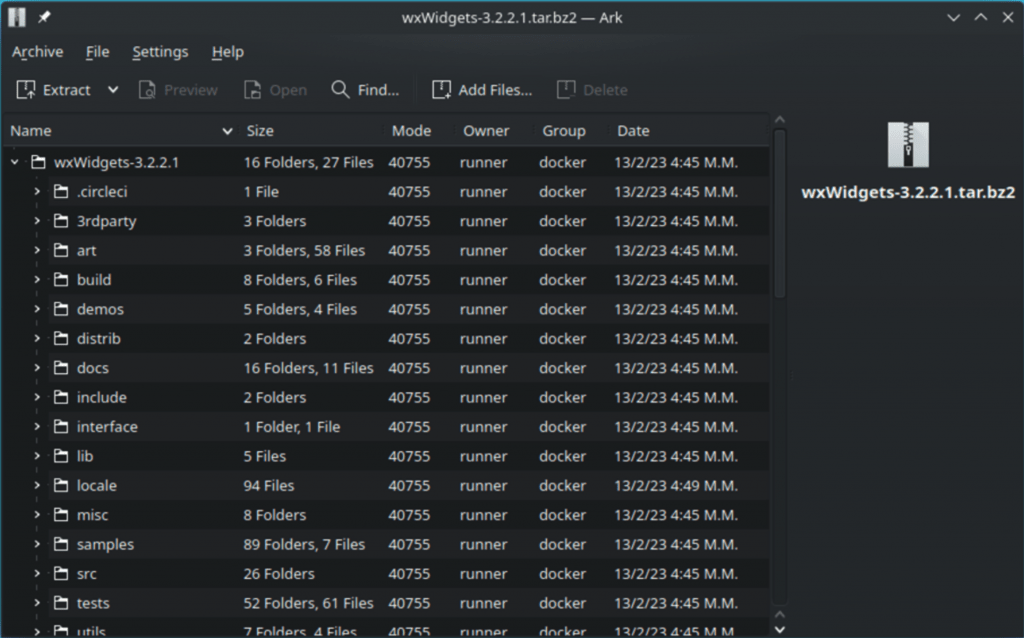
Note that, alternatively, you can obtain the wxWidgets folder with sources, cloning it from wxWidgets GitHub repositories:
$ git clone --recurse-submodules https://github.com/wxWidgets/wxWidgets.git
Now we are ready to build the wxWidgets.
Building the wxWidgets libraries from the sources
Note that we are going to buld them as dynamic (shared) libraries.
The installation is pretty straightforward, and one can just follow the official instruction on this page:
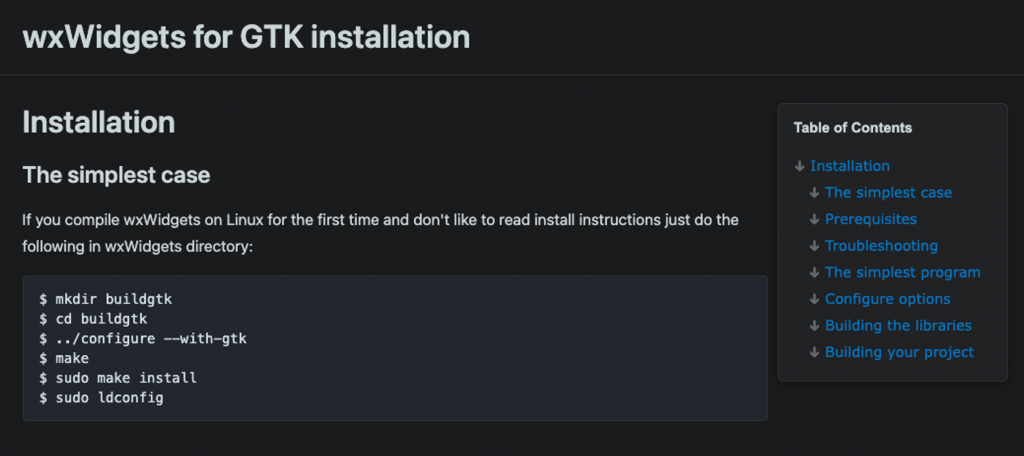
As you can see above what we have to do is summarized as:
Create a build sub-folder. The name of that sub-folder is recommended to be ‘buildgtk’.
From within that sub-folder, we have first to run the configure command that actually creates the necessary makefile(s). Since we are in Linux, it is essential to use the GTK libraries, and thus we have to run the configure command with the ‘–with-gtk’ option.
$ ../configure –with-gtk
Note: In case, your system is an aarch64-based system and it faces some recognizing issues and warnings like ‘configure: WARNING: you should use –build, –host, –target’ and/or ‘checking build system type… Invalid configuration `–with-gtk’: machine `–with-unknown’ not recognized’, you can try to use:
(this works on my Fedora)
$ ../configure --build=aarch64-unknown-linux-gnu -with-gtk
The end of the output of running the above command should look like:
After that we should execute the make utility, that actually bulds the wxWidgets libraries.
$ make
Note that, the make process takes some time (probably about 15 minutes or more, but it depends on your system and its configuration), so keep yourself patient.
After it has been finished we can run the command:
$ sudo make install
Which creates (if necessary) the standard library folders and puts there the wxWidgets libraries.
The output is something similar to:
As you can see above, the last step is to use the ldconfig command.
$ sudo ldconfig
The ldconfig command and the LD_LIBRARY_PATH env variable
ldconfig is a Linux command that is used to configure dynamic linker run-time bindings. The dynamic linker is in charge of loading and linking libraries to applications at run time.
ldconfig command is used to manage the list of libraries that the dynamic linker searches when loading libraries for dynamically linked programs. It checks for the shared library directories specified in the following places.
- /etc/ld.so.conf file
- directories specified in the command line (command-line mode with -n)
- trusted directories
- /lib, /usr/lib (32-bit systems)
- /lib64, /usr/lib64 (64-bit systems)
From man pages:
ldconfig – configure dynamic linker run-time bindings
DESCRIPTION
ldconfig creates, updates, and removes the necessary links and cache
(for use by the run-time linker, ld.so) to the most recent shared
libraries found in the directories specified on the command line, in
the file /etc/ld.so.conf, and in the trusted directories (/usr/lib and
/lib). ldconfig checks the header and file names of the libraries it
encounters when determining which versions should have their links
updated. ldconfig ignores symbolic links when scanning for libraries.
LD_LIBRARY_PATH: native code libraries. On Linux, in addition to the value of this variable, the lookup path typically contains /usr/local/lib, /usr/lib, /lib and a few others). The name LD comes from dynamic loader, the system component that loads libraries into dynamically linked executables.
That’s it. It seems that we have succesfully bult wxWidgets dynamic libraries, so let’s check it.
Check the wxWidgets libraries
For our purpose we can use the wx-config. The wx-config is a small command-line utility that can help you while building on Unix-like systems (including Linux and Mac OS X). For instance:
‘wx-config –version’ shows the version installed
‘wx-config –cxxflags’ informs you what compile flags to use
‘wx-config –libs’ tells you what link flags to use
Finally, we can see where the wx-config utility has finally been located:
$ which wx-config
The output of running the wx-config utility with the above options, is similar to:
Note that, you can also get the full list of options using the ‘wx-config –help’.
So, that’s it. It seems we managed to have wxWidgets dynamic libraries in our system. Now, it’s time to use a real example using them.
The wxWidgets ‘Hello World’ program
As our example, we will use the Hello World Example provided by the official page in Programming Guides of wxWidgets, here. It has been chosen, because the official page above, provides introductory instructions to start using wxWidgets using this example. Note that, I will also give some guidelines, going step-by-step, through this eample.
So, create a new project folder with the name ‘myhello’ and copy the source code in the ‘wxhello.cpp’ file (towards the bottom) of the above page.
From within the ‘myhello’ project folder, you can use the following command to build the ‘wx-myhello’ executable:
$ g++ -std=c++11 -Wall -o wx-myhello wxhello.cpp `wx-config --cflags --libs`
After that you can run the app:
$ ./wx-myhello
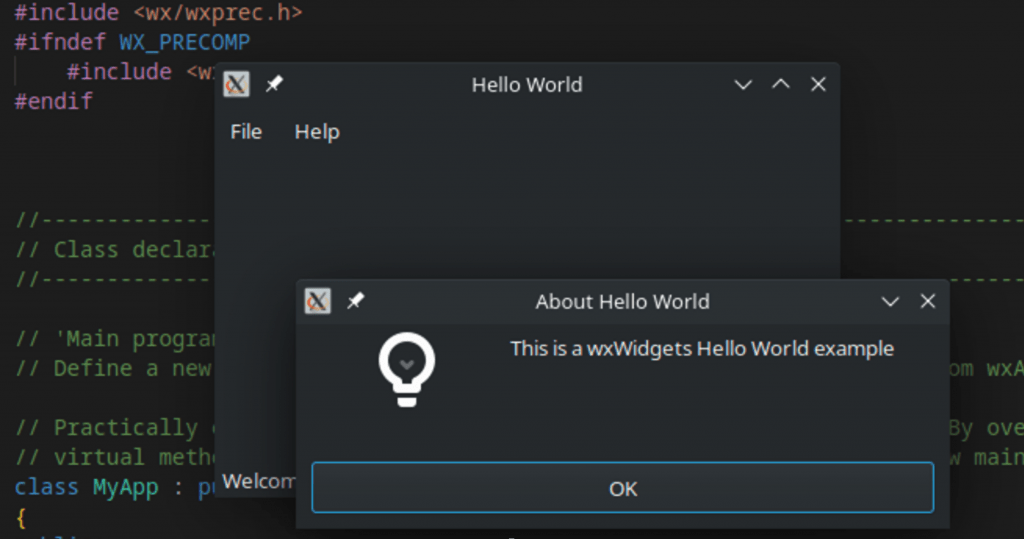
Bellow you can see some of the snapshots of the running app:
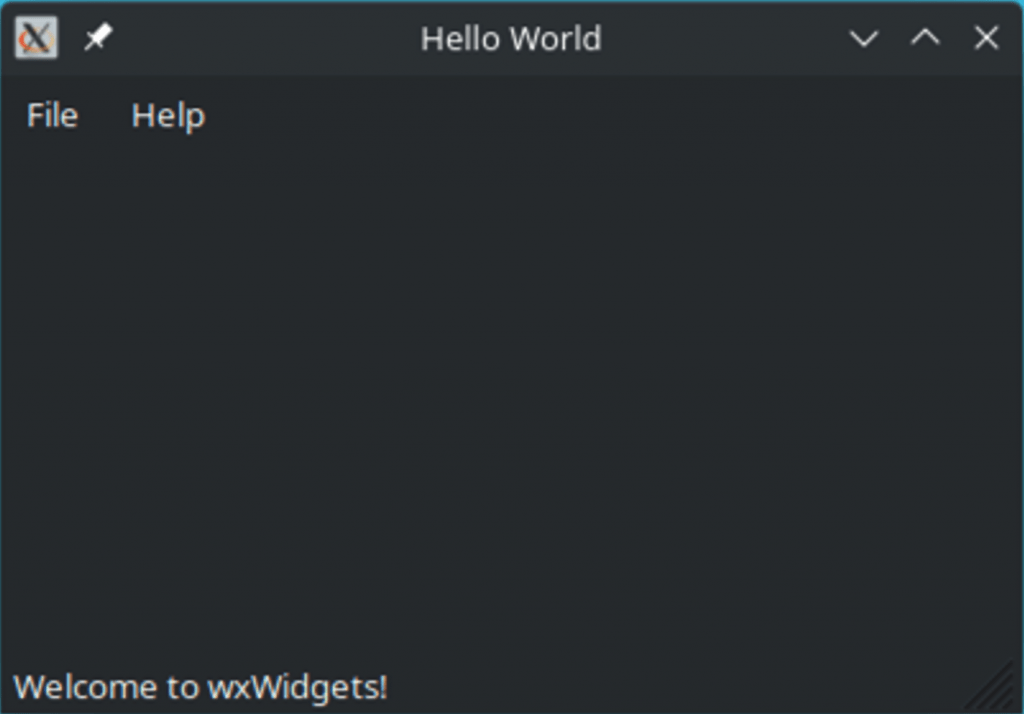
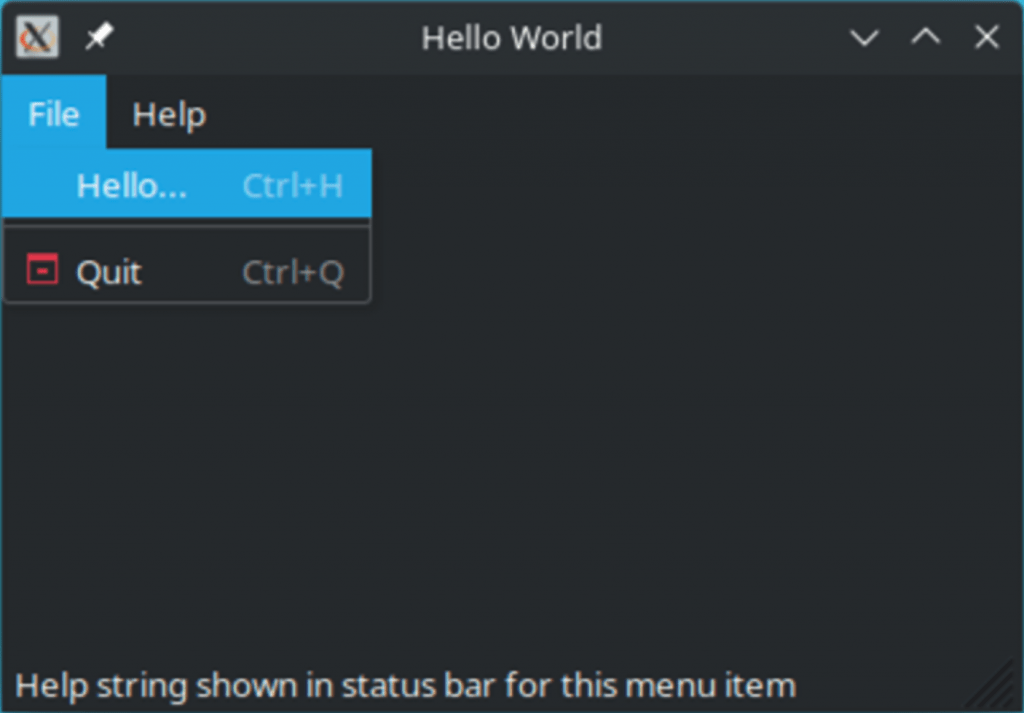
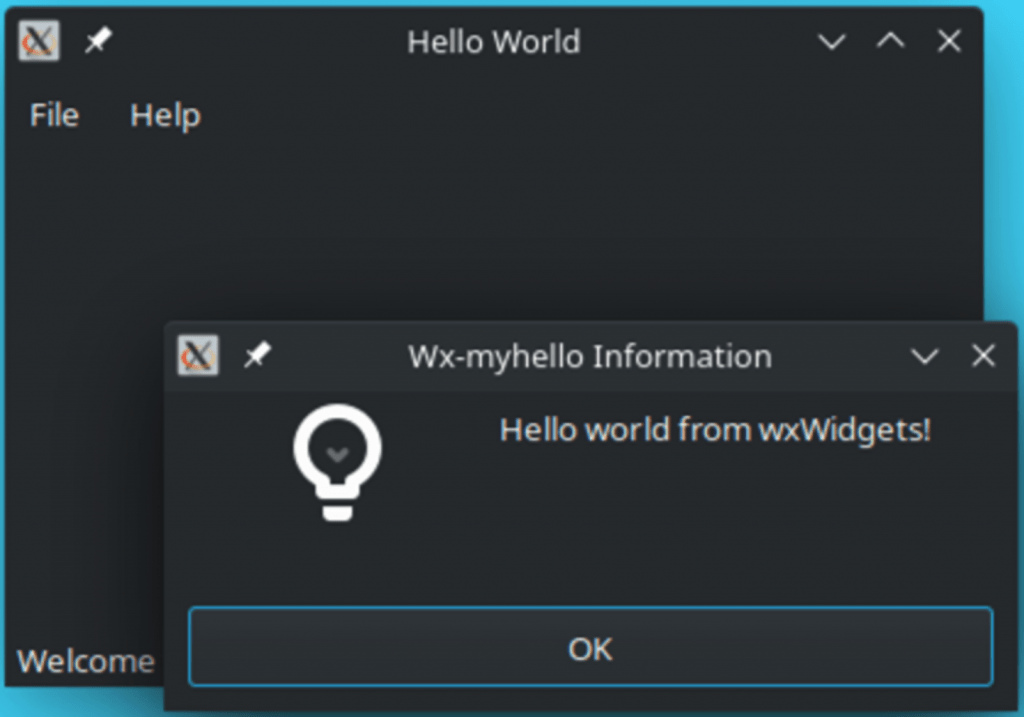
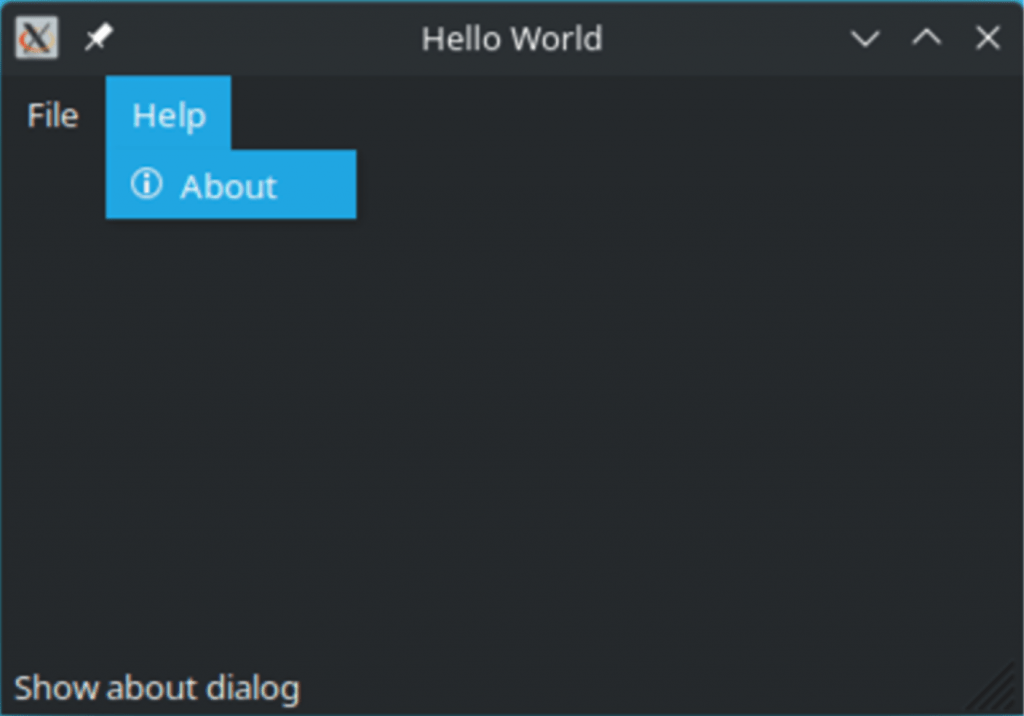
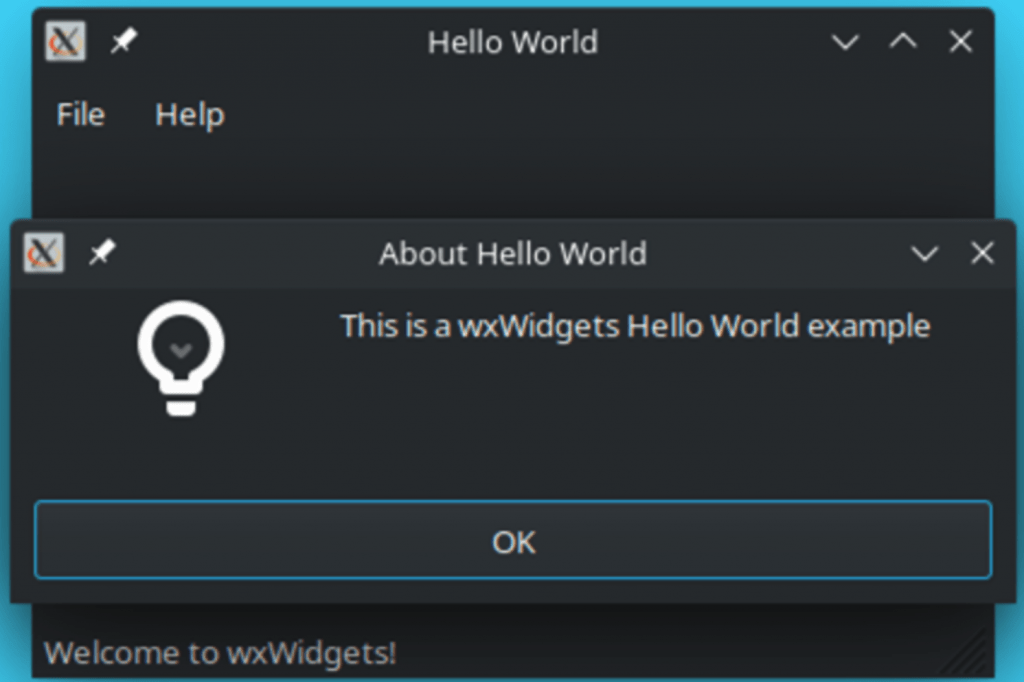
Note that, generally, we can build or executable, in 2 separate steps. First we can compile the source and make our object gile, and after that we can link it with necessary libraries.
Compile:
$ g++ -std=c++11 -Wall -c `wx-config --cflags` wxhello.cpp -o wxhello.o
Link:
$ g++ wxhello.o `wx-config --libs` -o wx-myhello
The output is quite the same.
Now lets’ go a bit deeper.
The Hello World example step-by-step
The header(s)
The Nr. 1 thing we have to do, is to include wxWidgets’ header files. The general header ‘wx/wx.h’ is used for the global include headers, or better for the most of the commonly needed headers. For the platforms with support for precompiled headers, as indicated by WX_PRECOMP, this global header is already included by wx/wxprec.h so we only include it for the other ones.
The core wxWidgets application class – derived from wxApp and the virtual OnInit() method
Practically every app should define a new class derived from wxApp. Below, for our case, we declare the MyApp class. However, the most important is the boolean OnInit() method. By overriding wxApp’s OnInit() virtual method the program can be initialized, e.g. by creating a new main window.
The main() application instance – via wxIMPLEMENT_APP() macro
As in all programs, there must be a “main” function. Under wxWidgets, main is implemented inside the wxIMPLEMENT_APP() macro, which creates an application instance of the specified class and starts running the GUI event loop. It is used simply as:
The main/core window – derived from wxFrame
Generally, in wxWindows, a frame is a window whose size and position can (usually) be changed by the user. A main window (a “main”Frame) is created by deriving a class from wxFrame. Here, as the first step, we declare the MyFrame class and its public constructor. We also add definitions of a number of event handlers, i.e.: for functions handling events such as mouse clicks, messages from the menu, or for other button-event responses. The event handlers are defined as private members of the “main”Frame class.
Define “control”-identifiers: const-variable(s)/enum-element(s) for menu-command(s) interaction
In order to be able to react to a menu command, it must be given a unique identifier -an id- which can be defined as a const variable or as an enum element. Using enums constants is often used because typically many such constants can be required.
We don’t need to define ids for “About” and “Exit”, because wxWidgets already predefines standard values such as wxID_ABOUT and wxID_EXIT (stock items), and preferably, we have to use these, as they can be handled in a special way by a particular platform (Linux, macOS, Windows, etc.).
Application Initialization – overriding the OnInit() method
As mentioned before, wxApp::OnInit() is called upon startup and should be used (overridded) to initialize the program. (Maybe showing a “splash screen” and creating the main and/or other windows. Frames are created hidden by default, to allow the creation of child windows before displaying them. We thus need to explicitly show them. Finally, we return true from this method to indicate successful initialization:
The “main”Frame constructor definition
Below is an extract from the official wxFrame class constructor and Member Function Documentation for creating a window/frame:
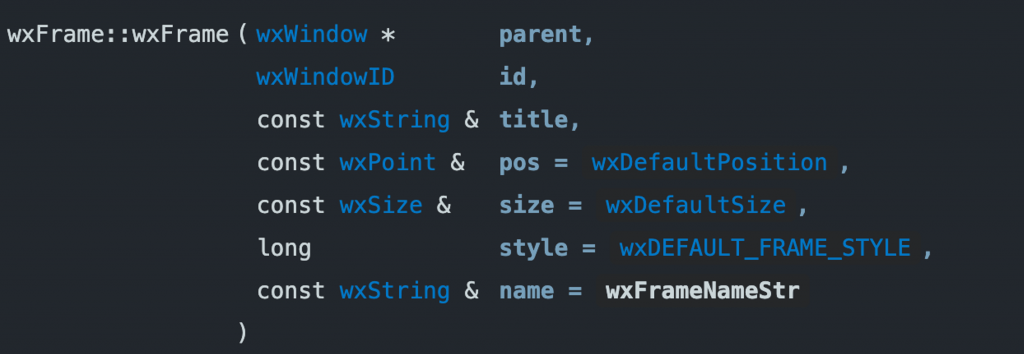
The constructor parameters are:
| parent | The window parent. This may be, and often is, NULL. If it is non-NULL, the frame will be minimized when its parent is minimized and restored when it is restored (although it will still be possible to minimize and restore just this frame itself). |
| id | The window identifier. It may take a value of -1 to indicate a default value. |
| title | The caption to be displayed on the frame’s title bar. |
| pos | The window position. The value wxDefaultPosition indicates a default position, chosen by either the windowing system or wxWidgets, depending on platform. |
| size | The window size. The value wxDefaultSize indicates a default size, chosen by either the windowing system or wxWidgets, depending on platform. |
| style | The window style. See wxFrame class description. The default value is wxDEFAULT_FRAME_STYLE |
| name | The name of the window. This parameter is used to associate a name with the item, allowing the application user to set Motif resource values for individual windows. |
Here we are going to use just the 3 first parameters, leaving the rest with their default values. Also, we are not going to use any Motif resource, so we also leave this parameter out. An early syntax is given below:
MyFrame::MyFrame(): wxFrame(NULL, wxID_ANY, "Hello World") {

	. . .

}
NULL is because this window is the main window of our app, and thus, has no any other parent window.
wxID_ANY: means that we don’t care about the window control id. control id can be any id. Mostly used, when creating a new window or when installing an event handler. The title of the title-bar of the window frame is set to “Hello World”.
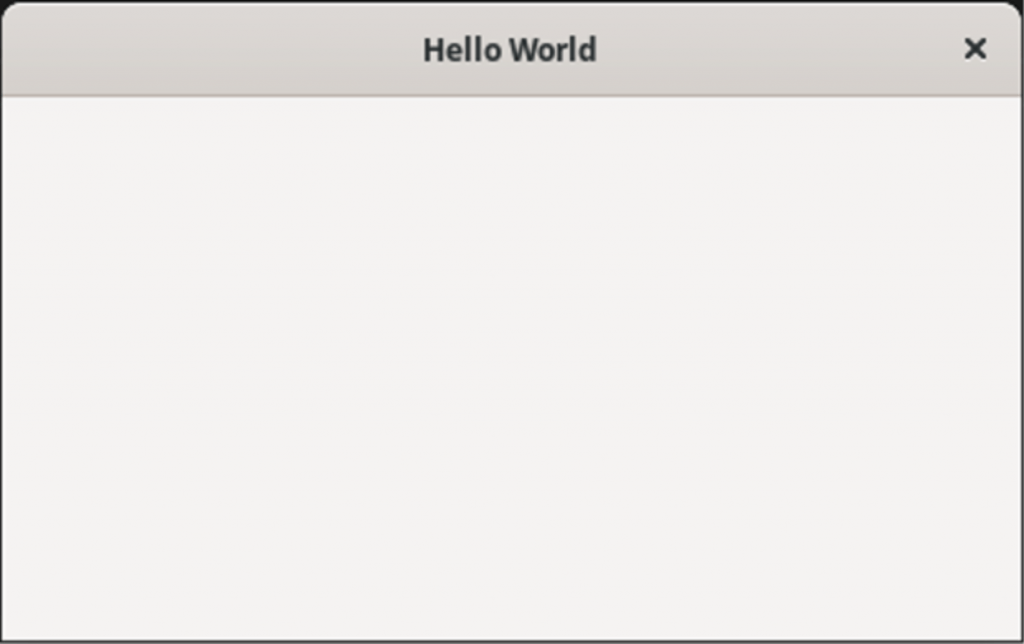
Setting a menu bar and status bar and their item(s) Next, we can declare/define a menu bar (at the top of the window, under the title bar) and a status bar (at the bottom of the window)
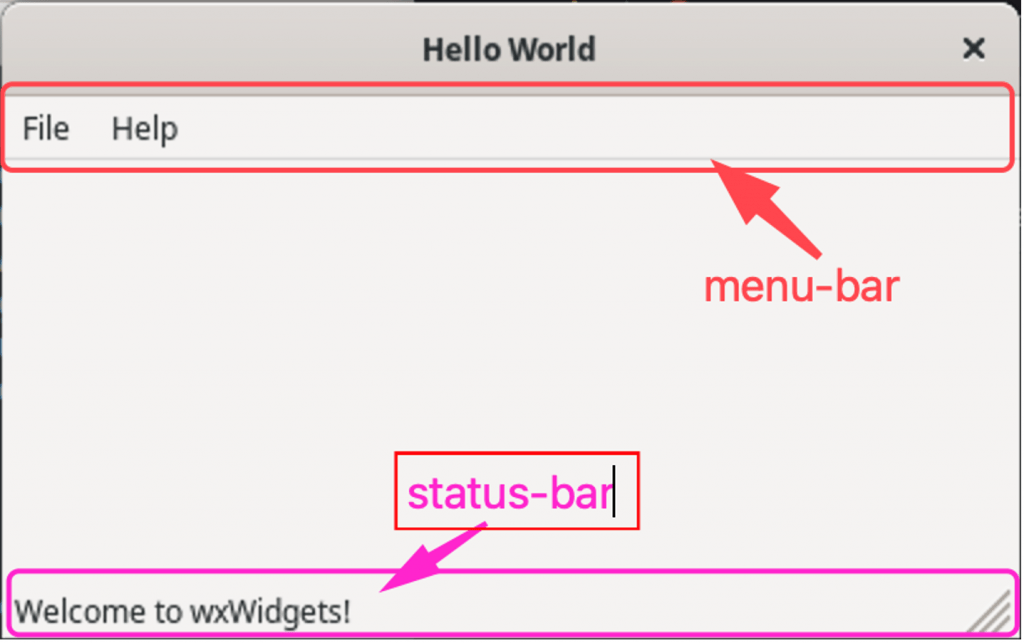
wxMenu
https://docs.wxwidgets.org/3.2/classwx_menu.html
In wxWidgets, a menu is a container object consisting of menu-items or menu entries. A menu can be used to construct either a menu bar or a popup menu. Menu items may be either normal items, check items or radio items. A menu item has an integer ID associated with it which can be used to identify the selection, or to change the menu item in some way. A menu item with a special identifier wxID_SEPARATOR is a separator item and doesn’t have an associated command but just makes a separator line appear in the menu.
Please note that wxID_ABOUT and wxID_EXIT are predefined by wxWidgets and have a special meaning since entries using these IDs will be taken out of the normal menus under macOS and will be inserted into the system menu (following the appropriate macOS interface guideline).
All menus must be created on the heap because all menus attached to a menubar or to another menu will be deleted by their parent when it is deleted. The only exception to this rule are the popup menus (i.e. menus used with wxWindow::PopupMenu()) as wxWidgets does not destroy them to allow reusing the same menu more than once. But the exception applies only to the menus themselves and not to any submenus of popup menus which are still destroyed by wxWidgets as usual and so must be heap-allocated.
As the frame menubar is deleted by the frame itself, it means that normally all menus used are deleted automatically.
In wxWidgets, in order to use a menu, we have to instantiate a wxMenu object (based on wxMenu class). After that, we can add menu items by using the wxMenu public method: Append().
wxMenuBar
https://docs.wxwidgets.org/3.2/classwx_menu_bar.html
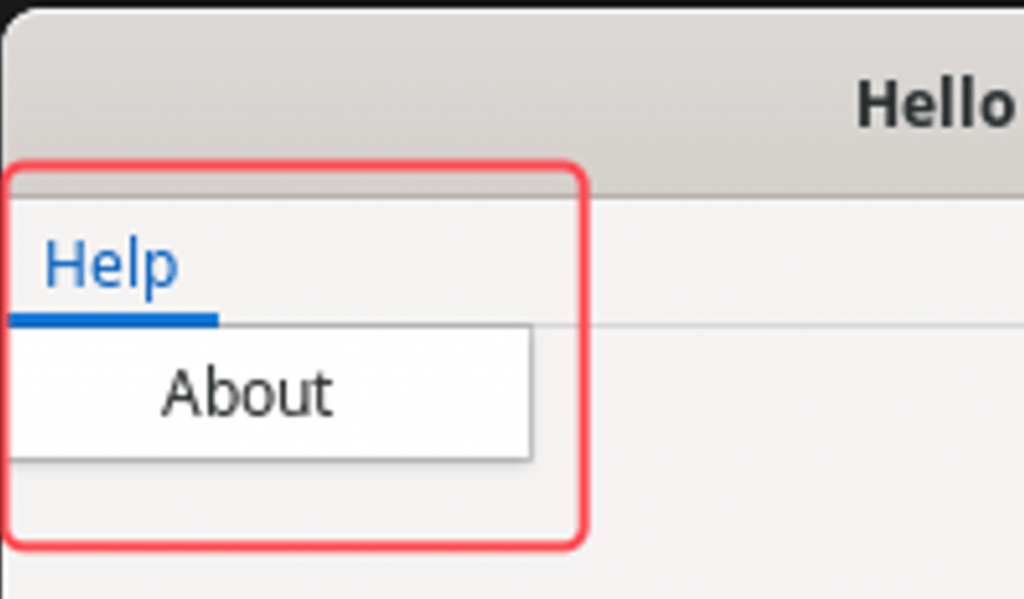
wxMenu objects can then be used as entries/items of a menu-bar. A menu bar is a series of menus accessible from the top of a window frame. wxMenu also uses a member function Append() for adding menu-bar menu items (wxMenu objects).
The code snippet below declares and defines a function for creating a menu and appending just 1 item (the standard wxID_About item):
Note, that if we are going to use a menu item only in a window/frame, e.g. in our MyFrame, it’s better to create and use that menu item inside the window/frame scope. As we’ve said, we can use the wxMenuBar to instantiate a menu bar and append an item to it. Finally, we can set the window/frame menu bar by using the public member function SetMenuBar(). The snippet below shows such an example:
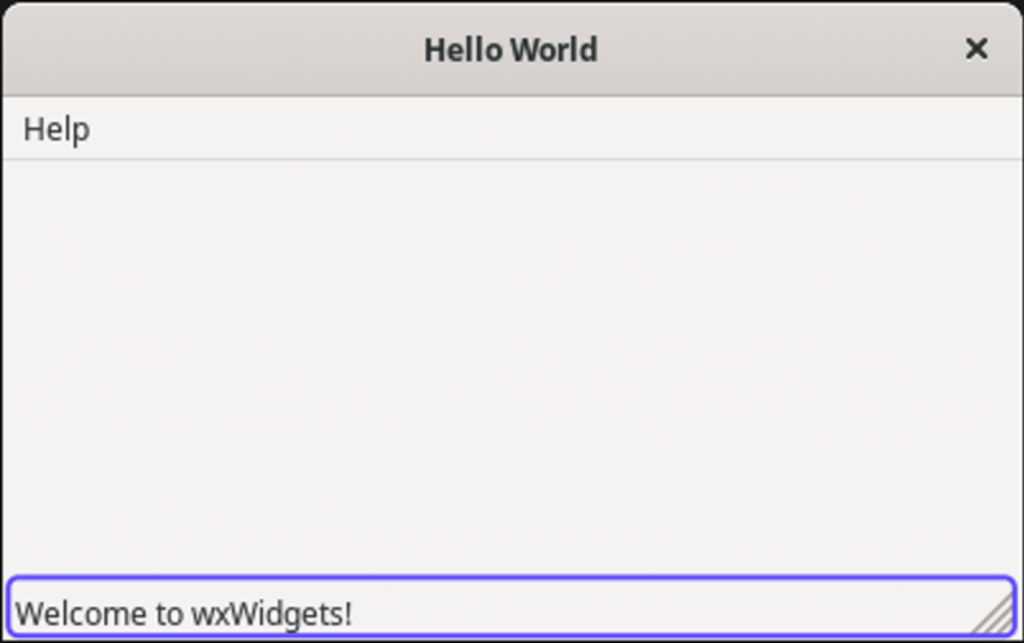
If we wish, we can add a status-bar at the bottom of the window frame. For that purpose we have to use the wxFrame public member function: CreateStatusBar(). Furthermore, we can also set some (initial) text to be displayed. Below, is the updated snippet:
Now, we can proceed further and add more menus with menu items in our menu-bar. Below is again the updated snippet:
As you can see, for appending to the wxMenu menu file instance, a ‘Hello’ entry (item), we use the overloaded version of the Append() method, passing it 3 arguments:
- the item id, which is actually the “ID_Hello = 1” that we’ve previously defined as an enum constant,
- the item string that is displayed as a menu item – here is “Hello…” followed by a definition of a shortcut that can be used instead of the mouse click. Here we define the Ctrl+H shortcut. (We “tabbed” it by using the \t escaped tab character, so it is aligned on the right side of the text).
- an optional string that can be displayed as a message at the status bar. The text here is “Help string shown in the status bar for this menu item”

Worth mentioning, that we also add a second menu item in the menuFile, for enabling user to use it for quitting the application. However here we use the stock item wxID_EXIT, which does all the rest of the job for us.
Binding events to event handlers
Now it’s the time to bind/connect some events that may be occurred to the function handles we’ve previously declared as private member functions (void functions) in the declaration of our MyFrame class (derived from the wxFrame class). The functions declared are: OnHello(), OnExit(), and OnAbout(). So, what we are actually going to do is to bind the mouse clicks on the menu items defined in the menus of the menu bar. Note, that this is also true for the corresponding shortcut clicks, where they have been defined. Recall, that here we have defined the Ctrl-H shortcut for the “Help” menu item, and the Ctrl-Q, which is auto-define for the wxID_EXIT meny item. The “About” menu item has not have any defined shortcut.
For binding an event with and event handler function we have to use the Bind() method (which is actually the 2nd overloaded option). The Bind() method is a member function of the wxEvtHandler class. We are going to pass 4 arguments to the Bind() function:
- the event type to be associated with this event handler. Here ,we will use the wxEVT_MENU event type, because we want to handle the events of our menu items.
- the event handler method. Here we will use one of the aforementioned methods: OnHello(), OnExit(), or OnAbout(). However, we can also use any other arbitrary method, which also, it is not necessary to be from a wxEvtHandler derived class.
- the Object whose method should be called. It must always be specified so it can be checked at compile time whether the given method is an actual member of the given handler. Since, here, all of the event handler functions are member of our MyFrame class, and beside that we are inside our class, we wiil use just the ‘this’ keyword, which exactly points to our MyFrame class.
- the first ID of the identifier range to be associated with the event handler. Here, we don’t use other ids of other items that can be bind to the same function, so we will use just the id of each one of the menu items.
That, said, this is the updated version of our code snippet:
Defining the event handler functions
In the previous step, we have bound the menu item events to event handler functions. In this final step we will define those 3 event handler functions: OnHello(), OnExit(), and OnAbout(). Recall, that we have declared them, as private members of our base window class ‘MyFrame’. What is needed is just to pass an event in each one of them, Actually, the event is a bound event and it is of type wxEVT_MENU, in our case. So, when such an event occurs, the appropriate event handler function is triggered and takes on.
OnExit()
The first event handler function is about quitting our app by clicking on the menu item “Quit”. It is quite simple. It just calls the Close() function (member of the core wxWindow class) as you can see below:
The parameter true indicates that other windows are not able to intervene in any way (e.g. by asking “Do you really want to close?”) to the emitted wxCloseEvent. If there is no other main window left, the application will quit.
OnAbout()
We can use our logic inside an event handler function. For the second function handling the mouse click on the menu item “About”, will display a small window with some text in it. In this case, it is a typical “About” wxMessageBox modal pop-up window with information about the program:
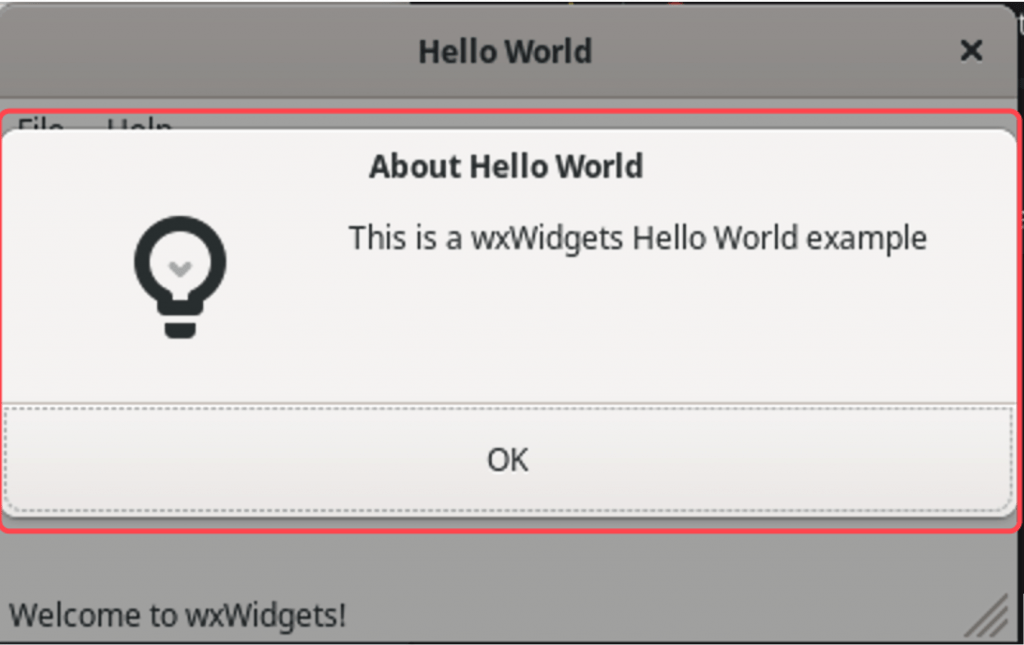
The wxMessageBox is member of the Dialogs set of wxWidgets, for getting input from the user and/or displaying messages. As you can see, we have used the wxMessageBox by using the following arguments:
- the string for the main message to be displayed in the body of the message box: “This is a wxWidgets Hello World example”,
- the string of the title of the message box – here this is “About Hello World”,
- the button(s) of the message box (here just the wxOK button), and finally
- the icon wxICON_INFORMATION provided by then icons set of the wxWidgets framework.
OnHello()
The third and final event handler function handles the mouse click on the “Hello” menu item. It uses the wxLogMessage to display again a default modal pop-up window box with a body text having the string provided.
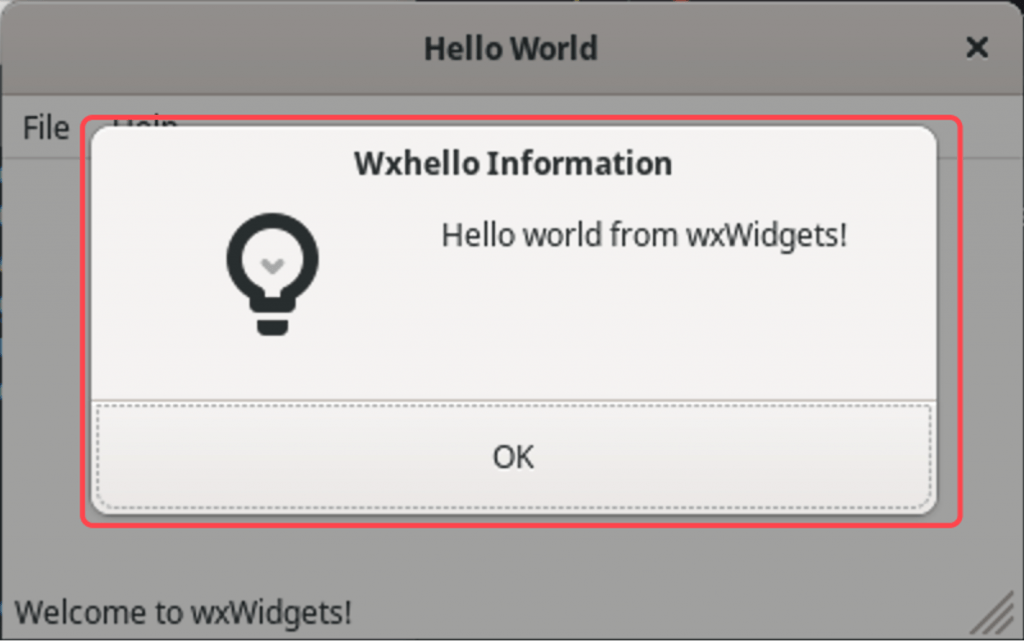
Note that the title of the window box consists of the name of our app (our executable) followed by default by the “Information”. As you can understand the wxLogMessage function, which is member of the wxWidgets Logging functions, is quite similar to the previously used wxMessageBox.
That’s it! You can find the example source code, fully commented, here.
Bonus – Using VS Code
You can use any editor or IDE you wish, but since more and more fellows start using VS Code for the C++ project, here are some fundamental points, for anyone who wants to use it with her/his simple C++ / wxWidgets projects.
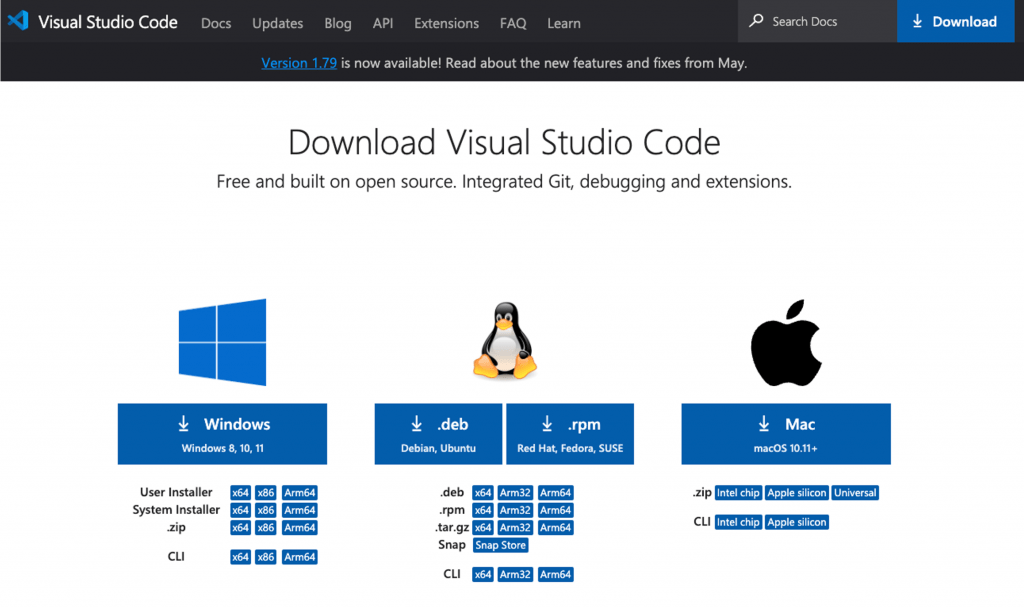
If you haven’t yet installed it in your system, go and grab it at the official VS Code site. As you can see you can download and install it on any of the major platforms:
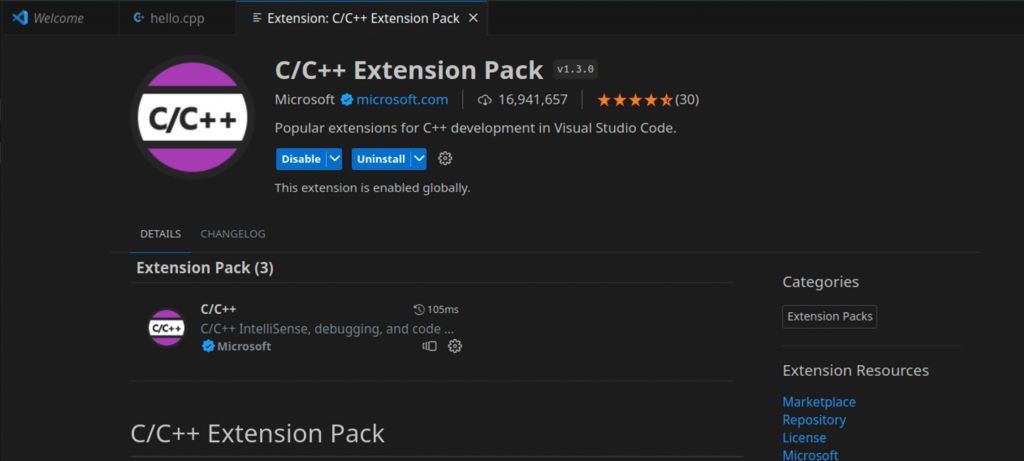
After you have installed it, it is necessary to install the C/C++ Extension Pack for VS Code.
The first time you open your project, you will probably face some configuration challenges for VS Code IntelliSense, like the ones pointed out, below:
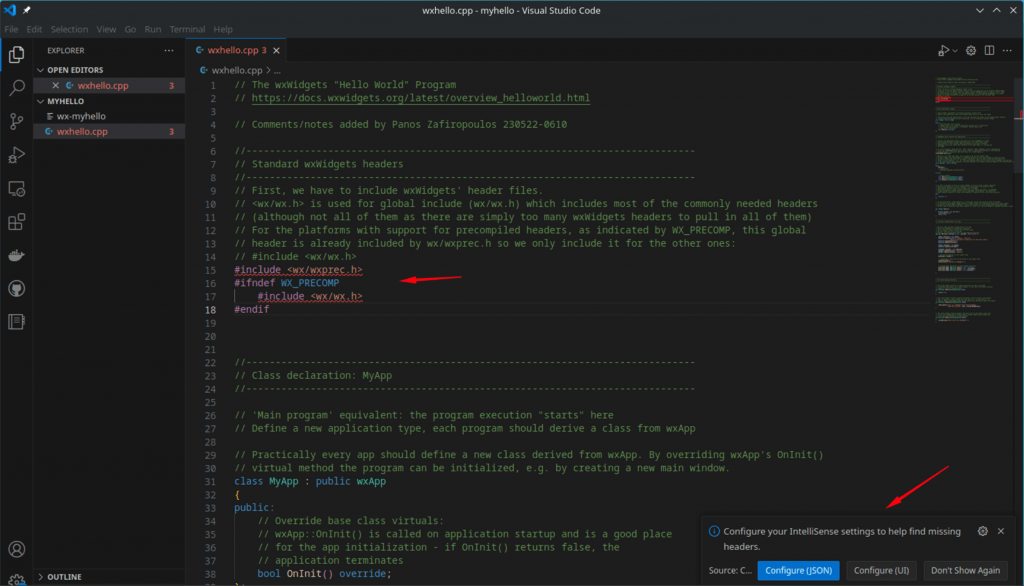
If you have before compiled and linked your program using the commands we’ve seen above, then these issues probably have nothing to do with real errors in your code. There are most likely because of missing setting in the C++ VS Code configuration.
What we have to do first, is to configure the C++ extension. We can do that using either the extension built-in UI or manually editing the ‘c_cpp_properties.json’ file. Setting your configuration via UI also results in the creation of the ‘c_cpp_properties.json’ file, with all the settings you provided.
Pressing on the Configure (UI) button, you enter the Configuration UI.
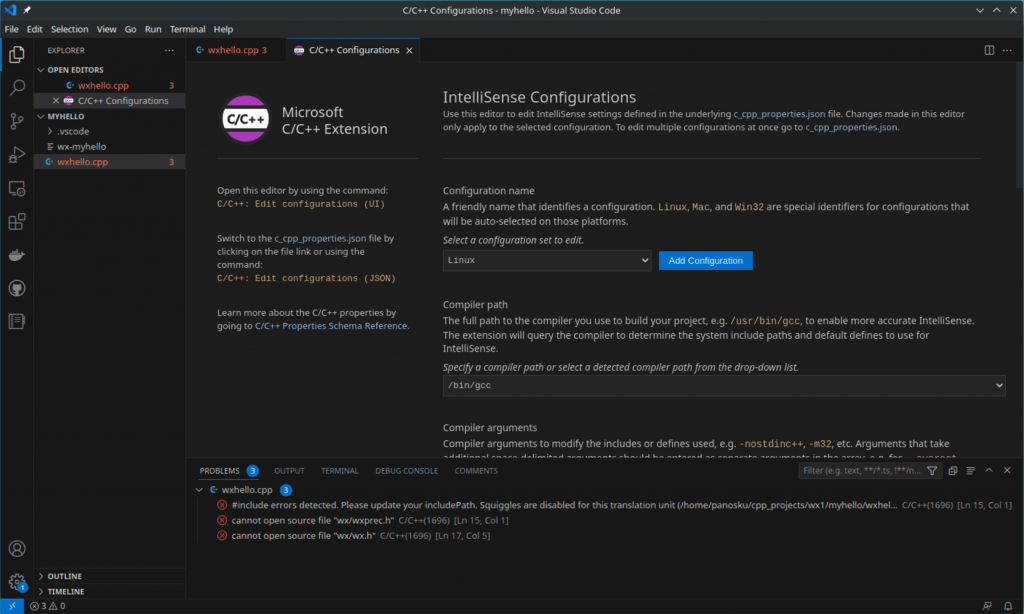
C++ Extension together with VS Code will try to gather from your system and installed packages, all possible values, so, what you have to do is just select the appropriate options.
The most important settings are given below:
Compiler path
Since we use C++, you have to choose the g++

Compiler arguments
Previously we have used the minimum C++ version to be version 11 (using the -std=c++11 argument/flag). Moreover, we have also guided the compiler to warn us, for all errors (using the -Wall argument/flag). So the same arguments can be used here.

IntelliSense mode
If your system is based on Linux and the CPU is a 64bit one, then you can select the ‘linux-gcc-x64’ here.

Include path
Apart from the default, and already selected, value ‘${workspaceFolder}/**’, here it is important to guide Intellisense to locate where the header files our program will use. In our case, we are interested in wxWidgets headers. As you have noticed before, there are red squiggles in our code, indicating the fact that VS Code cannot locate those headers.
A smart approach is to use the wx-config with ‘–cxxflags’ (or –cflags), which we have already seen before, testing the wxWidgets, and get the include paths (those indicated starting with -I):
$ wx-config --cflags
-I/usr/local/lib/wx/include/gtk3-unicode-3.3 -I/usr/local/include/wx-3.3 -D_FILE_OFFSET_BITS=64 -DWXUSINGDLL -D__WXGTK__ -pthread
$
So, in our case this is what we have to add as Include paths:

That’s it. You can leave the rest options with their default values, fo now.
After you have finished using the UI, you will notice that the IntelliSense settings ‘c_cpp_properties.json’ file has been created under the hidden .vscode folder in your app/project folder:
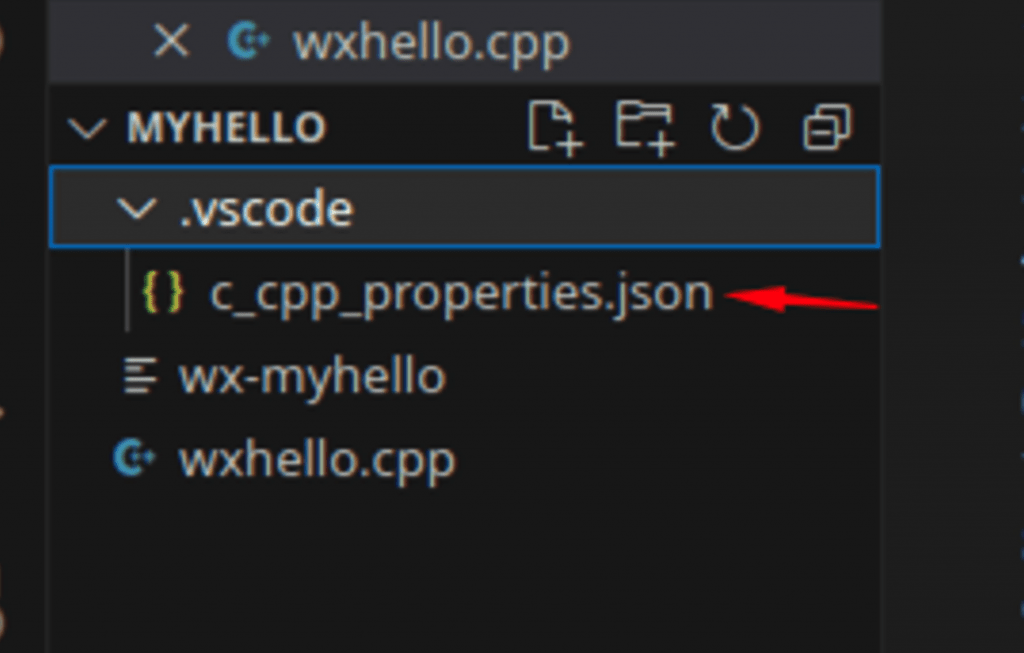
Here are its contents:
Next, if you wish to compile/link your C++ file and Run/Debug it via VS Code, what we have to do is to configure the .vscode ‘task.json’ file. The ‘task.json’ file is auto-generated by VS Code, the first time we click on the Run button:

After that, we have to select a task run/debug profile. For our case, it will be fine to select
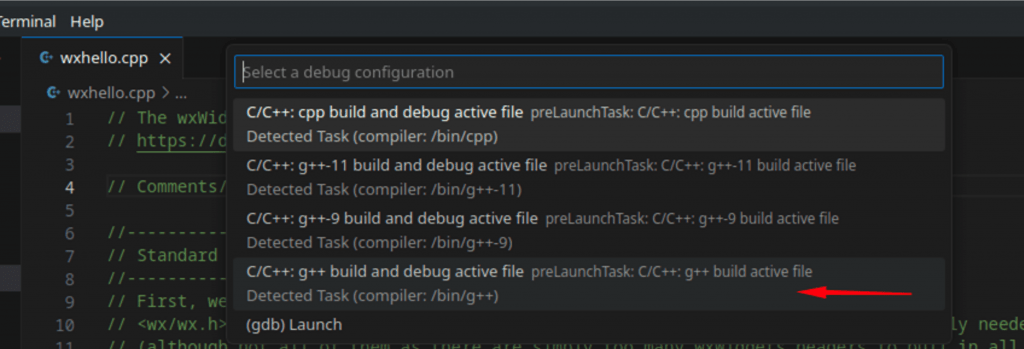
After that, you will probably get an error pop-up, warnings you that the run task failed.

You can leave it aside by clicking on ‘Abort’. What we actually have to do, is to add the “`wx-config –cflags –libs` arguments in the ‘task.json’ file. We can do that, like that:
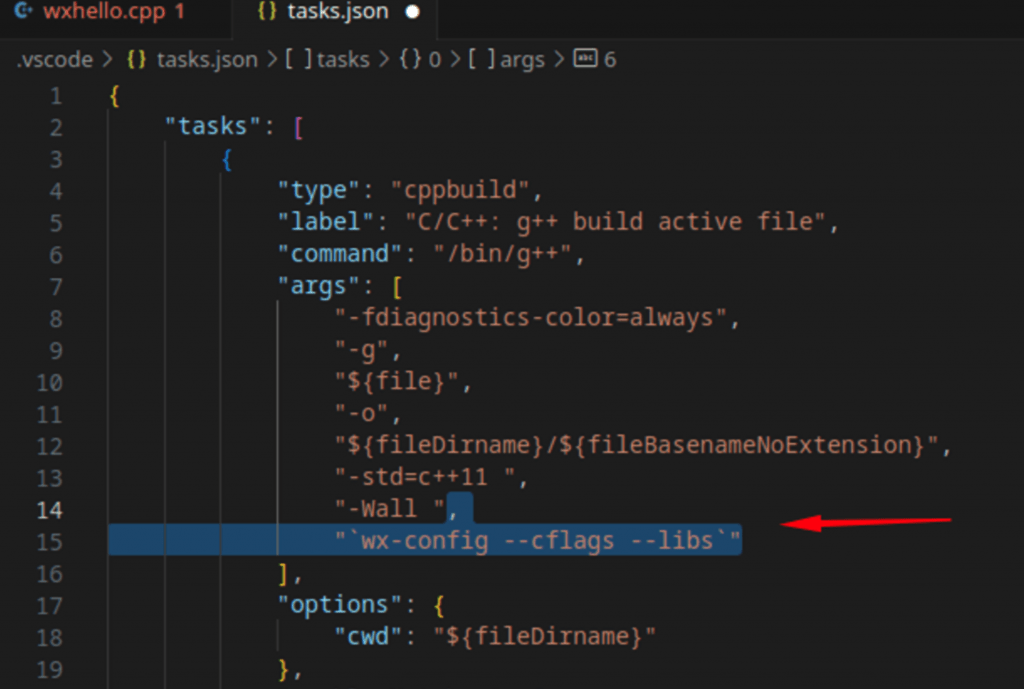
The whole ‘tasks.json’ file becomes:
Finally, clicking on the Run button again, your program runs OK:
So, that’s it all!
I hope you enjoyed it!
My next post is about building dynamic and static wxWidgets libraries om arm64 macOS, and create a big fat executable with clang++ for both architectures: arm64 and x86_64.
So, stay tuned!
Thank you for reading! Keep coding!

Mil gracias por la explicación how to.. wxWidgets, los ejemplos y consejos son geniales, me a ayudado a instalarlo después de varios intentos y además con el extra de ponerlo también para fedora. Estaría bien un tutorial de como usarlo en codeblocks junto con wxformbuilder.