Node – Installation on macOS via Homebrew

180720
Short Intro
node
node is the core JavaScript runtime environment that runs on the server-side and lets you implement your application back-end in JavaScript. Node is an Open Source Platform mainly written in C/C++. The node consists of core integrated modules, e.g., the HTTP module, in order to host a web server and other modules that can be installed via npm.
npm
npm is the Node package manager. It comes along automatically if Node is installed. All server page packages are called up and installed over npm. npm can also supply further tools.
Prerequisites
Homebrew
In case you don’t have yet installed Homebrew on your macOS, you can proceed and install it following the instructions here. If you have already done it, you can update it:
Why use Homebrew over the default Node installer:
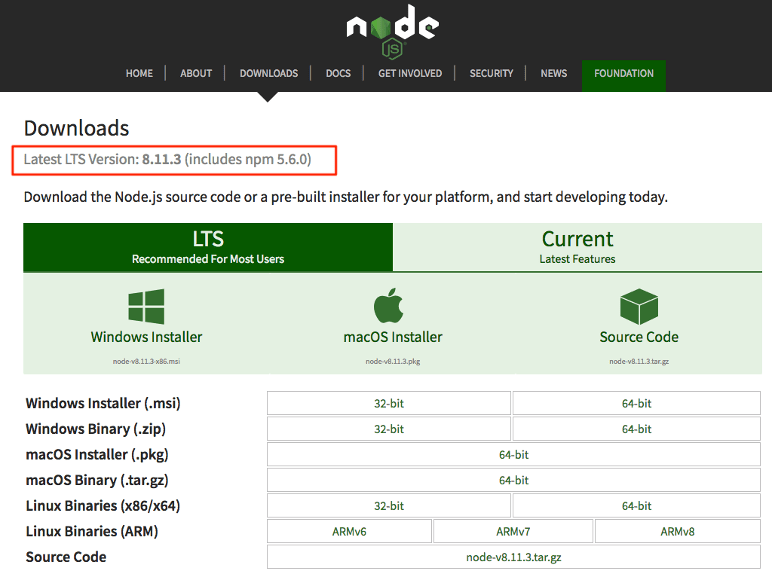
node.js provides a package installer for Mac OS X which includes node and npm. However, installing it via Homebrew perhaps is a preferred method:
– Homebrew doesn’t require access to administrator-only areas of your computer in order to install NodeJS (or any other package). This is a safer approach as it makes sure that any package you install with Homebrew can’t wreak havoc on your computer.
– After installing Node via the installer you have to add the path to the node executable to your system $PATH. This involves mucking around with your shell login file. For experienced Terminal users or Unix-people, this isn’t a big deal, but for those new, to the command line, that step can be daunting. Although the Homebrew method involves installing several different pieces of software, it’s generally just a simple process of point-click-and-wait. It takes a bit longer this way but there’s less room for error.
– Homebrew makes removing Node very easy (otherwise you have to crawl through your file system and delete a bunch of files manually).
– Homebrew also greatly simplifies the installation of other useful packages like Git, Ruby, or the very useful wget utility.
Be sure that you have an updated version of the Homebrew installed in your MacOS:
$ brew update
XCode and Xcode Command line tools
Xcode is the Mac’s IDE (Integrated Development Environment), that can be used for building apps for iOS, macOS, tvOS, and watchOS. Nowadays, the main programming language is Swift. Moreover, XCode includes many tools, such as a debugger, source control, device management, iPhone Simulator, profiling tools, Interface Builder, documentation, etc., to build applications for Apple devices (iPhone, iPad, Mac, Apple TV, etc.).
So be sure that you have the latest version of XCode, as well as XCode Command Line Tools in your macOS. In case you haven’t yet installed Command Line Tools, you can do that by using XCode.
To install the necessary Xcode tools using Xcode on the Mac:
– Start Xcode on the Mac.
– Choose Preferences from the Xcode menu.
– In the General panel, click Downloads.
– On the Downloads window, choose the Components tab.
Click the Install button next to Command Line Tools. You are asked for your Apple Developer login during the install process.
Alternatively, you cam use a terminal window:
$ xcode-select –install
Installation of npm and node
Installation
Installing Node.js and NPM is pretty straightforward using Homebrew. Homebrew handles downloading, unpacking, and installing node and npm on your system. The whole process (after you have XCode and Homebrew installed) should only take you a few minutes.
Open the Terminal app and type brew install node:
Updating brew:
pzmacbookpro:~ zafeiropoulospanos$
pzmacbookpro:~ zafeiropoulospanos$ brew install node
Updating Homebrew...
==> Auto-updated Homebrew!
Updated 1 tap (homebrew/core).
==> New Formulae
sonarqube-lts squashfuse
==> Updated Formulae
agda ccextractor fabric hyperfine libfixbuf pari suricata
allure certbot fastqc imagemagick librdkafka php telegraf
amazon-ecs-cli chronograf feh imagemagick@6 libtorrent-rasterbar php-code-sniffer traefik
annie clojure ffmpeg jenkins liquibase php@7.0 triton
apache-flink closure-compiler ffmpeg@2.8 jenkins-lts lmod presto webtorrent-cli
ask-cli cmake fn jpeg-archive mongo-c-driver proxychains-ng weechat
aws-elasticbeanstalk cockroach git-annex json-fortran mpop pspg wireguard-tools
aws-sdk-cpp collectd git-quick-stats jsonnet net-snmp pyenv wireshark
awscli conan giter8 kitchen-sync node root xml-security-c
azure-cli couchdb globus-toolkit kube-aws nodeenv rustup-init xml-tooling-c
babel dar go-bindata kubecfg nvc samtools znc
ballerina docker goreleaser kubernetes-cli ola sane-backends
bazel docker-completion gosu latex2rtf openapi-generator shibboleth-sp
bcftools docker-compose gsoap lensfun opensaml sipp
binutils docker-compose-completion harfbuzz lf overmind snakemake
byteman exercism heroku libcouchbase paket spotbugs
capstone faas-cli htslib libdvbpsi pango sratoolkit
==> Installing dependencies for node: icu4c
==> Installing node dependency: icu4c
==> Downloading https://homebrew.bintray.com/bottles/icu4c-62.1.high_sierra.bottle.tar.gz
==> Downloading from https://akamai.bintray.com/d1/d1c24fa3df7e89935554ebcdbc6de6363cab0d264f01902db17eda35d8df0333?__gda__=exp=1532070328~hmac=a58fce122c28a96cbc286490b8c980c0a428e4debf734edcac7
######################################################################## 100.0%
==> Pouring icu4c-62.1.high_sierra.bottle.tar.gz
==> Caveats
This formula is keg-only, which means it was not symlinked into /usr/local,
because macOS provides libicucore.dylib (but nothing else).
If you need to have this software first in your PATH run:
echo 'export PATH="/usr/local/opt/icu4c/bin:$PATH"' >> ~/.bash_profile
echo 'export PATH="/usr/local/opt/icu4c/sbin:$PATH"' >> ~/.bash_profile
For compilers to find this software you may need to set:
LDFLAGS: -L/usr/local/opt/icu4c/lib
CPPFLAGS: -I/usr/local/opt/icu4c/include
For pkg-config to find this software you may need to set:
PKG_CONFIG_PATH: /usr/local/opt/icu4c/lib/pkgconfig
==> Summary
πΊ /usr/local/Cellar/icu4c/62.1: 250 files, 67.3MB
Installing node:
==> Installing node
==> Downloading https://homebrew.bintray.com/bottles/node-10.7.0.high_sierra.bottle.tar.gz
==> Downloading from https://akamai.bintray.com/91/91abd24ab9aeceb24d6f5a7b298b35f86f2087da8a8edfe8e3e224217dbbe6f5?__gda__=exp=1532070334~hmac=35152ba33cbe0f0649236b378f4b7dc66bc01362bd58cf2cfa1
######################################################################## 100.0%
==> Pouring node-10.7.0.high_sierra.bottle.tar.gz
==> Caveats
Bash completion has been installed to:
/usr/local/etc/bash_completion.d
==> Summary
πΊ /usr/local/Cellar/node/10.7.0: 4,022 files, 48.7MB
==> Caveats
==> icu4c
This formula is keg-only, which means it was not symlinked into /usr/local,
because macOS provides libicucore.dylib (but nothing else).
If you need to have this software first in your PATH run:
echo 'export PATH="/usr/local/opt/icu4c/bin:$PATH"' >> ~/.bash_profile
echo 'export PATH="/usr/local/opt/icu4c/sbin:$PATH"' >> ~/.bash_profile
For compilers to find this software you may need to set:
LDFLAGS: -L/usr/local/opt/icu4c/lib
CPPFLAGS: -I/usr/local/opt/icu4c/include
For pkg-config to find this software you may need to set:
PKG_CONFIG_PATH: /usr/local/opt/icu4c/lib/pkgconfig
==> node
Bash completion has been installed to:
/usr/local/etc/bash_completion.d
pzmacbookpro:~ zafeiropoulospanos$
Check node and npm installation
To make sure you have Node and NPM installed, run two simple commands to see what version of each is installed:
- To see if Node is installed, type node -v in Terminal. This should print the version number so you’ll see something like this v10.7.0.
- To see if NPM is installed, type npm -v in Terminal. This should print the version number so you’ll see something like this 6.2.0
pzmacbookpro:~ zafeiropoulospanos$ node -v
v10.7.0
pzmacbookpro:~ zafeiropoulospanos$ npm -v
6.2.0
pzmacbookpro:~ zafeiropoulospanos$
pzmacbookpro:~ zafeiropoulospanos$
To test that you’ve got Node.js correctly installed on your computer, open a new terminal and type node –help and you should see the usage documentation
pzmacbookpro:~ zafeiropoulospanos$
pzmacbookpro:~ zafeiropoulospanos$ node --help
Usage: node [options] [ -e script | script.js | - ] [arguments]
       node inspect script.js [arguments]

Options:
  -                          script read from stdin (default;
                             interactive mode if a tty)
  --                         indicate the end of node options
  --abort-on-uncaught-exception
                             aborting instead of exiting causes a
                             core file to be generated for analysis
  --experimental-modules     experimental ES Module support
                             and caching modules
  --experimental-repl-await  experimental await keyword support
                             in REPL
  --experimental-vm-modules  experimental ES Module support
                             in vm module
  --experimental-worker      experimental threaded Worker support
  --icu-data-dir=dir         set ICU data load path to dir
                             (overrides NODE_ICU_DATA)
                             note: linked-in ICU data is present
  --inspect-brk[=[host:]port]
                             activate inspector on host:port
                             and break at start of user script
  --inspect-port=[host:]port
                             set host:port for inspector
  --inspect[=[host:]port]    activate inspector on host:port
                             (default: 127.0.0.1:9229)
  --napi-modules             load N-API modules (no-op - option
                             kept for compatibility)
  --no-deprecation           silence deprecation warnings
  --no-force-async-hooks-checks
                             disable checks for async_hooks
  --no-warnings              silence all process warnings
  --openssl-config=file      load OpenSSL configuration from the
                             specified file (overrides
                             OPENSSL_CONF)
  --pending-deprecation      emit pending deprecation warnings
  --preserve-symlinks        preserve symbolic links when resolving
  --preserve-symlinks-main   preserve symbolic links when resolving
                             the main module
  --prof                     generate V8 profiler output
  --prof-process             process V8 profiler output generated
                             using --prof
  --redirect-warnings=file
                             write warnings to file instead of
                             stderr
  --throw-deprecation        throw an exception on deprecations
  --title=title              the process title to use on start up
  --tls-cipher-list=val      use an alternative default TLS cipher list
  --trace-deprecation        show stack traces on deprecations
  --trace-event-categories   comma separated list of trace event
                             categories to record
  --trace-event-file-pattern Template string specifying the
                             filepath for the trace-events data, it
                             supports ${rotation} and ${pid}
                             log-rotation id. %2$u is the pid.
  --trace-events-enabled     track trace events
  --trace-sync-io            show stack trace when use of sync IO
                             is detected after the first tick
  --trace-warnings           show stack traces on process warnings
  --track-heap-objects       track heap object allocations for heap snapshots
  --use-bundled-ca           use bundled CA store (default)
  --use-openssl-ca           use OpenSSL's default CA store
  --v8-options               print v8 command line options
  --v8-pool-size=num         set v8's thread pool size
  --zero-fill-buffers        automatically zero-fill all newly allocated
                             Buffer and SlowBuffer instances
  -c, --check                syntax check script without executing
  -e, --eval script          evaluate script
  -h, --help                 print node command line options
  -i, --interactive          always enter the REPL even if stdin
                             does not appear to be a terminal
  -p, --print                evaluate script and print result
  -r, --require              module to preload (option can be repeated)
  -v, --version              print Node.js version

Environment variables:
NODE_DEBUG                   ','-separated list of core modules
                             that should print debug information
NODE_DEBUG_NATIVE            ','-separated list of C++ core debug
                             categories that should print debug
                             output
NODE_DISABLE_COLORS          set to 1 to disable colors in the REPL
NODE_EXTRA_CA_CERTS          path to additional CA certificates
                             file
NODE_ICU_DATA                data path for ICU (Intl object) data
                             (will extend linked-in data)
NODE_NO_WARNINGS             set to 1 to silence process warnings
NODE_OPTIONS                 set CLI options in the environment
                             via a space-separated list
NODE_PATH                    ':'-separated list of directories
                             prefixed to the module search path
NODE_PENDING_DEPRECATION     set to 1 to emit pending deprecation
                             warnings
NODE_PRESERVE_SYMLINKS       set to 1 to preserve symbolic links
                             when resolving and caching modules
NODE_REDIRECT_WARNINGS       write warnings to path instead of
                             stderr
NODE_REPL_HISTORY            path to the persistent REPL history
                             file
OPENSSL_CONF                 load OpenSSL configuration from file

Documentation can be found at https://nodejs.org/
pzmacbookpro:~ zafeiropoulospanos$
Check if Node is working properly and responds correctly
Start node in command line:
node
and give:
function testNode() {return “Panos, Node is working!”}; testNode();
Then, the command line must prompt the following output if the installation was successful:
‘Panos, Node is working!’
pzmacbookpro:~ zafeiropoulospanos$
pzmacbookpro:~ zafeiropoulospanos$ node
> function testNode() {return "Panos, Node is working!"}; testNode();
'Panos, Node is working!'
>
> .exit
pzmacbookpro:~ zafeiropoulospanos$
NB:
The usual location for Node is:
/usr/local/lib/node_modules
To see what modules are installed in that location:
ls /usr/local/lib/node_modules
How to Update Node and NPM
New versions of Node and NPM come out frequently. You can use Homebrew to update the software it installs.
- Make sure Homebrew has the latest version of the Node package. In Terminal type brew update
- Upgrade Node: brew upgrade node
How to Uninstall Node and NPM
You can use Homebrew to uninstall packages that it installed: brew uninstall node
With Node.js and NPM installed you’ll soon be able to take advantage of the huge world of NPM modules that can help with a wide variety of tasks both on the web server and on your desktop (or laptop) machine. The NPM site lists all of the official Node packages making it easy to make the choice.
That’s it! Have fun!
Thank you for reading!
