SYNOLOGY NAS with Apache Server behind an NGINX Proxy – Load the remoteip_module

220514
Intro
Some time ago, in one of my blog posts [here], I’ve shown how you can configure an NGINX server as a Reverse Proxy server in a Synology NAS. Note that an NGINX server is by default installed in any Synology NAS. An Apache Server is also by default installed in any Synology NAS that has a WEB Station installation. So, the WEB Station, and consequently the Apache Server (versions 2.2 or 2.4 or both) can be hosted either in the same Synology NAS with the NGINX proxy or in any other host in your local/home network.
Configuring an NGINX proxy is quite useful when, for instance, you want http/www incoming requests via your router, targeting a specific domain, to be redirected to a specific Apache Server. This targeted host (via the Apache Server) then, can serve content, pages, etc. e.g. from a WordPress site, which is dedicated to that domain.
The problem
Very often, a WordPress site/blog also uses some plug-ins to get some info for those accessing the blog. Such a well-known yet free tool is the WPStatistics plugin. The plugin offers a plethora of statistical data and the visitor statistics is one of them. This means that you can get info, in a table format, about the number of Visitors coming from each Search Engine, the Visitor’s Country Recognition, the Visitor’s City Recognition, the Visitor’s IP, etc.
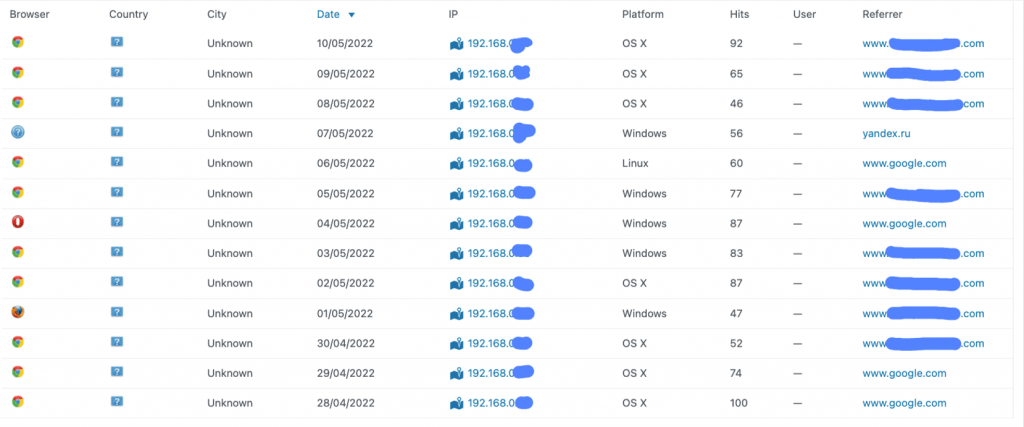
However, you might encounter an issue with the visitors’ IPs: all are the same and all look like coming from your internal network, and more precisely, from the NGINX proxy host!

The cause
Of course, this is not what a blogger would like to happen. However, the solution is not that hard. This behavior is caused because there is a necessary Apache Server module that should be installed (added/loaded). This is the mod_remoteip module. The module – as the official description states- does exactly what we want: “Replaces the original client IP address for the connection with the useragent IP address list presented by a proxies or a load balancer via the request headers.”. So here we are!
The solution
Since, this module, is not being loaded by default in Synology Apache server installations, we have to do it by our own and we can load it manually. This requires to access the targeted host via an SSH terminal session, and also, we have to have appropriate (sudo) privileges. If you want to get a look and “play” with a Synology NAS via terminal/SSH, and/or inspect the Synology NAS L(E)AMP stack environment, you can visit my older posts [here] and [here].
Working in the targeting host
Please, access the targeting host and then go and inspect the main Apache configuration file. In a Synology NAS and for the Apache version 2.4 this is the httpd24.conf file located at the /var/packages/Apache2.4/target/usr/local/etc/apache24/conf folder.
Towards the bottom of the contents of that file you will probably see a number of lines that they start with “Include”.

These lines tell the Apache Server to also include/use other configuration files, specified in that lines. This practice is usually followed by Synology which does not like touching a lot of the settings of the main configuration file, which is OK. Following this practice, we can create our own file, and then we can add an “Include” line for it as we’ve seen.
We can name the file what we wish, however here I use the name mod_remoteip.conf and I put it in the /var/packages/Apache2.4/target/usr/local/etc/apache24/conf/extra folder (as the rest of other configuration files you probably noticed. So grab your vi (or any other editor/tool, go to the …/conf/extra folder, create the mod_remoteip.conf file and add the following lines:
LoadModule remoteip_module modules/mod_remoteip.so

<IfModule remoteip_module>
    RemoteIPHeader X-Forwarded-For
    RemoteIPInternalProxy 127.0.0.1
</IfModule>
The next step is to add/include it in the main configuration file:

The final step is to restart the Apache Server in order to load the module and use the new added configuration settings. Use the following command to restart it:
sudo synoservice --restart pkgctl-Apache2.4

After that ensure that your Apache server is up and running:
sudo synoservice --status pkgctl-Apache2.4

Working in the NGINX proxy host
After that, switch to NGINX proxy host and inspect the Reverse proxy settings. In a Synology NAS this the server.ReverseProxy.conf file located inside the etc/nginx/app.d folder. Locate the section for the particular server/domain you are interested in, and more precisely ensure that in the sub-section for location, in the proxy settings (lines starting with proxy_…) the following settings exist:
. . .

        proxy_set_header        X-Real-IP            $remote_addr;

        proxy_set_header        X-Forwarded-For            $proxy_add_x_forwarded_for;

        proxy_set_header        X-Forwarded-Proto            $scheme;
. . .
It is most likely that the Synology Reverse Proxy configuration has taken care of that, during the initial setup of the proxy, so probably you will have nothing to do more than to ensure about it.
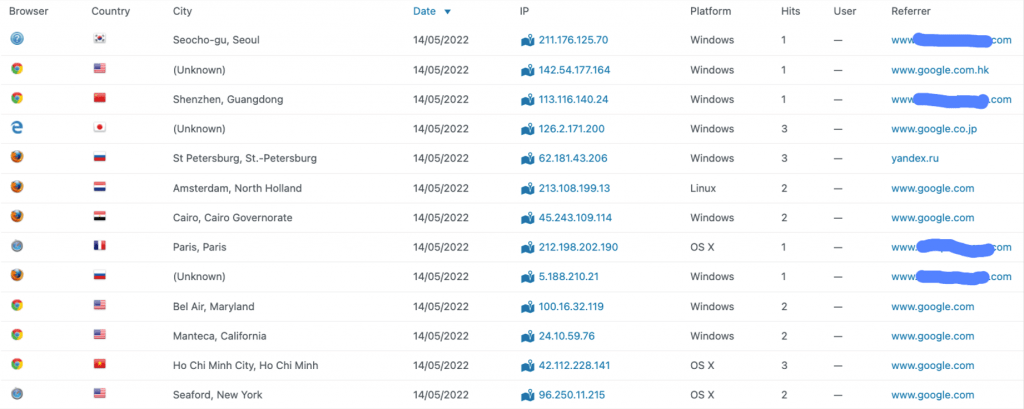
If everything has gone OK, you can check the visitor statistics via WPStatistics plugin in your WordPress dashboard. This time they should be as it is expected:

That’s it!
Enjoy, and thank you for reading!
