Start using CodeSandbox with your Angular project
231110-13
Intro
Two of the most well-liked tools for developers are Codesandbox and Stackblitz. These probably are the most popular cloud-based IDEs where one can write code without needing to install any software on her/his own (local) computer. Apart from that both of them offer free options for single users to use a cloud IDE, their popularity is also based on the fact that a user can also enjoy a live development server for testing and showing how a particular project application runs and behaves online. And this is quite attractive when we want to showcase our demo projects, not only by providing the code or even the whole repo but also we want to offer to a user, the capability to see the output UI and interactively ‘play’ with it.
I have used both of them and I can say that even the Stackblitz seems to be a bit more user-friendly for beginners and also has a live community (e.g. Discord), I prefer the open-source CodeSandbox, since it feels a bit more professional (at least to me :-)), also providing a bash terminal that one can use, the same way she/he can do with her/his local machine.
Out there, there are many more similar tools offering analogous capabilities, like Replit, Vercel (former ZEIT), CodePen, etc., just to name some of the well-known of them. However here we will focus on how we can use the CodeSandbox, and start working with our Angular projects.
Starting with CodeSandbox
Visit the CodeSandbox site here. You can try it for free, without any subscription. But, as we’ve said, it also offers a free plan for personal use (‘For learning and experimenting’). The free plan/subscription gives you unlimited, public sandboxes, repositories, and your personal dashboard. However, it only offers 2GB RAM, 2 virtual CPUs, and 6GB storage, which, on the other hand, are OK for most of your personal projects. So, this is our case.
First things, first. One can log in/register by clicking on Sign-In on top. There are options to register using your GitHub, Google, or Apple account. The GitHub is the first-class player here. This is quite convenient if you also plan to work, importing any of your repos from GitHub.

So, click on the GitHub button and continue to authorize CodeSandbox to access data from your GitHub account.

After that you enter to your Dashboard. If it is the 1st time you login, then you have to create a new sandboxed project or import one from your repositories. Click on the button stating ‘New sandbox’ for creating a new project from scratch.
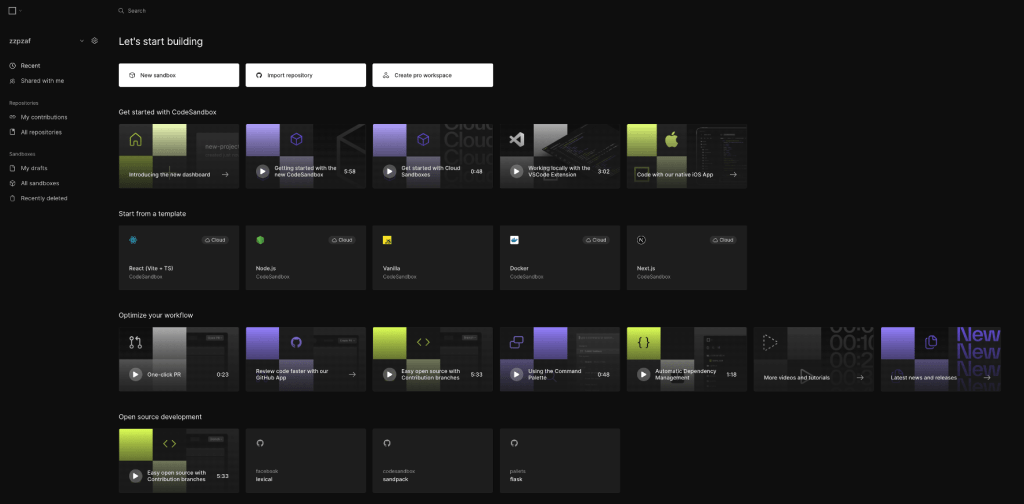
CodeSandbox has a number of ready-made templates (like StackBlitz).
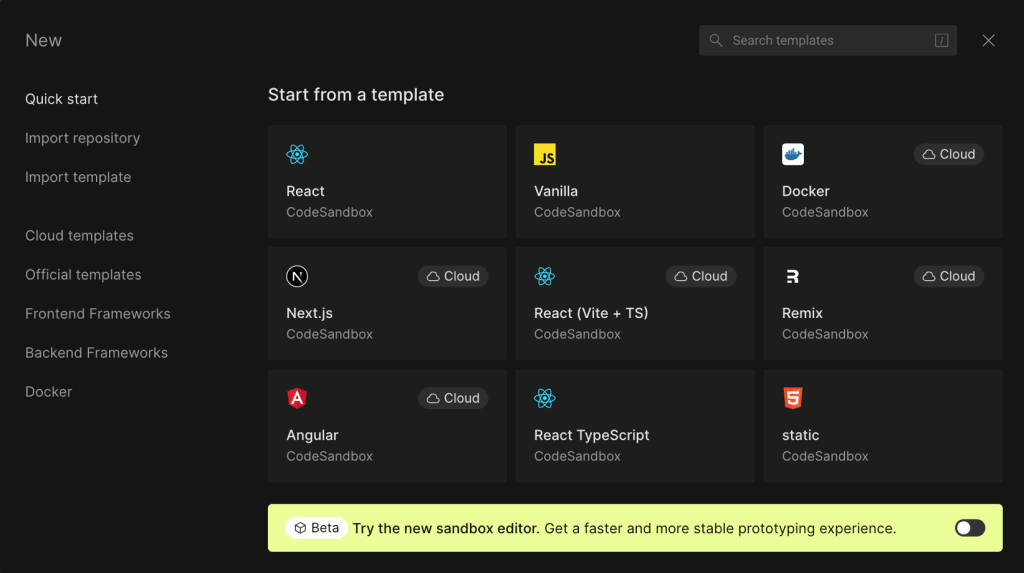
Start a project from a template
For our case, we will select Angular (what else? ). And… here it is! Codesandbox quite quickly prepared the standard scaffold for your new project.
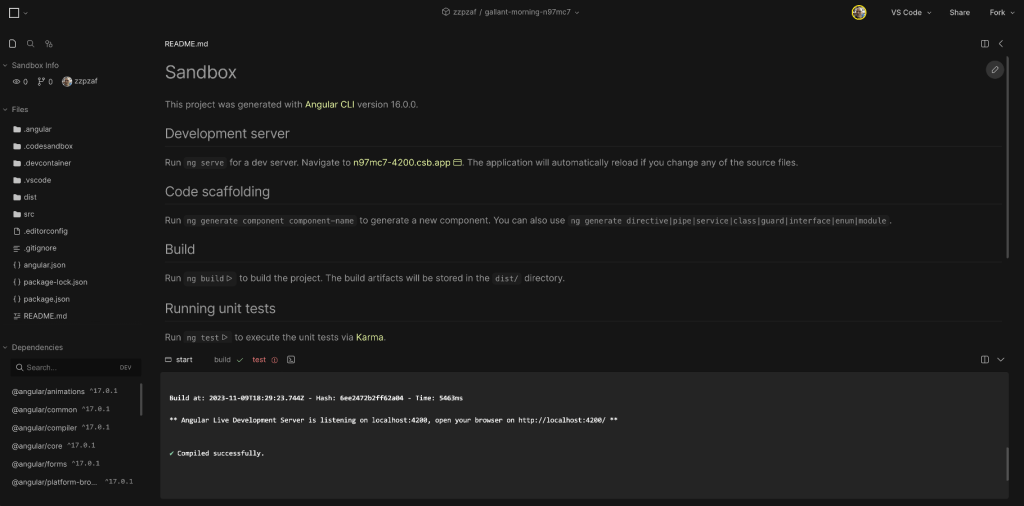
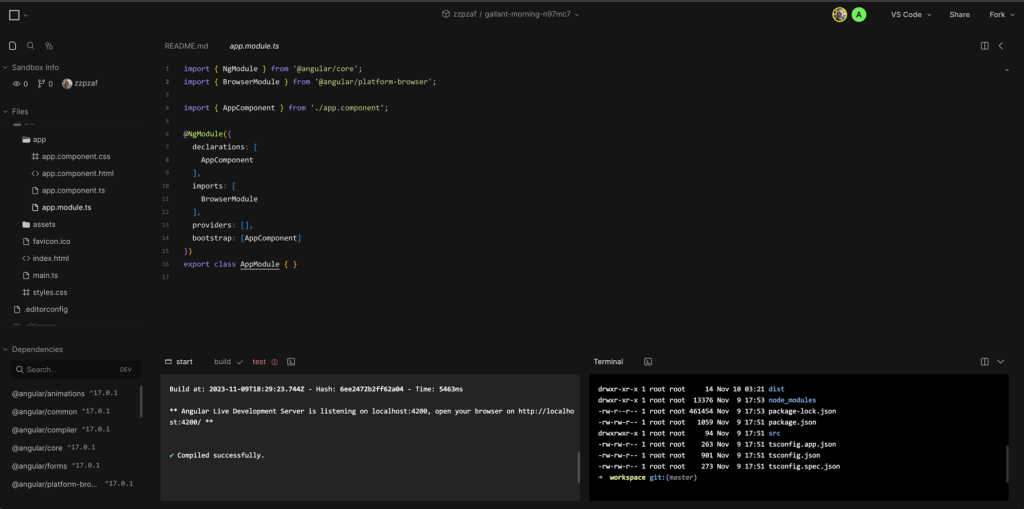
Using an embedded terminal window
Then we can use the terminal to create whatever schematics we want (components, services, directives, etc.)

Terminal output example:
Creating new artifacts
CodeSandbox, unlike the Stackblitz, creates an ng-module-based project. A notable difference here is that CodeSandbox uses an embedded terminal for creating new Angular schematics (components, services, directives, etc.), whereas StackBlitz does not. (It actually allows you to select the type of artifact you want by right-clicking or the /src folder and using StackBlitz ‘Angular generator’).
You probably are aware that since Angular 17, the default settings are for creating a project with standalone components (no ng-modules). If we want to create a new project based on ng-modules we can use the standalone flag:
ng new [name] --standalone=false
Please pay attention, that even the CodeSandbox default settings create an ng-module-based project, when you create a new component, via the command ‘ng g c [name]’ it is a standalone component. However, we can always bypass the default setting, by using again the standalone flag:
ng g c [name] --standalone=false
Preview
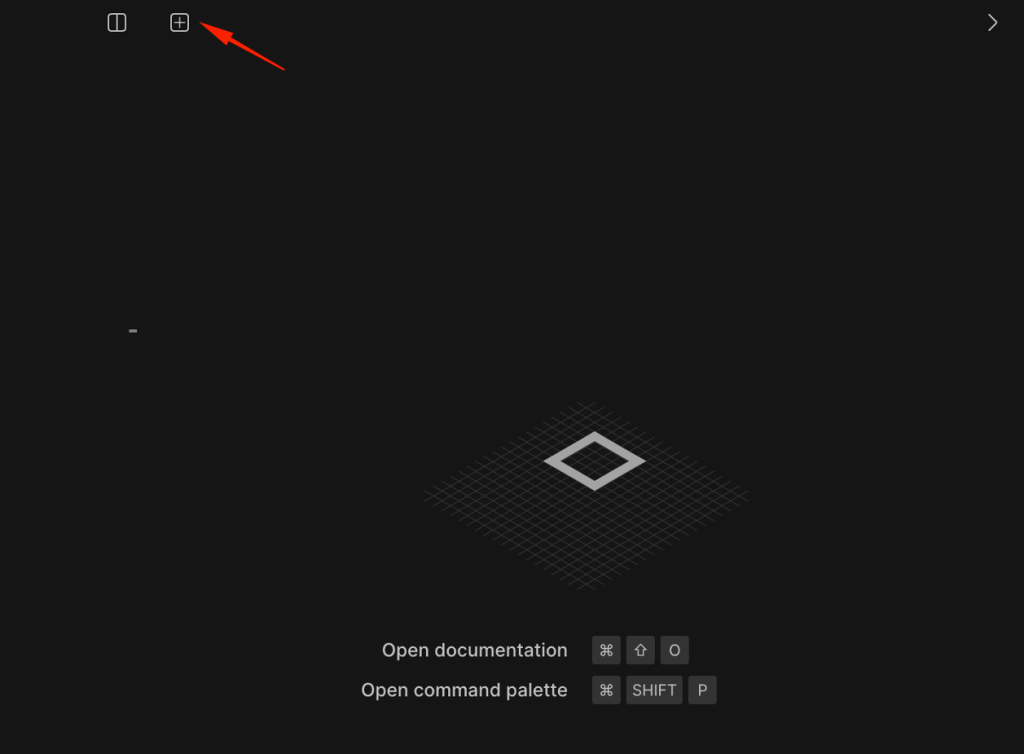
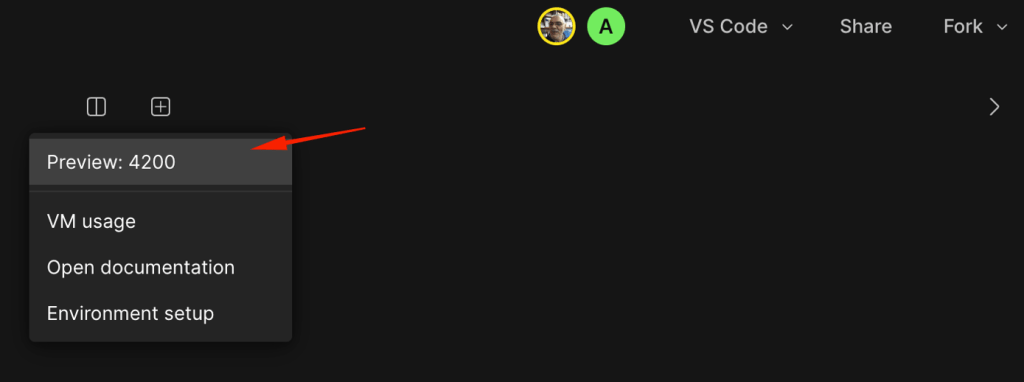
Furthermore, whenever you want you, can preview your running app in a side window or in a separate tab or in a new browser window. The following snapshots might be helpful for this:


Rename a project
It is quite easy, and you can give your project a more human-readable and memorisable name. Just follow the snapshots below:
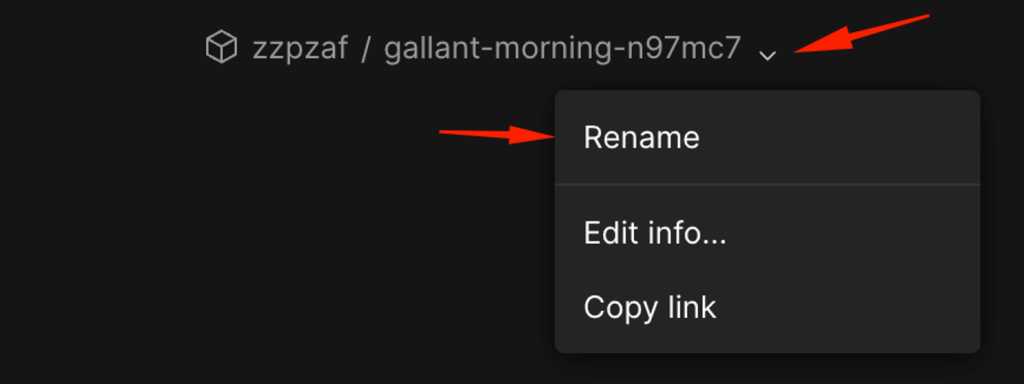

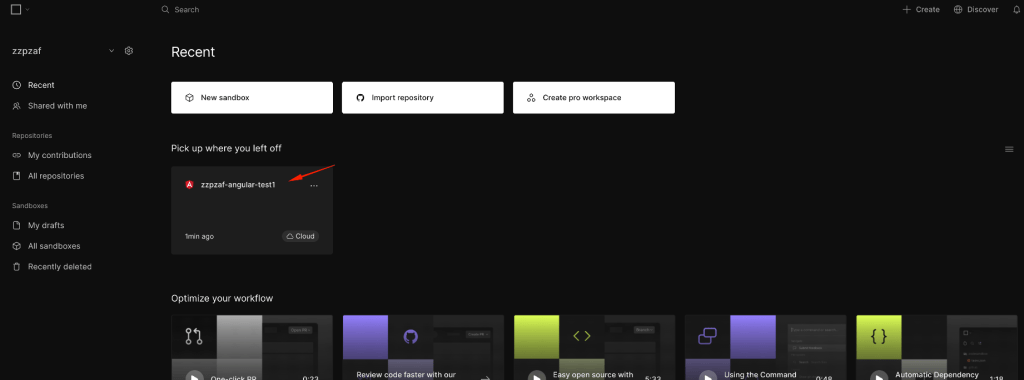
After that we can continue adding and editing our code. If you have experience using VS Code in your local machine, you will find the CodeSandbox pretty similar the VS Code environment.
Next, let’s see the steps for importing a GitHub repository.
Importing a GitHub repository
We can import a GitHub repository from Dashboard:
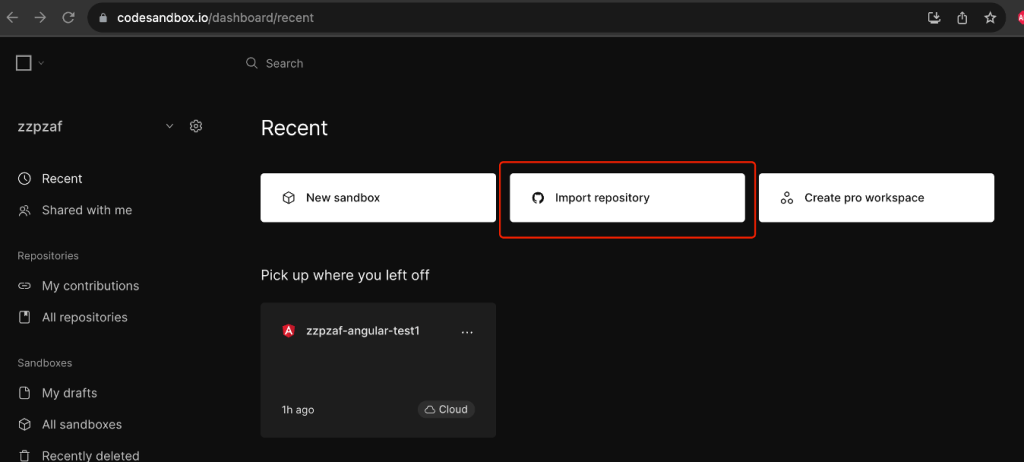
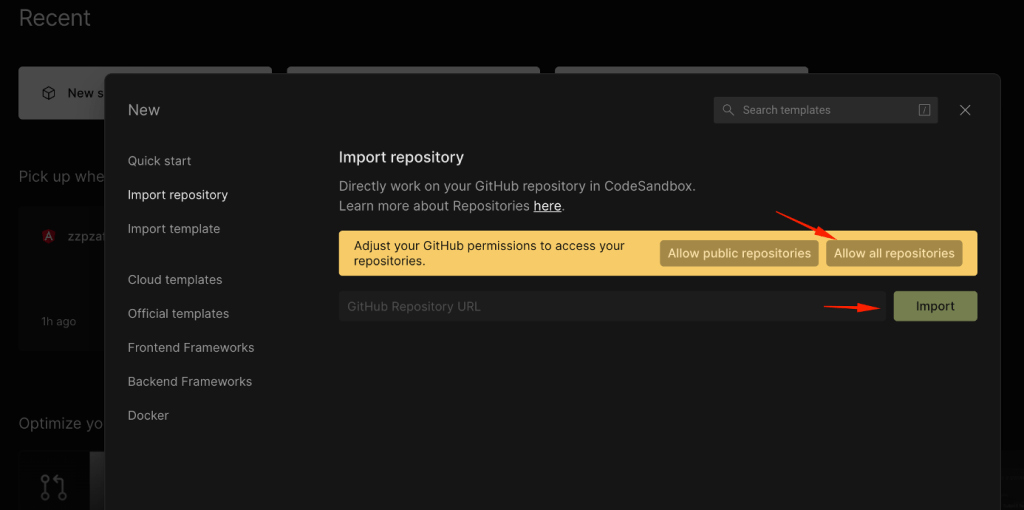
Then we have to authorize GitHub to allow access to Codesandbox:

We have to provide the GitHub password to confirm the access:

Finally, we have to select the repository we are interested in, e.g.:
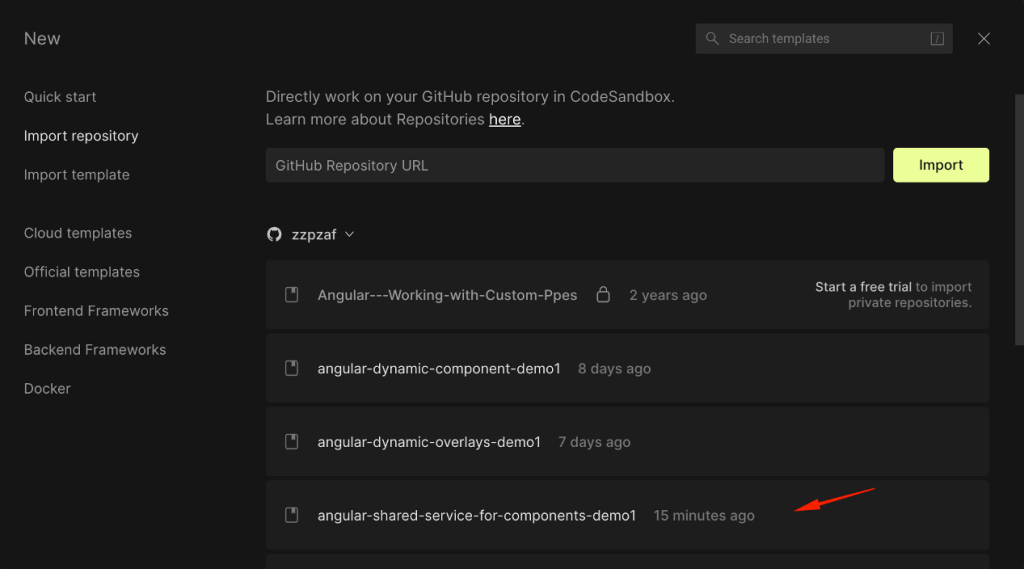
The import takes some time…
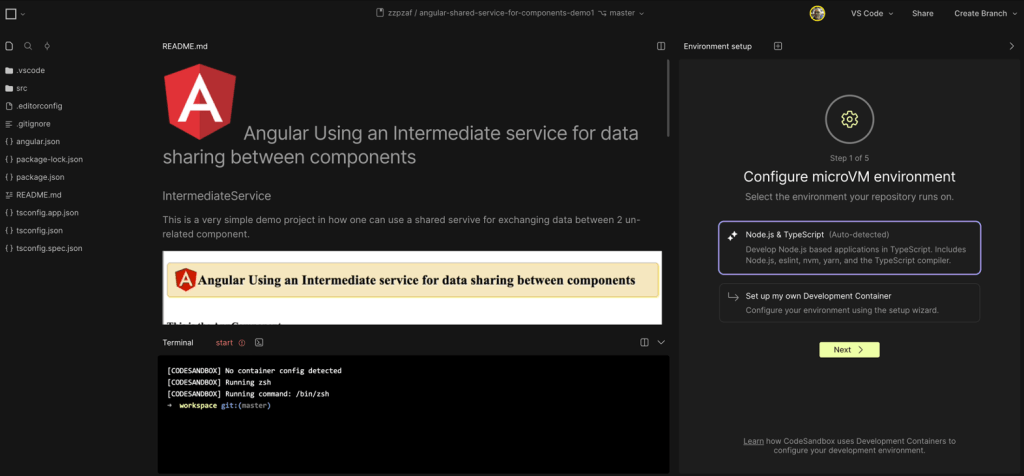
As a next step, we have also to set up the environment -> configure the microVM environment. This will cause npm installation as well as all packages and dependencies, and after that, the application restart. Even, when we leave the predefine settings, the whole process takes some more time….


Finally, we will see in the default terminal window, that after the changes our app restarts.

That’s it! Now you can preview your running app. However, you might face an issue where your application fails to start, and in the preview window shows the message “Invalid Host header”:

You can find a solution elsewhere, but for an Angular project, below is a working solution, as well as some good notes about what causes this issue.
A quick and dirty solution for the “Invalid Host header” error.
You are perhaps aware that by giving the Angular CLI command: “ng serve ….”, a prepackaged local development server starts up, and serves your project application (upon building process finishes), so you can use your browser and access it, e.g.: in the default 4200 port.
It is actually based on the webpack-dev-server development dependency which is one of the widely used development servers from Webpack, that runs and hosts our project application for testing purposes. It is also capable of hot module replacement (live reloading), and after code changes it responds by rerunning/refreshing our application without building it again. You can read more about it here, here, and here.
Generally, most of the local development servers, for security reasons, accept calls only from local traffic (from the local machine that the development server runs). And this is exactly the reason that when we are trying to access the running app on the server of the CodeSandbox container, we get stuck showing the above “Invalid Host header” error.
Note that, when we create a project application, from scratch, directly in CodeSandbox by using the Angular template, the CodeSandbox uses its own sandbox settings for serving the application (in angular.json file under architect -> serve section), which does not cause any similar issue. However, when we import our project from a remote repo, the settings default to the ones related to our local webpack-dev-server.
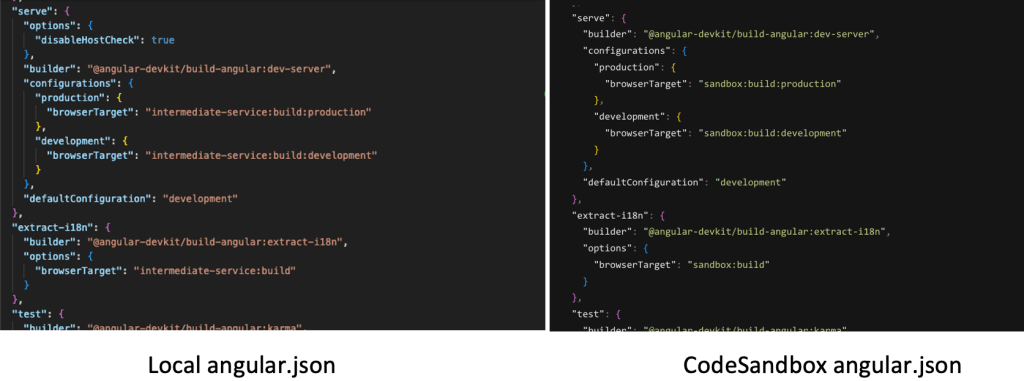
The solution
Even the fact that the ‘ng serve’ command is based on the webpack-dev-server, (which is based on the webpack-dev-middleware), we don’t have direct access to its configuration settings. If we had, a solution could have been to set them, e.g.: setting the ‘allowed-hosts’ to ‘all’.
However, a quick and dirty solution for our case is to set the ‘disableHostCheck’ property to ‘true’ in the imported project’s angular.json file (under architect -> serve -> options).
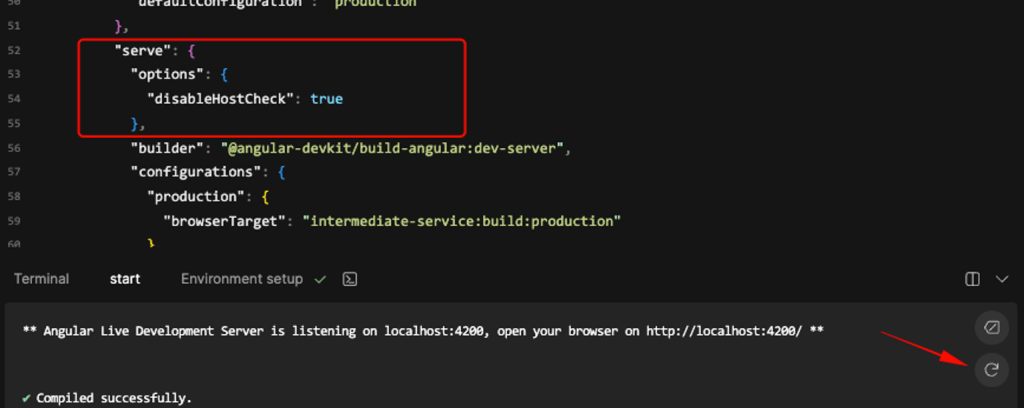
Note that normally, this is not recommended for security reasons, and when you run the ng serve command you probably get a warning message similar to:

Warning: Running a server with –disable-host-check is a security risk. See https://medium.com/webpack/webpack-dev-server-middleware-security-issues-1489d950874a for more information.
However, after we add the ‘options’ section with setting ‘true’ to the ‘disableHostCheck’ property, and restart the app, our imported GitHub project runs OK!
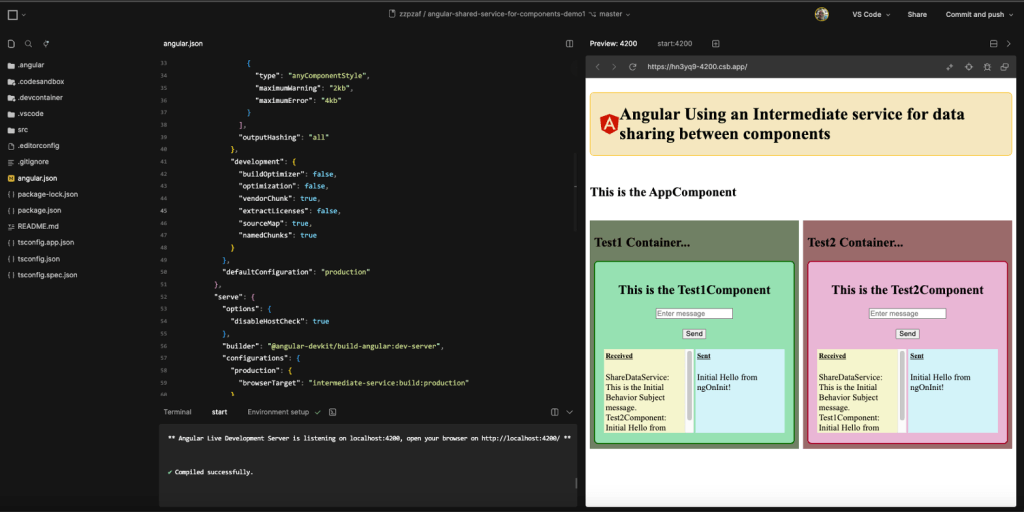
So, that’s it, for now! You are ready to give CodeSandbox a try with you Angular (and not only) project(s).
Thank you for reading! Stay tuned and… keep coding!
