Typescript: Start a browser-based project (System.js)

211123-1126
NB:The same post has been also posted at Medium.
Summary
Coming from other backgrounds and wanting to start playing with Typescript asap, is quite likely that you will fail in some trouble trying to make a simple browser-based project. Which for pure JavaScript world looks like a piece of cake: just a stylesheet and a JavaScript file, linked in an HTML file. However, trying to do something similar with Typescript requires a bit more effort, especially if you are not familiar enough with how to deal with some very fundamental concepts. The module management system is one of the very fundamental concepts and you should be able to make the appropriate choices in configuration settings in your project.
The goal is to start working with typescript files (=modules) in Typescript projects, -using the (new) standard way- without being bothered about JavaScript backward compatibility issues. This post aims to add some grasp on that.
This post also provides a minimum yet a standard solution for all those who have some programming knowledge (e.g. in JavaScript), and who like to benefit from the capabilities of Typescript (OOP, strictly typed, etc.). So, if someone wants to start playing with Typescript and he is looking for a quick way to implement a simple Typescript project that it runs just in a browser, then this post enlightens a bit about this process.
Briefing in JavaScript modules
Modules in the JavaScript world is an essential part of the application development process.
And the same is absolutely true for Typescript as well. If you have an OOP background (e.g., in Java) you will probably find similarities between a class in Java and a module in JavaScript/Typescript (even the fact that a class in Java should be residing in just 1 file). For instance, both of them have their own scope and encloses functions and properties.
However, in ECMAScript (JavaScript) arena when we want to access an object e.g., a class, from another file we have to go through the module system using exports and imports. And this is also true when we want to share code (variables, classes, interfaces, objects, etc.) from one file to another.
As the Typescript is a superset of JavaScript it also has to deal with exports and imports. This is OK. However, when it comes to JavaScript and browsers’ backward compatibility, challenges arrive. This is because older versions of JavaScript, amongst others, instead of using “export” and “import” they used to use “module” and “require” respectively. So, when we develop Typescript applications, and moreover when we want them to be used in older browsers, we have to inform the tsc compiler about that. To do so we have to use appropriate settings in the tsconfig.json file. Generally, the tsconfig.json file is the main configuration file for the key typescript settings of a project. (You can read more here).
Module settings in tsconfig.json
Setting the appropriate value to the module option (key) in the tsconfig.json, guides the tsc compiler on how the emitted (transpiled) JavaScript files will handle the different modules of our project. The Modules concept has been introduced with ECMAScript 2015. Modules are executed within their own scope, not in the global scope; this means that variables, functions, classes, etc. declared in a module are not visible outside the module unless they are explicitly exported. And if another module wants to use a function, variable, class, etc, exported from another module, then it has to import it. Any file containing a top-level import or export is considered a module.
Internally, at runtime, Node.js uses a module loading mechanism that is responsible for locating and executing all dependencies of a module before executing it.
The CommonJS module specification is the default setting used in Node.js for working with modules.
"module": "commonjs", /* Specify what module code is generated. */

Other settings for the “module’ option are None, ES6 or ES2015, ES2020, UMD, AMD, System, and ESNext.
Generally, the “module”: “commonjs” setting is OK and targets any Node.js project that runs outside a browser, i.e., on a server. Server-side actually is the main environment for the Node.js run-time system. You can find a very fundamental introduction on how to install the Typescript “the default (server-based) way” on your Mac here. Thus, keep in mind that these settings are not suitable for relatively simpler projects running on the client-side, i.e., in a browser.
I am not going to get into more detail on this. You can go and review the official documentation here and here. And of course, you can google and find dozens and hundreds of posts and articles regarding the above subject.
Since the tsc compiler transpiles a .ts file and emits in a .js file, it should be expected that the process should have been pretty straightforward.
Well, the process becomes getting more complex when we start adding more .ts/.js files and moreover when we use them as modules and start exporting and importing objects between them. Apart from the fact that using an increased number of (emitted) .js files requires a counterpart of a number of <script> tags, there are also other side effects (e.g., delays in loading, naming collisions, CORS issues, etc.).
Tools dealing with such challenges were started to be used and they are widely adopted. Wrappers, Bundlers, Minifiers are tools that so far are considered as an essential part of Node.js project development. Browserify, Parcel, Rollup, FuseBox, Brunch, Webpack, ESBuild, etc. are some of the well-known representatives of such tools.
Since as we’ve said, our purpose is to keep our starting project as simple as possible, we are not going to use any bundler like the one mentioned above. You can search Medium and you will find a number of quite detailed info about them. No more on such tools in this post.
Here we are going to use just the System.js as our node module management mechanism. As you can read at its place in GitHub here “SystemJS is a hookable, standards-based module loader. It provides a workflow where code written for production workflows of native ES modules in browsers”.

It transpiles the (new) standard (ES2015/ES6) way of working with modules via import-export format (as well as the other popular formats like CommonJS, UMD, AMD) to the older System.register module format (ES5). Pay attention that the System.js is a run-time loader which actually means that it loads ‘on the fly’ the modules transpiled to System.register format. It can be considered as a module format designed to support the exact semantics of ES6 modules within older ES5. In practice, we can just inform the browser that we use the System.register format. We do that by using a minimum overhead of JavaScript code via <script> tags, which should be loaded before we load our project transpiled files. We will see it in practice later.
Apart from that, we have to say that the System.js can also be considered as a bundler and it should be thought of as such, since it can ‘bundle’ together all of the import-export objects of our files, as we will see later.
System.js can be a preferable solution not only because allows us to use the Typescript emitted .js files (as we know with ‘normal’ .js files) with our browser, but it is also one of the “offered” options (values) when we are setting up a new Typescript project (in the tsconfig.json file).
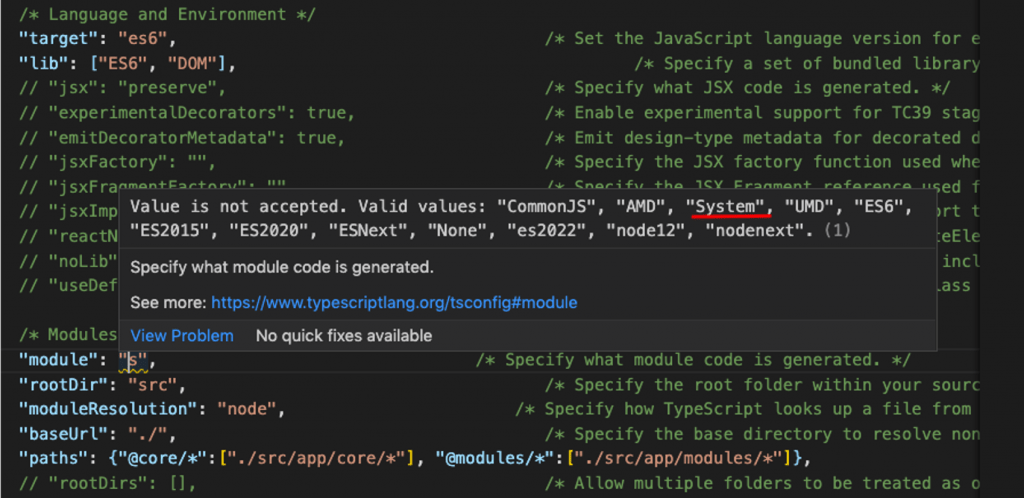
So. let’s grab it as our choice and continue. For the purpose of our simple project, the main steps that should be followed are:
NB: It is supposed that you have already installed Node.js / npm in your system and you have obtained some familiarity with npm. If you haven’t yet installed you can install it on your Mac using this post.
A. Create your working project directory
Let’s name our project folder ‘ts-browser’.
mkdir tsbrowser
cd tsbrowser
B. Make a working folder-file structure (scaffold) for your project
Since our purpose is also to be able to use different files/modules (to see a practical yet simple example of export-import), a nice approach is to create and use an appropriate folder/subfolder structure (scaffold) of the project. For starting up, just create the classic index.html and style.css files.
NB: VS Code is an excellent, popular, and free IDE to work with. Here we use it.
For demonstration purposes add the following lines in the index.htm file.
Note, that the div element with id=”app” will be the linked point with our typescript source code as will see after a while.
And this in style.css file. (Choose whatever settings like, e.g. colors, etc.)
You can test them in your browser:
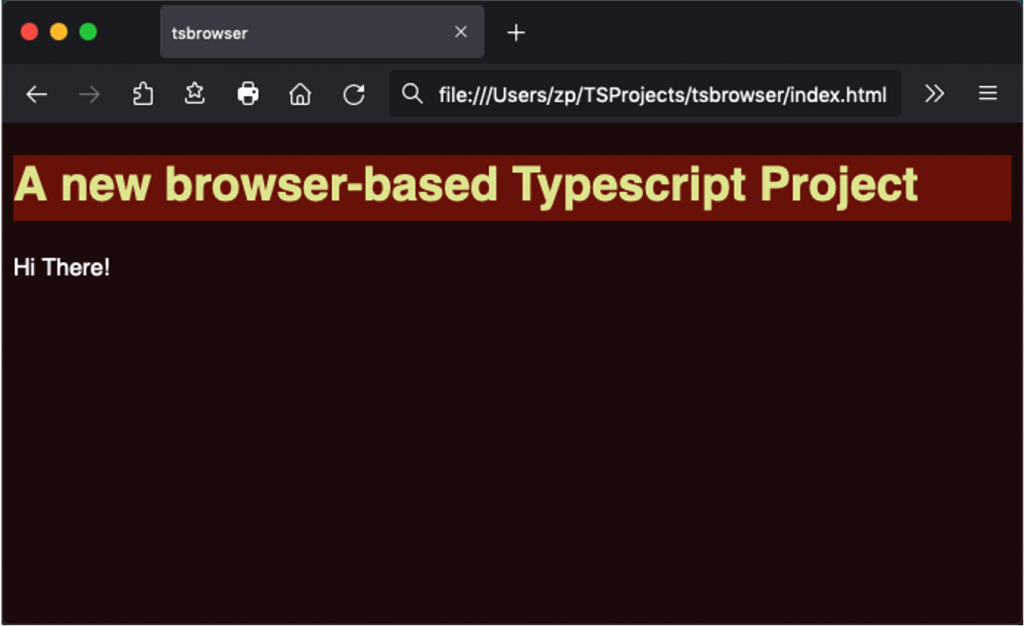
After that, create a new subfolder and name it “src”. Jump in it and create an “index.ts” file. This can be considered as the starting point of our app. Then create a subfolder naming it “app” and inside it another subfolder “modules”. After that, inside the “modules” subfolder create a new typescript file naming it “myfunctions.ts”. We will update them a bit later. The project scaffold should look like this:
.
|-- index.html
|-- src
|   |-- app
|   |   `-- modules
|   |       `-- myfunctions.ts
|   `-- index.ts
`-- style.css
C. Initiate a Node.js project (application)
Use the interactive way which allows you to answer to some questions about the very main options of your project (name, etc):
npm init
or leave them with default values:
npm init --y
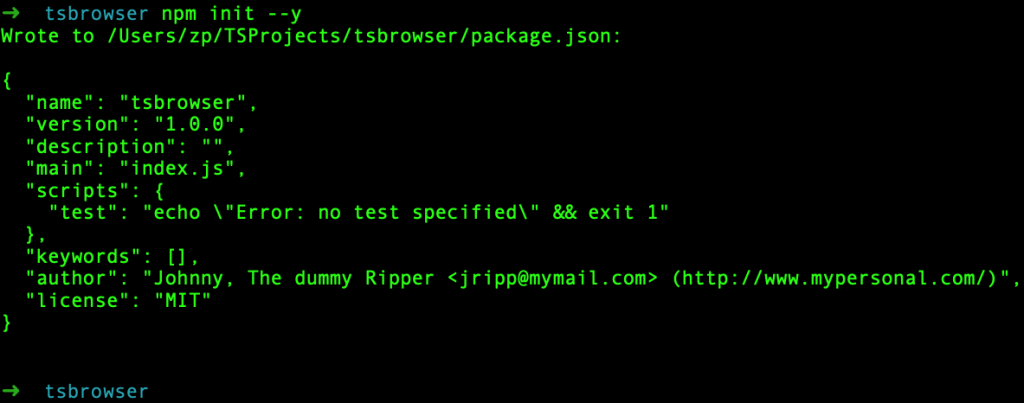
This creates a very basic (and very initial) package.json file.
D. Install Typescript
Even if you have installed it globally in your system, you might think as a good approach to install it as a development dependency, which also allows you to install and use the preferable or the latest version of Typescript. Bellow, we install the latest (default) version.

Check the different versions of Typescript The globally installed:

And for the Typescript installed in our project (locally installed):

E. Initiate the Typescript configuration for the project
You can just use the npx tsc –init command to create a very basic tsconfig.json file with the default settings, like this one below:
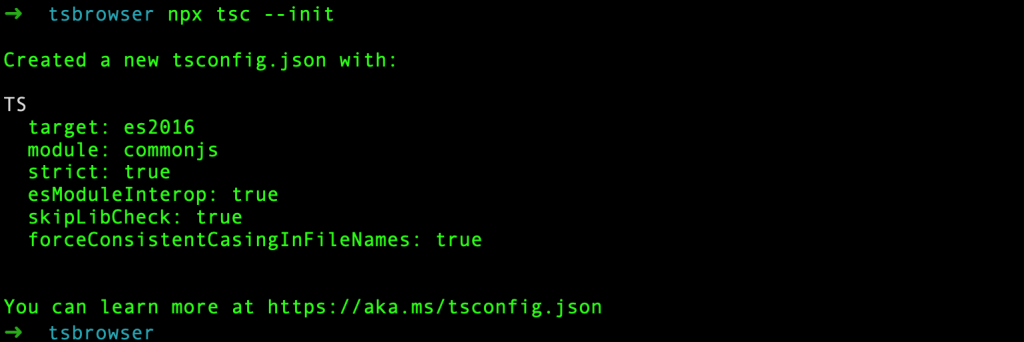
This creates the project tsconfig.json file.
F. Adjust the tsconfig.json settings to reflect our project
Below are the minimum fundamental settings that will allow our project to function correctly and efficiently in a browser.
As we have said this is a browser-based project, use the System (instead of the default commonjs).
"module": "System",
Add the es2016 and DOM in libraries section, since we want to be able to use and manipulate the browser’s DOM object
"lib": ["es2016","DOM"],
Define the src subfolder we create before, as the folder that holds all of our source typescript files.
"rootDir": "src",
Define the output folder for transpiled .js files. This folder will be created just after the 1st compilation. We name this folder “build”.
"outDir": "build",
The following is an important setting that makes crystal clear how the System.js can bundle together -just in 1 file-, the whole project code. We name this file “bundle.js”
"outFile": "./build/bundle.js",
It will be also fine to enable source mapping for the output/emitted .js files for debugging purposes.
"sourceMap": true,
G. Add typescript code
We are going to use the snippets below as a simple demonstration of how we can use the modules exporting – importing mechanism. Add the following code in the src/app/modules/myfunction.ts file:
The above source code just demonstrates how we export a function (the “capitalizeFirst” function) and makes it available to other source files. It simply exports a function that capitalizes the 1st character of a sentence. Add the following code in index.ts file:
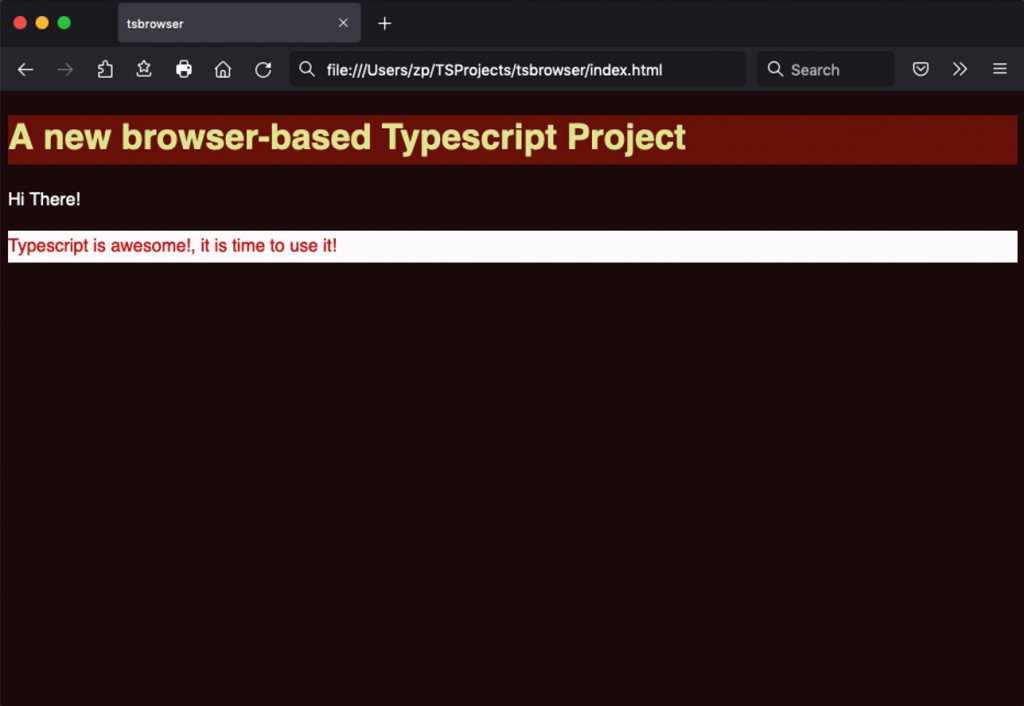
The above code uses the “capitalizeFirst” function (imports it), previously exported in ./app/modules/myfunctions.ts file. Then it creates an object of the div element with id=”app”, which is the connection point inside the .html file, as we have already mentioned. After that, it manipulates it (adds a new div element and outputs text), and finally outputs it back to the browser document (in the index.html file). When it runs we expect that we will see the text “Typescript is awesome!, it is time to use it! ” line colored in red on white background.
Now we are ready to compile.
G. Compile
Run the tsc compiler just for our project (“locally”):

Note, that we use the npx command to run the locally installed tsc compiler (the tsc package). (Using npx has the same effect as we have run the tsc command using its full path:
./node_modules/.bin/tsc)
Check the generated output (build) folder
It should be like the following one:
.
|-- build
|   |-- bundle.js
|   `-- bundle.js.map
|-- index.html
|-- node_modules
|-- package-lock.json
|-- package.json
|-- src
|   |-- app
|   |   `-- modules
|   |       `-- myfunctions.ts
|   `-- index.ts
|-- style.css
`-- tsconfig.json
Now check the generated bundle.js inside the build folder. It should be like that:
As you can see it bundles together -in 1 file- all the source code of our project. Please, also note the anonymous function syntax being used to here: System.register(…) {}. This is actually how System.js transpiled our modules sharing (exports/imports).
I. Update the index.html file
Now it’s time to apply our emitted code to our HTML document. Generally, a module (similarly to pure JavaScript code files) can be applied to an HTML document enclosing it in the <script> tag, and declaring it with type=”module” attribute, e.g.:
<script type=”module” src="myfunction.js"></script>
Applying our bundle.js file to our index.htm document is not far away from the above syntax. However, we have somehow to inform the browser how to deal with System.register(…) {}. And this is exactly what the System.js offers us.
The “offering” (in most of simple cases) consists of just 2 .js files provided by the Ssytem.js. The 1st is the system loader and the 2nd is the named register module (which actually makes the System.register sysntax “understandable”. Both are also offered in their “light” versions, which fit well with our simple project. These are the files s.js and named-register.min.js.
It is not my intention to go in more technical details, but if you want you can take a look at the official documentation here and here.
All available options are included in the system,js package that can be installed in our project using our node package manager, for example:
npm i -D systemjs @types/systemjs
After installation you can check that your package.json has been updated:

and the systemjs package has been installed locally in your project node_packages subfolder. Then we could apply them to our index.html document like that:
<script src="node_modules/systemjs/dist/s.js"></script>
<script src="node_modules/systemjs/dist/extras/named-register.min.js"></script>
However, a commonly used alternative is to obtain them directly at run-time from one of the free node packages CDN services, like the UNPKG or the JSPM. So, you can avoid to install the systemjs package locally. Grab it directly from a CDN. Here I use the UNPKG service.
Now is the time to finally add the few necessary script tags in our index.html file. Add the following lines before body closing tag </body> :
. . .
    <script src="https://unpkg.com/systemjs@6.11.0/dist/s.js"></script>
    <script src="https://unpkg.com/systemjs@6.11.0/dist/extras/named-register.min.js"></script>
    <script src="bundle.js"></script>
    <script type="module">
      System.import('index');
    </script>
. . .
The last step of course is to load the index.html in our browser. This is how it looks like now: And this is what was expected to be:
Now your browser-based app is ready. No server is needed. You can “take away” it, deploying it everywhere. You just need the files: index.html, style.css, and the build/bundle.js.
You can go and grab the project at my repo at GitHub here :or you can download the repo’s .zip file. There you can find all the source code as well as the configuration settings (tsconfig.json, etc.).
That’s it!
Let me know if you find problems or if there is something missing.
Enjoy, and stay tuned.
Thanx for reading!
