Oracle Database in Docker
220924
Intro
I’m not going to start explaining why Oracle is the leader in the RDBMS industry, wasting your time. Here I want just to show how fast you can set up a Docker working environment for your Oracle development needs, following the latest official Oracle repos.
Prerequisites
- You have to be familiar with Docker, Docker Images, and Containers, and Docker should be installed in your system (preferably a Linux system or a macOS)
- You have to have created an Oracle Account (You can create an Oracle Account here)
Installation
The process includes 2 phases:
- Build a Docker Image with the appropriate -for you-version of Oracle DB
- Create a working Oracle container.
Phase 1 – Build a Docker Image
This phase requires 3 steps:
Step 1 – Get the necessary scripts to build the image
Oracle provides us via its GitHub repositories with the necessary build scripts that automate/facilitate the image creation process. You can clone the entire repo, but I don’t think this is useful for our case here.
The Oracle Database supporting files for the Docker image can be found here. You can see that you can find all the vital information and examples for how to create your Docker image.
The available versions of Oracle for your image are: Till the day I was writing this post Sep. 23, 2022):
- Oracle Database 21c (21.3.0) Enterprise Edition, Standard Edition 2 and Express Edition (XE)
- Oracle Database 19c (19.3.0) Enterprise Edition and Standard Edition 2
- Oracle Database 18c (18.4.0) Express Edition (XE)
- Oracle Database 18c (18.3.0) Enterprise Edition and Standard Edition 2
- Oracle Database 12c Release 2 (12.2.0.2) Enterprise Edition and Standard Edition 2
- Oracle Database 12c Release 1 (12.1.0.2) Enterprise Edition and Standard Edition 2
- Oracle Database 11g Release 2 (11.2.0.2) Express Edition (XE)
The important script and dockerfile(s) are located in the dockerfiles folder. There, you can also see that there are separate subfolders for each one of the versions supported.
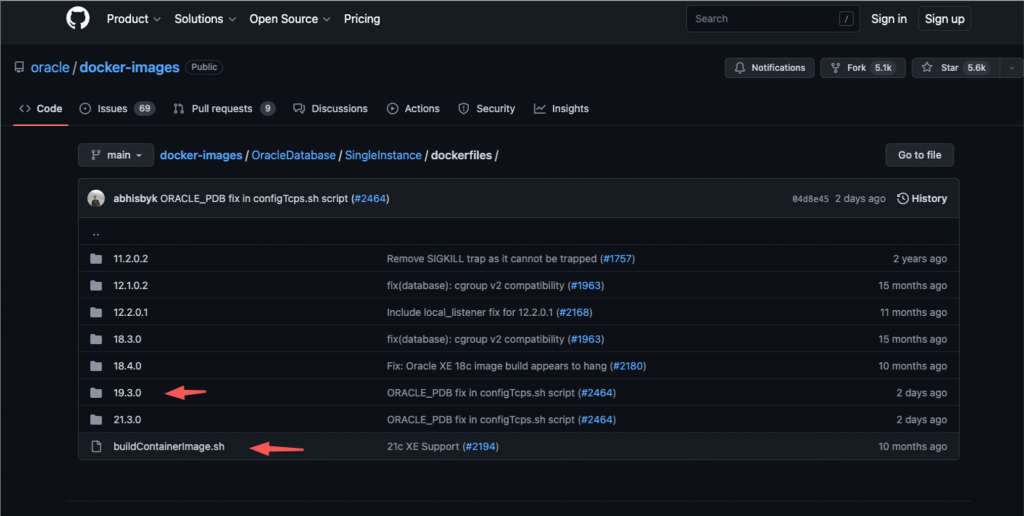
We are going to create the image for a single instance with one PDB, for the OracleDB version 19.3.0 (On Sep. 23, 2022 this is the latest Long-Term Release with the widest window of support duration).
So, I suggest you create a folder where you like to do it in your system. Name it as you wish, e.g. /dockerOracleDB, and copy there only the buildContainerImage.sh and the corresponding folder which in our case is the 19.3.0 subfolder.
Note: Instead of the repo 19.3.0 subfolder, you can grab any other version subfolder is suitable for your needs.
If you have troubles to download the entire 19.3.0 subfolder with all its content you can use one of the available tools, e.g. download-directory-github-io (paste the link of that GitHub subfolder). It compresses the subfolder into a .zip file, which you can place in the desired place in your system (for our case inside /dockerOracleDB the folder).
Give read-write and execute permission to the contents of the /dockerOracleDB folder.
Proceed to the next step.
Step 2 – Obtain the installation binaries for your preferable Oracle Version
Go to Oracle Technology Network page.
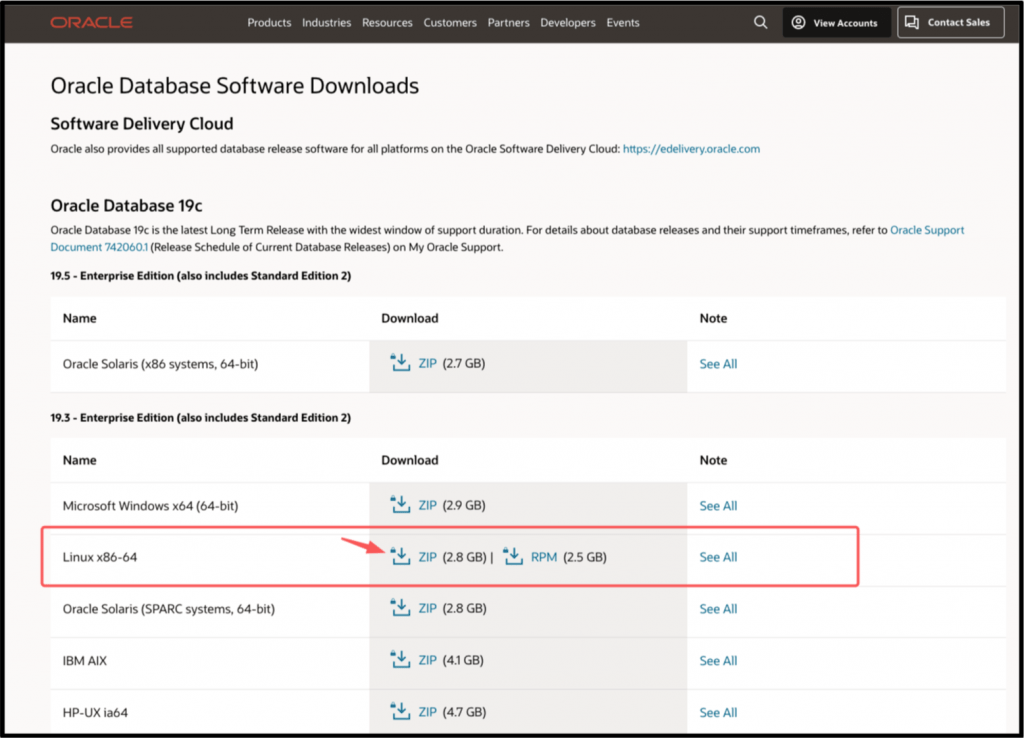
It’s better if you have already logged in into you Oracle Account, since here is where you need it, to download the 19.3.0 binaries.
Download the .zip file for Linux x86-64 binaries, and place the .zip file into the /19.3.0 subfolder. (As you can see it is about 2.8GB, so, maybe it will take some minutes to download it).
Step 3 – Run the script to build the image
./buildContainerImage.sh -v 19.3.0 -t oracle19.3.0:or19c -s -i
Below, is a short description about the parameters we use:
| -v: | is about passing the version of the database binaries. It actually points to the subfolder with the corresponding binaries for the specific version. Here we have just 1 option, and it should be 19.3.0 |
| -t: | it is mandatory and it is about the name of the image to be created, followed by a tag name for the image, separated by the column symbol |
| -s: | creates an image based on ‘Standard Edition 2’ (instead of -s, we can also use one of the following other options: -e: for ‘Enterprise Edition’, and -x: for an image based on ‘Express Edition’) |
| -i: | ignores MD5 checksum |
There are about 24 steps that should be completed, so the process might take some minutes to be finished. If the built was successful, you must see the ending lines to be similar to:
---> 2af00a8fe26b
Successfully built 2af00a8fe26b
Successfully tagged oracle19.3.0:or19c
  Oracle Database container image for 'se2' version 19.3.0 is ready to be extended:
    --> oracle19.3.0:or19c
  Build completed in 458 seconds.
You can see the whole (quite long) output log file here.
Use the docker image command to see that the image is now in the list of your local docker images:

So far, so good! Let’s now proceed creating a new docker container from the above image.
Phase 2 – Create a working Oracle container
docker run --name oracle19c -p 1621:1521 -p 5500:5500 -e ORACLE_SID=dockor19c -e ORACLE_PDB=dockor19cPDB -v $HOME/DOCKER/dockerOracleDB/datafiles19c:/opt/oracle/oradata oracle19.3.0:or19c
The parameters used here are given to the following table:
| –name: | The name of the container (default: auto-generated). Here we use the container name: “oracle19c” |
| -p | The port(s) mapping of the host port(s) to the container port(s). Two ports are exposed here: the default 1521 (Oracle Listener for accessing the database instance) which is mapped to the 1621 port of our local host, and the 5500 (for accessing the Oracle Enterprise Manager – EM) |
| -e | ORACLE_SID: The Oracle Database SID that should be used. The default is “ORCLCDB” but here we use the “dockor19c” |
| -e | ORACLE_PDB: The Oracle Database PDB name that should be used. Here we use the “dockor19cPDB” instead of the default: “ORCLPDB1”. |
| -v | The data volume to use for the database data and log files. Here we use the local folder “$HOME/DOCKER/dockerOracleDB/datafiles19c” The folder has to be owned by the Unix user “oracle” or you can set its permissions accessible to other users e.g. “sudo chmod -R o+rw datafiles19c”. If omitted the database will not be persisted over container recreation. |
The container creation process might take some time, however you will stay informed. When you see the message “DATABASE IS READY TO USE!” your docker container should be created and it keeps running.
You can find the container creation output/log here.
Check it via the docker ps command:

You can stop the container and start it again using standard docker commands, i.e.:
docker stop oracle19c
docker start oracle19c
Access the container shell and use the sql*plus and perform some fundamental actions
Access the container shell by executing:
~/dockerOracleDB$ docker exec -it oracle19c bash -c "source /home/oracle/.bashrc; bash"
Get some info about the Linux distro being used (it’s an Oracle Linux Server 7.9 version)
Connect via sql*Plus (within the container) as sysdba:
See the connection name (This is the CDB – root container)
Change SYS and SYSTEM passwords
Switch to the pluggable database
Connect using the Oracle SQLcl
Connect to the sql*plus from your local host using the SQLcl (Oracle free command line tool)
[Note: be sure to use a SQLcl version aligned with your JRE active version. The latest version on Sep 24, 2022 of SQLcl was the version 22.2.1 which requires JRE version 11 or later]
Connect to the root instance:
~$ sqlcl sys/myPassw@localhost:1621/dockor19c as sysdba
or to the PDB:
~$ sqlcl sys/myPassw@localhost:1621/dockor19cPDB as sysdba
(Note: Above we use renamed sql executable in the /bin folder, from sql to sqlcl)
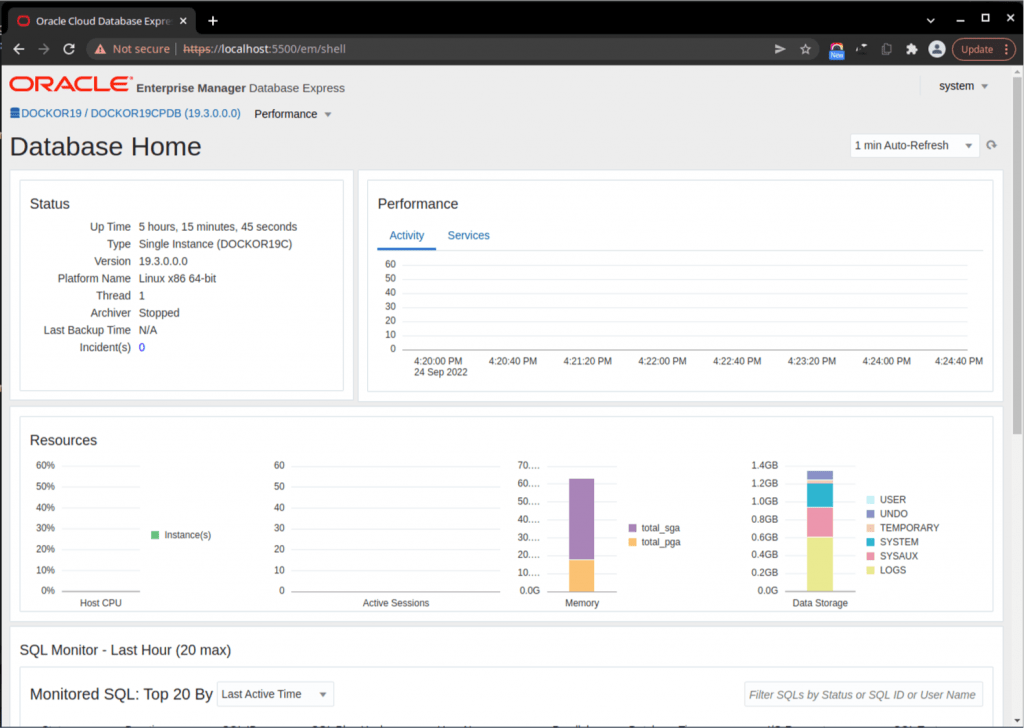
Oracle Enterprise Manager (EM) – Login and start working
Oracle Enterprise Manager is the Oracle’s monitoring and management tool for your Database. Oracle ships the Express version with the docker binaries we have downloaded.
Since we have mapped the port 5500 (which is the default port for EM console) we can login to it. Open a new window or tab to your browser and give the address:
https://localhost:5500/em/login
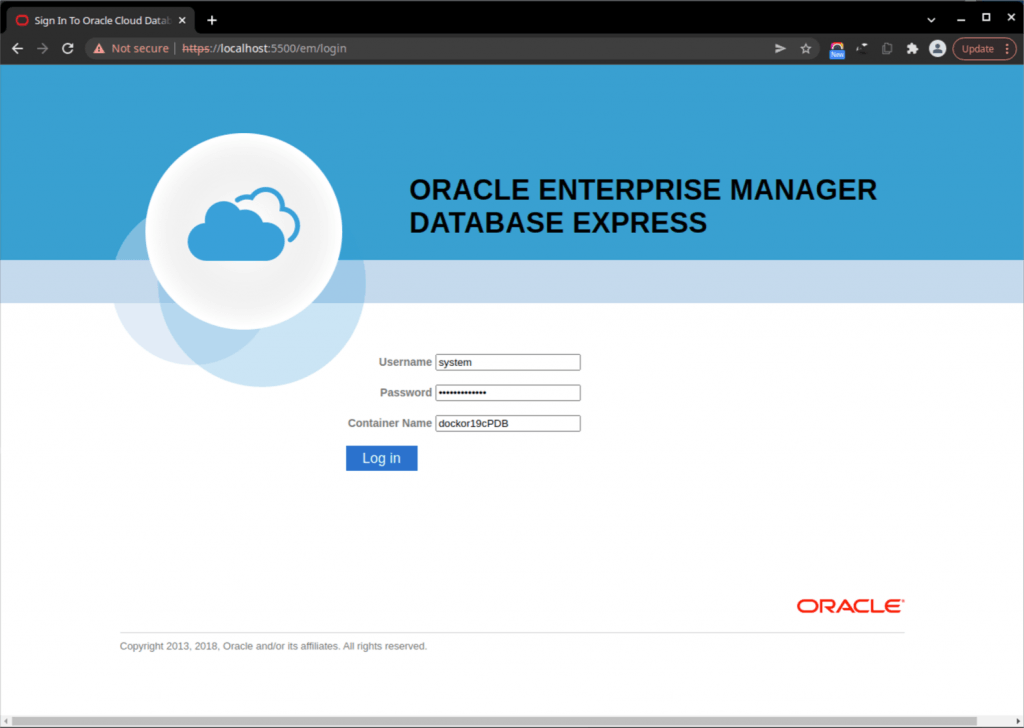
That’s it for now! I hope you enjoyed it!
Thanks for reading and stay tuned!
