Transfer / migrate a WordPress site from a macOS (using HomeBrew MAMP stack) to a Synology NAS server

210111-12
It is supposed that you use a LAMP/MAMP stack on your macOS installed via Homebrew. In case you don’t have yet installed Homebrew on your macOS, you can proceed and install it following the instructions here. Below, you can also find links to access all necessary steps to install and use the main MAMP stack components on macOS:
- Apache (httpd) server
- MariaDB
- PHP
- as well as phpMyAdmin
Check and analyze the existing MAMP site
Actually, we are going to transfer the present site you see, from my MacBook Pro to my Synology NAS server. First, we will inspect all the vital WordPress information of the macOS site, and put it aside for any necessary adjustments on the target Synology NAS server.

Keep aside important information, such as:
- Plugins
- WordPress and Site Addresses
- Permalinks
- Users
- etc.
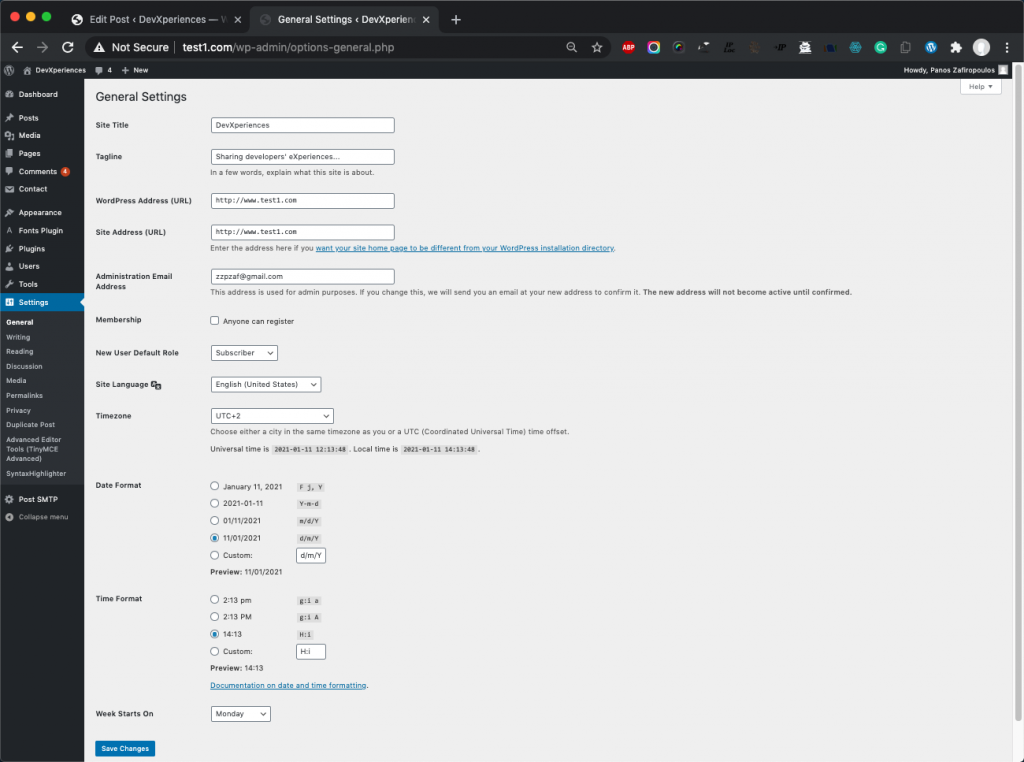

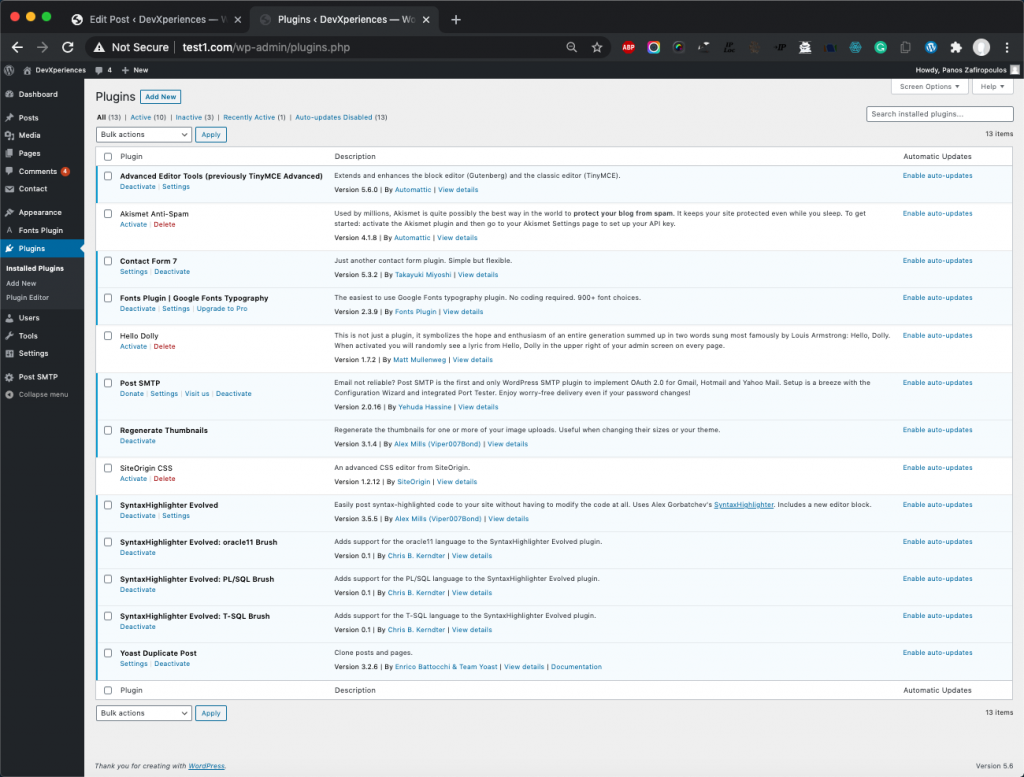
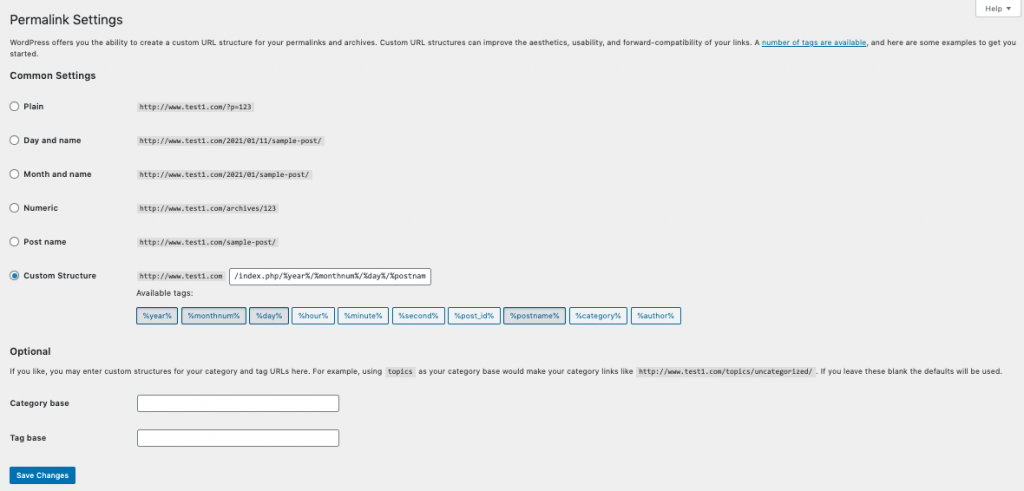
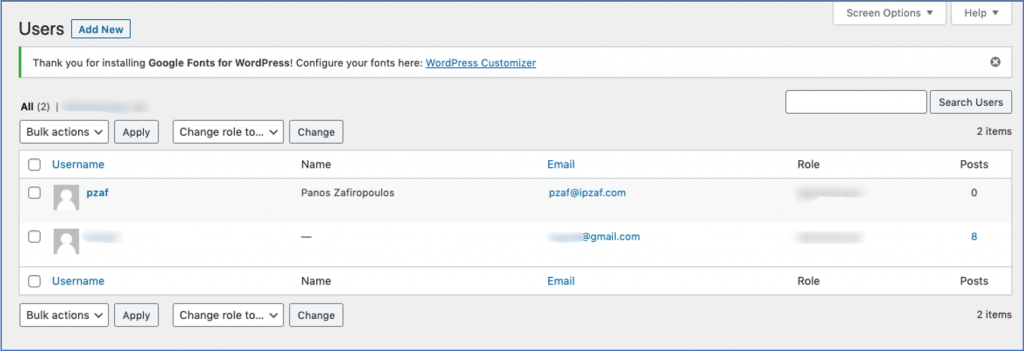
Other important links:
Home: www.test1.com
Contact us: http://www.devxperiences.com/contact-us/
Check the site’s already define users:
We can check the site’s already define users, via the phpMyAdmin web interface:
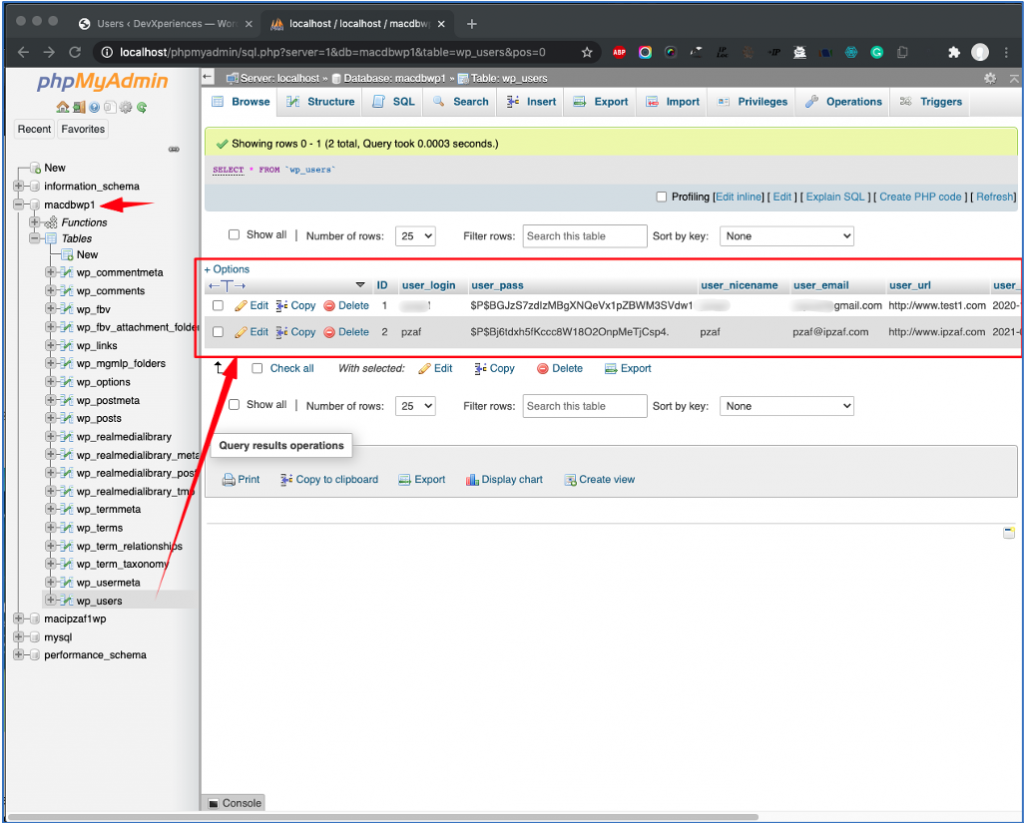
As you can see above, there are 2 users defined for the www.test1.com WordPress site. The site’s users should be preserved during the transfer, and they can also be used later on, to login into the Dashboard (/wp-admin) of the new (transferred) site.
Check the folder/file structure of the DocumentRoot at macOS
In a MAMP (installed via Homebrew) various ‘sites’ can be found under the folder:
/usr/local/var/www
NB: This is defined using the DocumentRoot directive, inside the default Apache configuration file: usr/local/etc/httpd/httpd.conf.
As you can see below, our site’s folder is test1.com (full pathname: /usr/local/var/www/test1.com)

Below, is the full WordPress folder/file structure of the www.test1.com site.
➜  test1.com pwd
/usr/local/var/www/test1.com
➜  test1.com
➜  test1.com
➜  test1.com ls -al
total 432
drwxr-xr-x   25 zp  staff    800 Jan  2 12:27 .
drwxr-xr-x   13 zp  admin    416 Dec 10 11:51 ..
-rw-r--r--@   1 zp  staff   6148 Nov 23 18:17 .DS_Store
-rw-r--r--@   1 zp  staff    523 Jan  2 12:23 .htaccess
-rw-r--r--@   1 zp  admin    194 Nov 20 14:53 index.html
-rw-r--r--    1 zp  staff    405 Feb  6  2020 index.php
-rw-r--r--    1 zp  staff  19915 Jan  2 12:23 license.txt
-rw-r--r--@   1 zp  staff   7278 Jan  2 12:23 readme.html
-rw-r--r--    1 zp  staff   7101 Jul 28 20:20 wp-activate.php
drwxr-xr-x   98 zp  staff   3136 Jan  2 12:23 wp-admin
-rw-r--r--    1 zp  staff    351 Feb  6  2020 wp-blog-header.php
-rw-r--r--    1 zp  staff   2328 Jan  2 12:23 wp-comments-post.php
-rw-r--r--@   1 zp  staff   2913 Feb  6  2020 wp-config-sample.php
-rw-r--r--@   1 zp  staff   3314 Nov 23 23:00 wp-config.php
drwxr-xr-x    7 zp  staff    224 Nov 28 08:31 wp-content
-rw-r--r--    1 zp  staff   3939 Jan  2 12:23 wp-cron.php
drwxr-xr-x  223 zp  staff   7136 Jan  2 12:23 wp-includes
-rw-r--r--    1 zp  staff   2496 Feb  6  2020 wp-links-opml.php
-rw-r--r--    1 zp  staff   3300 Feb  6  2020 wp-load.php
-rw-r--r--    1 zp  staff  49831 Jan  2 12:23 wp-login.php
-rw-r--r--    1 zp  staff   8509 Apr 14  2020 wp-mail.php
-rw-r--r--    1 zp  staff  20975 Jan  2 12:23 wp-settings.php
-rw-r--r--    1 zp  staff  31337 Jan  2 12:23 wp-signup.php
-rw-r--r--    1 zp  staff   4747 Jan  2 12:23 wp-trackback.php
-rw-r--r--    1 zp  staff   3236 Jun  8  2020 xmlrpc.php
➜  test1.com
➜  test1.com
Open the wp-config.php file and check the site’s database and the user/owner:
// ** MySQL settings - You can get this info from your web host ** //
/** The name of the database for WordPress */
define( 'DB_NAME', 'macdbwp1' );

/** MySQL database username */
define( 'DB_USER', 'macuserwp1' );

/** MySQL database password */
define( 'DB_PASSWORD', 'W#jsh*dgfXFw3@' );

/** MySQL hostname */
define( 'DB_HOST', 'localhost' );

/** Database Charset to use in creating database tables. */
define( 'DB_CHARSET', 'utf8mb4' );

/** The Database Collate type. Don't change this if in doubt. */
define( 'DB_COLLATE', 'utf8mb4_unicode_ci' );

/** WordPress should use to write directly to the filesystem (not via FTP) */
define('FS_METHOD', 'direct');
For the above example, the site’s database schema is ‘macdbwp1’ and the user/owner is the ‘macuserwp1’ user. These are defined in the macOS MariaDB database. Any time you can also enter to macOS MariaDB and check them (e.g. using the statement: SHOW DATABASES; and the sql command: SELECT User From mysql.user;):
➜  ~ mariadb -u root -p
Enter password:
Welcome to the MariaDB monitor.  Commands end with ; or \g.
Your MariaDB connection id is 130
Server version: 10.5.8-MariaDB Homebrew

Copyright (c) 2000, 2018, Oracle, MariaDB Corporation Ab and others.

Type 'help;' or '\h' for help. Type '\c' to clear the current input statement.

MariaDB [(none)]>
MariaDB [(none)]> SHOW DATABASES;
+--------------------+
| Database           |
+--------------------+
| information_schema |
| macdbwp1           |
| macipzaf1wp        |
| mysql              |
| performance_schema |
+--------------------+
5 rows in set (0.003 sec)

MariaDB [(none)]>
MariaDB [(none)]> SELECT User FROM mysql.user;
+--------------------+
| User               |
+--------------------+
|                    |
| ipzaf1user01       |
| macuserwp1           |
| mariadb.sys        |
| root               |
| zp                 |
|                    |
+--------------------+
7 rows in set (0.009 sec)

MariaDB [(none)]>
Later, we should use the same database name (‘macdbwp1‘) to create a brand new database schema on the target system’s MariaDB/MySQL. The same is also true for the user/owner (‘macuserwp1‘) of that schema.
Exporting macOS site’s database
We have to use the mysqldump command (in bash shell):
$ mysqldump –user=<user> –password=<“password”> > <mydatabase> > <mydatabase>.sql
So, for the macdbwp1 database we can use:
$ mysqldump --user=root --password='JV$jsh*dgf@XFw3' macdbwp1 > macdbwp1.sql
NB: Please, take care to correctly write your password. If it contains non-standard characters, you should include it in single quotes.
NB: The output sql script ‘macdbwp1.sql’ file will be generated at the folder where the user is, at the moment of execution of the command above (e.g. /usr/local/var/www/test1.com).
However, you can use an absolute path as well.
The sqldump outputs an sql script file with the name specified (‘macdbwp1.sql’) which is a full export of our data in the macdbwp1 database. We will use it later and we will import it in a same database schema in the target system MariaDB?MySQL.
➜  test1.com mysqldump --user=root --password='JV$jsh*dgf@XFw3' macdbwp1 > macdbwp1.sql
➜  test1.com
➜  test1.com
➜  test1.com ls -al
total 25024
drwxr-xr-x   27 zp  staff      864 Jan 10 18:11 .
drwxr-xr-x   13 zp  admin      416 Dec 10 11:51 ..
-rw-r--r--@   1 zp  staff     6148 Nov 23 18:17 .DS_Store
-rw-r--r--@   1 zp  staff      523 Jan  2 12:23 .htaccess
-rw-r--r--@   1 zp  admin      194 Nov 20 14:53 index.html
-rw-r--r--    1 zp  staff      405 Feb  6  2020 index.php
-rw-r--r--    1 zp  staff    19915 Jan  2 12:23 license.txt
-rw-r--r--    1 zp  staff  5659747 Jan 10 18:10 macdbwp1.sql
-rw-r--r--@   1 zp  staff     7278 Jan  2 12:23 readme.html
-rw-r--r--    1 zp  staff     7101 Jul 28 20:20 wp-activate.php
drwxr-xr-x   98 zp  staff     3136 Jan  2 12:23 wp-admin
-rw-r--r--    1 zp  staff      351 Feb  6  2020 wp-blog-header.php
-rw-r--r--    1 zp  staff     2328 Jan  2 12:23 wp-comments-post.php
-rw-r--r--@   1 zp  staff     2913 Feb  6  2020 wp-config-sample.php
-rw-r--r--@   1 zp  staff     3314 Nov 23 23:00 wp-config.php
drwxr-xr-x    7 zp  staff      224 Nov 28 08:31 wp-content
-rw-r--r--    1 zp  staff     3939 Jan  2 12:23 wp-cron.php
drwxr-xr-x  223 zp  staff     7136 Jan  2 12:23 wp-includes
-rw-r--r--    1 zp  staff     2496 Feb  6  2020 wp-links-opml.php
-rw-r--r--    1 zp  staff     3300 Feb  6  2020 wp-load.php
-rw-r--r--    1 zp  staff    49831 Jan  2 12:23 wp-login.php
-rw-r--r--    1 zp  staff     8509 Apr 14  2020 wp-mail.php
-rw-r--r--    1 zp  staff    20975 Jan  2 12:23 wp-settings.php
-rw-r--r--    1 zp  staff    31337 Jan  2 12:23 wp-signup.php
-rw-r--r--    1 zp  staff     4747 Jan  2 12:23 wp-trackback.php
-rw-r--r--    1 zp  staff     3236 Jun  8  2020 xmlrpc.php
➜  test1.com
➜  test1.com

l
Transferring the whole WordPress folder/file structure from macOS to the Synology NAS server
Now, we have to determine, where exactly in our target system (this our Synology NAS server), we will transfer the entire macOS WordPress folder structure. In a Synology NAS server, the default place we put our sites is usually under the /web folder. You can check it via NAS station web interface – File Station application:

The /web folder normally can be found in the 1st volume created in our NAS server (here its name is: nas01) e.g. volume1:
nas01:/volume1/web$
nas01:/volume1/web$ pwd
/volume1/web
nas01:/volume1/web$
nas01:/volume1/web$ ls -al
total 4
drwxrwxrwx+ 1 root    root    96 Jan  1 13:13 .
drwxr-xr-x  1 root    root   108 Jan  1 12:29 ..
drwxrwxrwx+ 1 root    root    70 Jan  1 13:13 @eaDir
-rwxrwxrwx+ 1 user01 users 1481 Apr 14  2020 index.html
drwxrwxrwx+ 1 user01 users 3474 Jan  1 15:47 phpMyAdmin
drwxrwxrwx+ 1 user01 users  664 Nov 11 17:45 site01
drwxrwxrwx+ 1 user01 users  210 Apr 27  2020 tmp
drwxrwxrwx+ 1 user01 users   28 Apr 11  2020 web_images
drwxrwxrwx+ 1 user01 users   68 Apr 13  2020 WP
nas01:/volume1/web$
Please recall that our source is the entire macOS WordPress folder structure and that it can be found under the folder /usr/local/var/www/test1.com. Also, we have put inside it, the export file of our WordPress database macdbwp1.sql.
We are going to transfer the source to the target. For this purpose, we are going to use the scp linux command using our mac terminal.
scp is a linux command (similar to cp) that copies files securely between hosts on a network. It uses ssh for data transfer, and uses the same authentication, and provides the same security as ssh. scp will ask for passwords or passphrases if they are needed for authentication. scp should be installed in both of the systems: the source machine and the target system.
We will use the general syntax:
$ scp <options> <file(s)_or_directory(-ies)> user@target_host:/<folder>
Since we are going to copy an entire folder with all included files and sub-folders, we have to use the -r (=copy recursively) optional parameter. So, in our case, this is the full syntax:
$ scp -r /usr/local/var/www/test1.com user01@nas01:/volume1/web
Alternatively, avoiding getting ‘unknown host errors’, we can use the IP host’s address, instead of its name:
$ scp -r /usr/local/var/www/test1.com/ user01@192.168.1.241:/volume1/web
Moreover, you can also use the verbose mode (-v) to see everything is copying:
$ scp -rv /usr/local/var/www/test1.com/ user01@192.168.1.241:/volume1/web
After a successful transfer (at the end of the process you will see: debug1: Exit status 0), you will be able to see the folder transferred into your NAS server:
nas01:/volume1/web$
nas01:/volume1/web$ pwd
/volume1/web
nas01:/volume1/web$
nas01:/volume1/web$ ls -al
total 4
drwxrwxrwx+ 1 root    root    96 Jan  1 13:13 .
drwxr-xr-x  1 root    root   108 Jan  1 12:29 ..
drwxrwxrwx+ 1 root    root    70 Jan  1 13:13 @eaDir
-rwxrwxrwx+ 1 user01 users 1481 Apr 14  2020 index.html
drwxrwxrwx+ 1 user01 users 3474 Jan  1 15:47 phpMyAdmin
drwxrwxrwx+ 1 user01 users  664 Nov 11 17:45 site01
drwxr-xr-x  1 user01 users  628 Jan 11 21:08 test1.com
drwxrwxrwx+ 1 user01 users  210 Apr 27  2020 tmp
drwxrwxrwx+ 1 user01 users   28 Apr 11  2020 web_images
drwxrwxrwx+ 1 user01 users   68 Apr 13  2020 WP
nas01:/volume1/web$
Or again, via NAS station web interface – File Station application:

Tip: As we know, the scp command copies all included files and folders, in a one-to-one basis. In case we want to speed up a little bit the whole process, we can follow another approach.
So, we can first make an archive file (using the tar command to make a .tar file) of the entire folder to be copied, and then we can use the scp command to transfer just that archive file to the target machine. Finally, we can extract it in the target machine.
Moreover, we can also compress the .tar file before transferring it over the network, using a compression command (e.g. gzip or bzip2). Of course, then we have to uncompress it into the host received it.
Importing the exported (.sql) database
In your target host (this is the Synology NAS server) login in MariaDB, as a user who has appropriate privileges to create database schemas, users and import a database, eg. root.
S mysql -u root -p
NB: In a Synology NAS server MariaDB binaries are usually located at: /usr/local/mariadb10/bin/ (this is a symbolic link to the actual place which is located into the volume selected during initial MariaDB installation).
So, use the full pathname syntax:
S /usr/local/mariadb10/bin/mysql -u root -p
After you have logged in, you can check existing schemas and users:
nas01:/volume1/web$
nas01:/volume1/web$ /usr/local/mariadb10/bin/mysql -u root -p
Enter password:
Welcome to the MariaDB monitor.  Commands end with ; or \g.
Your MariaDB connection id is 624
Server version: 10.3.7-MariaDB Source distribution

Copyright (c) 2000, 2018, Oracle, MariaDB Corporation Ab and others.

Type 'help;' or '\h' for help. Type '\c' to clear the current input statement.

MariaDB [(none)]>
MariaDB [(none)]>
MariaDB [(none)]> SHOW DATABASES;
+--------------------+
| Database           |
+--------------------+
| information_schema |
| mysql              |
| performance_schema |
| phpmyadmin         |
| wpr1               |
| wpr2               |
+--------------------+
6 rows in set (0.000 sec)

MariaDB [(none)]>
MariaDB [(none)]> SELECT User FROM mysql.user;
+----------+
| User     |
+----------+
| root     |
| root     |
| us01     |
| wpusr    |
+----------+
4 rows in set (0.000 sec)

MariaDB [(none)]>
MariaDB [(none)]>
Now, we can proceed with creating a new database (schema) as well as a new user who will own that database. We are going to use the database and user names taken from the macOS (see above).
The database name was ‘macdbwp1’, the username was ‘macuserwp1’, and the password was ‘W#jsh*dgfXFw3@’
NB: You can always use different names for the database, the user name, and the password. In such a case, you have also to adjust the WordPress configuration file ‘wp-config.php‘ inside the site’s folder (/volume1/web/test1.com). For those adjustments, as well as for updating the ‘Authentication Unique Keys and Salts’, you can find more details here.
Create a new database
Use the following mysql command/script:
CREATE DATABASE macdbwp1 DEFAULT CHARACTER SET utf8mb4 COLLATE utf8mb4_unicode_ci;
Create a new user and grant access to the database
We are going to create the user account, set the password, and grant full access to the database we created. We can do this by typing the following command and the FLUSH statement:
GRANT ALL ON macdbwp1.* TO 'macuserwp1'@'localhost' IDENTIFIED BY 'W#jsh*dgfXFw3@';

FLUSH PRIVILEGES;
After that you can check again existing schemas and users, just to be sure that everything went OK.:
SHOW DATABASES;
SELECT User FROM mysql.user;
Moreover, see also, that the newly created database has no tables yet:
SHOW TABLES FROM macdbwp1;
Let’s see all the above in our terminal:
MariaDB [(none)]>
MariaDB [(none)]>
MariaDB [(none)]> CREATE DATABASE macdbwp1 DEFAULT CHARACTER SET utf8mb4 COLLATE utf8mb4_unicode_ci;
Query OK, 1 row affected (0.000 sec)

MariaDB [(none)]>
MariaDB [(none)]> GRANT ALL ON macdbwp1.* TO 'macuserwp1'@'localhost' IDENTIFIED BY 'W#jsh*dgfXFw3@';
Query OK, 0 rows affected (0.036 sec)

MariaDB [(none)]>
MariaDB [(none)]> FLUSH PRIVILEGES;
Query OK, 0 rows affected (0.001 sec)

MariaDB [(none)]>
MariaDB [(none)]> SHOW DATABASES;
+--------------------+
| Database           |
+--------------------+
| information_schema |
| macdbwp1           |
| mysql              |
| performance_schema |
| phpmyadmin         |
| wpr1               |
| wpr2               |
+--------------------+
7 rows in set (0.000 sec)

MariaDB [(none)]>
MariaDB [(none)]> SELECT User FROM mysql.user;
+------------+
| User       |
+------------+
| root       |
| root       |
| macuserwp1 |
| us01       |
| wpusr      |
+------------+
5 rows in set (0.000 sec)

MariaDB [(none)]>
MariaDB [(none)]> SHOW TABLES FROM macdbwp1;
Empty set (0.000 sec)

MariaDB [(none)]>
MariaDB [(none)]>
Import the macOS .sql exported file
Please recall that this file was the macdbwp1.sql file, so you can import it now into the target Synology NAS server MariaDB, by using the following bash shell command (Synology NAS Server bash shell):
$ /usr/local/mariadb10/bin/mysql -u root -p macdbwp1 < /volume1/web/test1.com/macdbwp1.sql
nas01:/volume1/web/test1.com$ /usr/local/mariadb10/bin/mysql -u root -p macdbwp1 < /volume1/web/test1.com/macdbwp1.sql
Enter password:
nas01:/volume1/web/test1.com$
nas01:/volume1/web/test1.com$
After the successful import, you can check again that this time all the table of our site have been imported to the newly created database:
MariaDB [(none)]>
MariaDB [(none)]> SHOW TABLES FROM macdbwp1;
+---------------------------+
| Tables_in_macdbwp1        |
+---------------------------+
| wp_commentmeta            |
| wp_comments               |
| wp_fbv                    |
| wp_fbv_attachment_folder  |
| wp_links                  |
| wp_mgmlp_folders          |
| wp_options                |
| wp_postmeta               |
| wp_posts                  |
| wp_realmedialibrary       |
| wp_realmedialibrary_meta  |
| wp_realmedialibrary_posts |
| wp_realmedialibrary_tmp   |
| wp_term_relationships     |
| wp_term_taxonomy          |
| wp_termmeta               |
| wp_terms                  |
| wp_usermeta               |
| wp_users                  |
+---------------------------+
19 rows in set (0.000 sec)

MariaDB [(none)]>
MariaDB [(none)]>
Changes made to MariaDB schemas are immediately reflected in phpMyAdmin of the Synology NAS server:
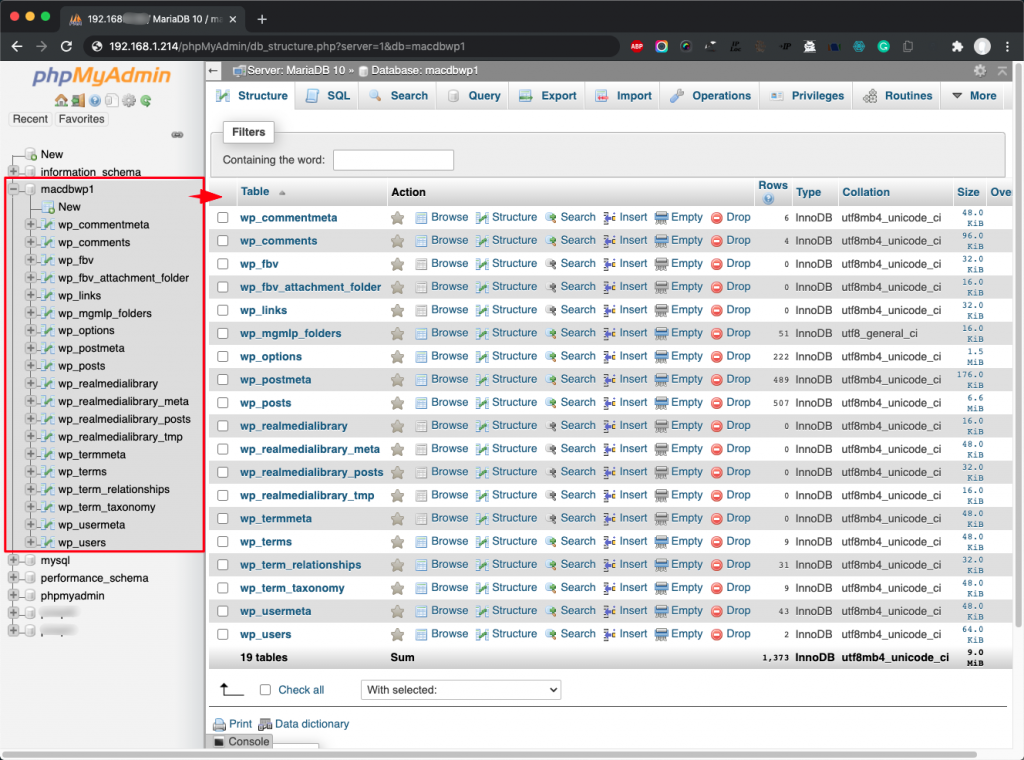
[tbc]
Adjust folder and file permissions
In a Synology NAS server, the default owner and usergroup is the ‘http’ virtual user. You can check it, for instance, if you have installed the WordPress via the official Package Center, where the folder created by default is the wordpress folder under the path: /volume1/web/:
nas01:/volume1:~$ ls -al /volume1/web/wordpress
total 204
drwxrwxrwx+ 1 http http   618 Dec  6 11:24 .
drwxrwxrwx+ 1 root root   142 Jan 18 14:24 ..
-rwxrwxrwx+ 1 http http   764 Dec 12  2018 disabled.html
-rwxrwxrwx+ 1 http http   435 Nov 29 12:54 .htaccess
-rwxrwxrwx+ 1 http http   424 May 20  2019 .htaccess.org
-rwxrwxrwx+ 1 http http   420 Dec  1  2017 index.php
-rw-r--r--  1 http http 19935 Feb 17  2020 license.txt
-rwxrwxrwx+ 1 http http     0 Dec 12  2018 pingbackIsOpend
-rwxrwxrwx+ 1 http http   278 Dec 12  2018 syno-misc.php
-rw-r--r--  1 http http  6939 Feb 17  2020 wp-activate.php
drwxr-xr-x  1 http http  2618 Feb 17  2020 wp-admin
-rw-r--r--  1 http http   369 Feb 17  2020 wp-blog-header.php
-rw-r--r--  1 http http  2283 Feb 17  2020 wp-comments-post.php
-rwxrwxrwx  1 http http  3836 Nov  1 13:51 wp-config.php
drwxrwxrwx+ 1 http http   134 Jan 18 12:45 wp-content
-rw-r--r--  1 http http  3955 Feb 17  2020 wp-cron.php
drwxr-xr-x  1 http http  7652 Feb 17  2020 wp-includes
-rw-r--r--  1 http http  2504 Feb 17  2020 wp-links-opml.php
-rw-r--r--  1 http http  3326 Feb 17  2020 wp-load.php
-rw-r--r--  1 http http 47597 Feb 17  2020 wp-login.php
-rw-r--r--  1 http http  8483 Feb 17  2020 wp-mail.php
-rw-r--r--  1 http http 19120 Feb 17  2020 wp-settings.php
-rw-r--r--  1 http http 31112 Feb 17  2020 wp-signup.php
-rw-r--r--  1 http http  4764 Feb 17  2020 wp-trackback.php
-rw-r--r--  1 http http  3150 Feb 17  2020 xmlrpc.php
nas01:/volume1:~$
So you can use the following command to change the owner and user group for out /volume1/web/test1.com folder:
$ sudo chown -R "http:http" /volume1/web/test1.com
nas01:/volume1:~$ sudo chown -R "http:http" /volume3/web/test1.com
nas01:/volume1:~$ ls -al
total 11280
drwxr-xr-x  1 http http     704 Jan 18 12:58 .
drwxrwxrwx+ 1 root root     132 Jan 18 12:58 ..
-rwxr-xr-x  1 http http    6148 Jan 11 21:08 .DS_Store
drwxrwxrwx+ 1 http http     346 Jan 18 13:10 @eaDir
-rwxr-xr-x  1 http http     405 Jan 18 12:58 .htaccess
-rwxr-xr-x  1 http http     523 Jan 18 12:58 .htaccess_mac1
-rwxr-xr-x  1 http http     194 Jan 11 21:08 index.html
-rwxr-xr-x  1 http http     405 Jan 11 21:08 index.php
-rwxr-xr-x  1 http http   19915 Jan 11 21:08 license.txt
-rwxr-xr-x  1 http http 5659747 Jan 11 21:08 macdbwp1.sql
-rwxr-xr-x  1 http http    7278 Jan 11 21:08 readme.html
-rwxr-xr-x  1 http http    7101 Jan 11 21:08 wp-activate.php
drwxr-xr-x  1 http http    2668 Jan 11 21:08 wp-admin
-rwxr-xr-x  1 http http     351 Jan 11 21:08 wp-blog-header.php
-rwxr-xr-x  1 http http    2328 Jan 11 21:08 wp-comments-post.php
-rwxr-xr-x  1 http http    3314 Jan 11 21:08 wp-config-mac1.php
-rwxr-xr-x  1 http http    3285 Jan 18 13:22 wp-config.php
-rwxr-xr-x  1 http http    2913 Jan 11 21:08 wp-config-sample.php
drwxr-xr-x  1 http http      72 Jan 11 21:08 wp-content
-rwxr-xr-x  1 http http    3939 Jan 11 21:08 wp-cron.php
drwxr-xr-x  1 http http    8264 Jan 11 21:08 wp-includes
-rwxr-xr-x  1 http http    2496 Jan 11 21:08 wp-links-opml.php
-rwxr-xr-x  1 http http    3300 Jan 11 21:08 wp-load.php
-rwxr-xr-x  1 http http   49831 Jan 11 21:08 wp-login.php
-rwxr-xr-x  1 http http    8509 Jan 11 21:08 wp-mail.php
-rwxr-xr-x  1 http http   20975 Jan 11 21:08 wp-settings.php
-rwxr-xr-x  1 http http   31337 Jan 11 21:08 wp-signup.php
-rwxr-xr-x  1 http http    4747 Jan 11 21:08 wp-trackback.php
-rwxr-xr-x  1 http http    3236 Jan 11 21:08 xmlrpc.php
nas01:/volume1:~$
After that, and following the instructions of my post here, we are going to implement folder and file permission of the Synology NAS server site’s folder (/volume1/web/test1.com/):
For Folders:
$ sudo find /volume1/web/test1.com/ -type d -exec chmod 755 {} \;
For Files:
$ sudo find /volume1/web/test1.com/ -type f -exec chmod 644 {} \;
Adjust the host settings in wp-confi.php file
When you try to login to the Dashboard of the transferred site, e.g.
https://192.168.1.214/test1.com/wp-login.php
you might encounter issues connecting to the database, getting errors like ‘Error establishing a database connection‘:

It is most likely that this is caused by the different settings of the MariaDB host service in your Synology NAS server. In such case adjust the DB_HOST definition in the wp-config.php file, like that:
/** MySQL hostname */
/* define( 'DB_HOST', 'localhost' ); */
define( 'DB_HOST', 'localhost:/run/mysqld/mysqld10.sock' );
NB: you can find the correct syntax for your system using the CLI of MariaDB via status statement. Then look at the UNIX socket:
MariaDB [(none)]> status
--------------
/usr/local/mariadb10/bin/mysql  Ver 15.1 Distrib 10.3.7-MariaDB, for Linux () using readline 5.1

Connection id:		651
Current database:
Current user:		root@localhost
SSL:			Not in use
Current pager:		more
Using outfile:		''
Using delimiter:	;
Server:			MariaDB
Server version:		10.3.7-MariaDB Source distribution
Protocol version:	10
Connection:		Localhost via UNIX socket
Server characterset:	utf8
Db     characterset:	utf8
Client characterset:	utf8
Conn.  characterset:	utf8
UNIX socket:		/run/mysqld/mysqld10.sock
Uptime:			17 days 15 min 14 sec

Threads: 7  Questions: 21895  Slow queries: 0  Opens: 1615  Flush tables: 1  Open tables: 10  Queries per second avg: 0.014
--------------

MariaDB [(none)]>
After that you probably will be in a situation you can reach your new site using the direct IP of your Synology NAS server:
https://192.168.1.214/test1.com/wp-login.php

Name your new site and update your MAC’s /etc/hosts file
Choose a name for your site, e.g. www.devxperiences.com, and add it to your MAC’s /etc/hosts file, where 192.168.1.214 is the local IP address of your Synology NAS server:
192.168.1.214 www.devxperiences.com
Then use your browser and try it:
http://www.devxperiences.com
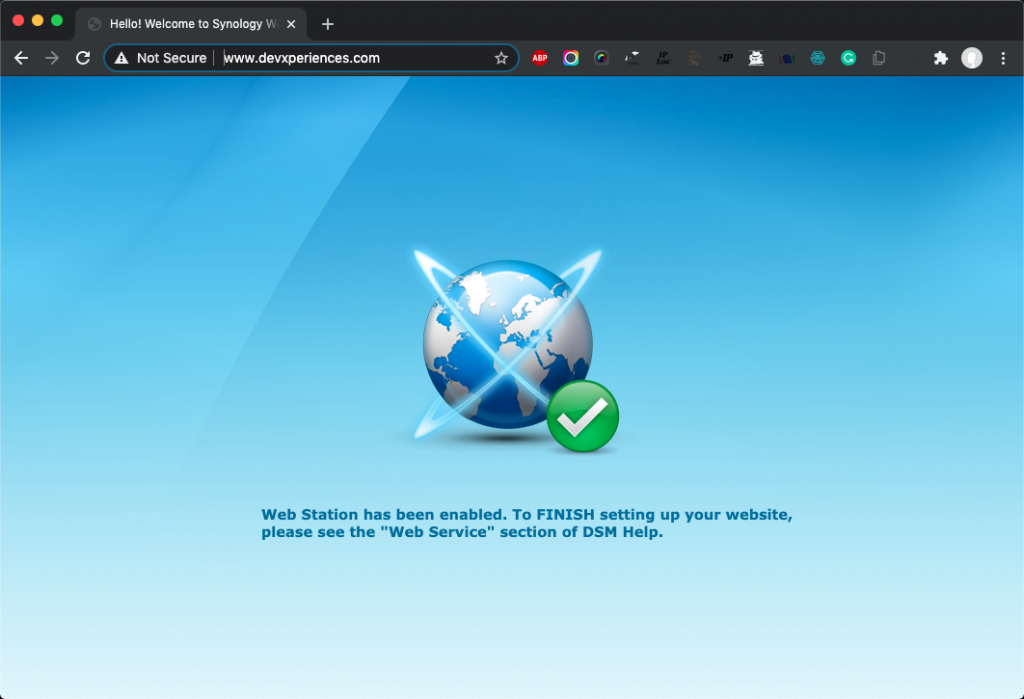
What you get is the default index.html file located inside the NAS’ /volume1/web folder. The index.html file is created by default during the Web Station installation of your NAS server. Here is the index.html file:
<!DOCTYPE html>
<html class="img-no-display"><head>
<meta http-equiv="Content-Type" content="text/html; charset=UTF-8" />
<meta http-equiv="X-UA-Compatible" content="IE=edge,chrome=1"><meta http-equiv="Content-Type" content="text/html; charset=utf-8">
<title>Hello! Welcome to Synology Web Station!</title>
<style>
html {
    height: 100%;
    overflow: hidden;
}
body {
    background: url(web_images/bg.png) no-repeat center center fixed;
    -webkit-background-size: cover;
    -moz-background-size: cover;
    -o-background-size: cover;
    background-size: cover;
    height: 100%;
}
div#outer {
    display: table;
    height: 100%;
    width: 100%;
}
div#container {
	display: table-cell;
    text-align: center;
    vertical-align: middle;
}
#paragraph {
	padding: 20px 0 30px 40px;
	margin: 0 auto;
	text-align: left;
	width: 560px;
	color: #146b9d;
	font-size: 11pt;
	font-weight: bold;
	font-family: Verdana;
}
</style>
<link href="../help.css" type="text/css" rel="stylesheet" />
<link href="../scrollbar/flexcroll.css" type="text/css" rel="stylesheet" />
<script type="text/javascript" src="../scrollbar/flexcroll.js"></script>
<script type="text/javascript" src="../scrollbar/initFlexcroll.js"></script>
</head>
<body>
<div id="outer">
<div id="container">
<img src="web_images/icon.png" />
<p id="paragraph">Web Station has been enabled. To FINISH setting up your website, please see the "Web Service" section of DSM Help.</p>
</div>
</div>


</body></html>
The reason you get this file is due to the fact that you haven’t yet created a Virtual Host for that site, so the server can not determine what you are asking about, and thus directs you to that file. So, let’s create a new Virtual Host for your new site!
Create a new Virtual Host on your Synology NAS server
We can create a new Virtual Host either manually, by adding the appropriate script block inside the Apache’s 2.4 virtual hosts configuration file: /usr/local/etc/httpd/extrahttpd-vhosts.conf [see also here and here], or using the GUI of our NAS’ Web Station. Since using a GUI is quite convenient, let’s create a new Virtual Host via Web Statio for your new site!. On your NAS server, open the Web Statio, go to Virtual Hosts and click on Create. Then fill in the required fields and press OK. That’s it!


Now, you can check that your Apache’s (version 2.4) configuration file, has been updated automatically:
user01@nas01:~$ cat /usr/local/etc/apache24/sites-enabled/httpd-vhost.conf
Alias /_webstation_/ "/var/packages/WebStation/target/error_page/"
ErrorDocument 400 /_webstation_/400.html
ErrorDocument 401 /_webstation_/401.html
ErrorDocument 402 /_webstation_/402.html
ErrorDocument 403 /_webstation_/403.html
ErrorDocument 404 /_webstation_/404.html
ErrorDocument 405 /_webstation_/405.html
ErrorDocument 406 /_webstation_/406.html
ErrorDocument 407 /_webstation_/407.html
ErrorDocument 408 /_webstation_/408.html
ErrorDocument 500 /_webstation_/500.html
ErrorDocument 501 /_webstation_/501.html
ErrorDocument 502 /_webstation_/502.html
ErrorDocument 503 /_webstation_/503.html
ErrorDocument 504 /_webstation_/504.html
ErrorDocument 505 /_webstation_/505.html


<VirtualHost *:80 *:443>
    ServerName www.devxperiences.com
    SetEnv HOST www.devxperiences.com
    DocumentRoot "/volume1/web/test1.com"
    <IfModule dir_module>
        DirectoryIndex  index.html index.htm index.cgi index.php index.php5
    </IfModule>
    <Directory "/volume1/web/test1.com">
        Options MultiViews FollowSymLinks ExecCGI
        AllowOverride All
        <IfModule authz_core_module>
            Require all granted
        </IfModule>
    </Directory>

    <FilesMatch "\.(php[345]?|phtml)$">
        SetHandler "proxy:unix:/run/php-fpm/php-caae0ba2-8365-462f-a019-e88c88a9cc9d.sock|fcgi://localhost"

    </FilesMatch>
</VirtualHos

<VirtualHost *:80 *:443>
    ServerName www.mysite.com
    SetEnv HOST www.mysite.com
    DocumentRoot "/volume1/web/wordpress"
    <IfModule dir_module>
        DirectoryIndex  index.html index.htm index.cgi index.php index.php5
    </IfModule>
    <Directory "/volume1/web/wordpress">
        Options MultiViews FollowSymLinks ExecCGI
        AllowOverride All
        <IfModule authz_core_module>
            Require all granted
        </IfModule>
    </Directory>

    <FilesMatch "\.(php[345]?|phtml)$">
        SetHandler "proxy:unix:/run/php-fpm/php-f4d357e4-6d9e-420f-b23e-c2b2c9184588.sock|fcgi://localhost"

    </FilesMatch>
</VirtualHost>

user01@nas01:~$
Now, open your browser and try again to access the
http://www.devxperiences.com :
NB: It is preferable to use another PC -if it is available because we haven’t yet changed the URLs for our new site. If you use your MAC where the www.test1.com is still alive, then you will see that all links seem working OK, since they are point to valid links on your MAC and not to the new site on our NAS server.
This time our new site is really reachable, even there are issues with its appearance because as we said before, we haven’t updated the URLs and links yet:
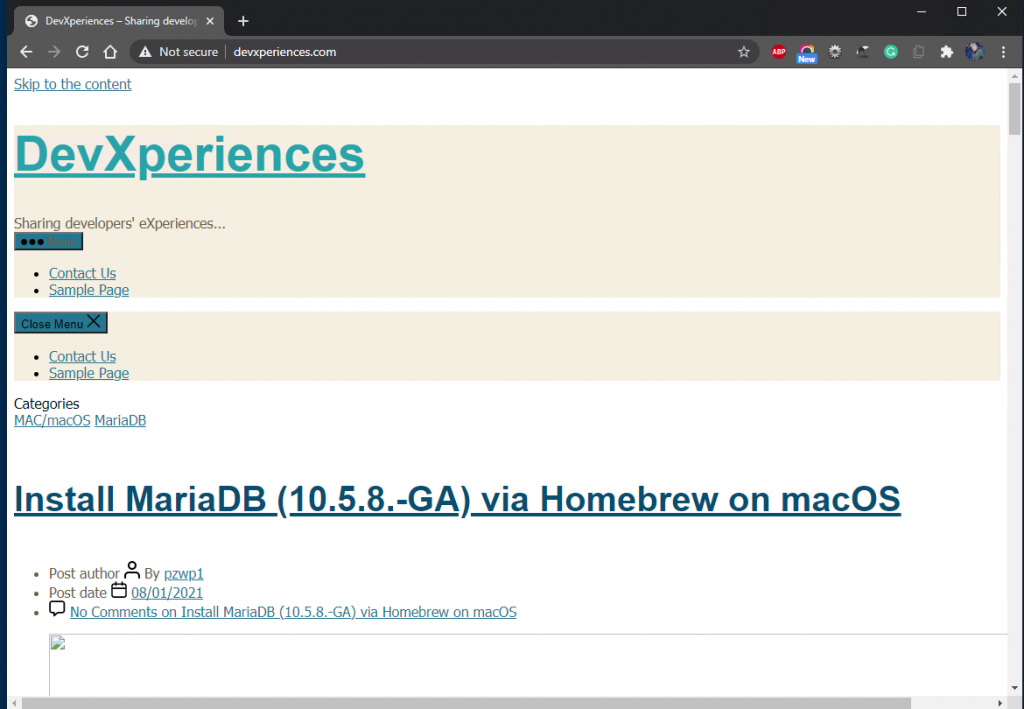
http://www.devxperiences.com/wp-login.php
Now, is time to update the URLs and links of our new site.
Check/update database tables (site url, home, etc.)
First, let’s check the site URLs using phpMyAdmin web GUI. Login as root, go to the site’s database (recall that its name is ‘macdbwp1‘, locate and click on wp_options table. Then, locate the rows with option_name field having values siteurl and home. These are probably the first 2 rows:
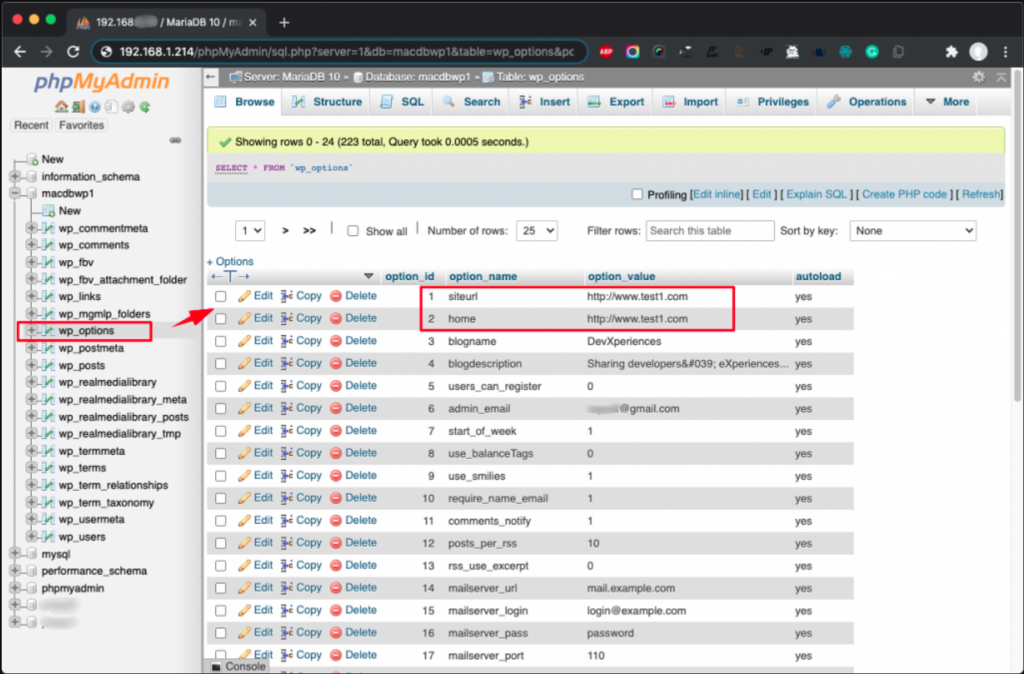
Then, Edit both of them, changing the value of the option_value field, from http://www.devxperiences.com to httpp://www.devxperiences.com.

ΝB: You can also use the SQL pane of phpMyAdmin or even the mysql/MariaDB CLI interface to achieve the same result. For instance, to change the siteurl and home values, at once:
UPDATE 'wp_options` SET 'option_value' = 'http://www.devxperiences.com' WHERE 'option_name' IN ('siteurl', 'home');

or

UPDATE wp_options SET option_value = replace(option_value, 'http://www.devxperiences.com', 'http://www.devxperiences.com') WHERE option_name = 'home' OR option_name = 'siteurl';
Furthermore, in case you face issues with some broken links, you can search ‘deeper’ the wp_options table for old site values in whole column options_value .i.e www.test1.com, and change them to www.devxperiences.com.
wp_options
UPDATE wp_options SET option_value = replace(option_value, 'http://www.devxperiences.com', 'http://www.devxperiences.com');
Then, if it is necessary, you can continue searching and replacing other tables of your site’s database.
wp_posts
This is the table of content of all posts. It containes the posts’ text in the post_content field. So, if you have internal links in your posts, you have to replace the old URLs.
UPDATE wp_posts SET post_content = replace(post_content, 'http://www.devxperiences.com', 'http://www.devxperiences.com');
wp_postmeta
In this table, you can find all the attributes and custom fields, as well as advanced custom fields (ACF). If there are any permalinks in custom fields, you must have to replace them with the new ones.
UPDATE wp_postmeta SET meta_value = replace(meta_value, 'http://www.devxperiences.com', 'http://www.devxperiences.com');
wp_commants
wp_comments table contains post comments, which also might contain some permalinks to other posts of your website. In such case, you also have to replace them.
UPDATE wp_comments SET comment_content = replace(comment_content, 'http://www.devxperiences.com', 'http://www.devxperiences.com');
Now, open your browser and try again to access the
http://www.devxperiences.com :
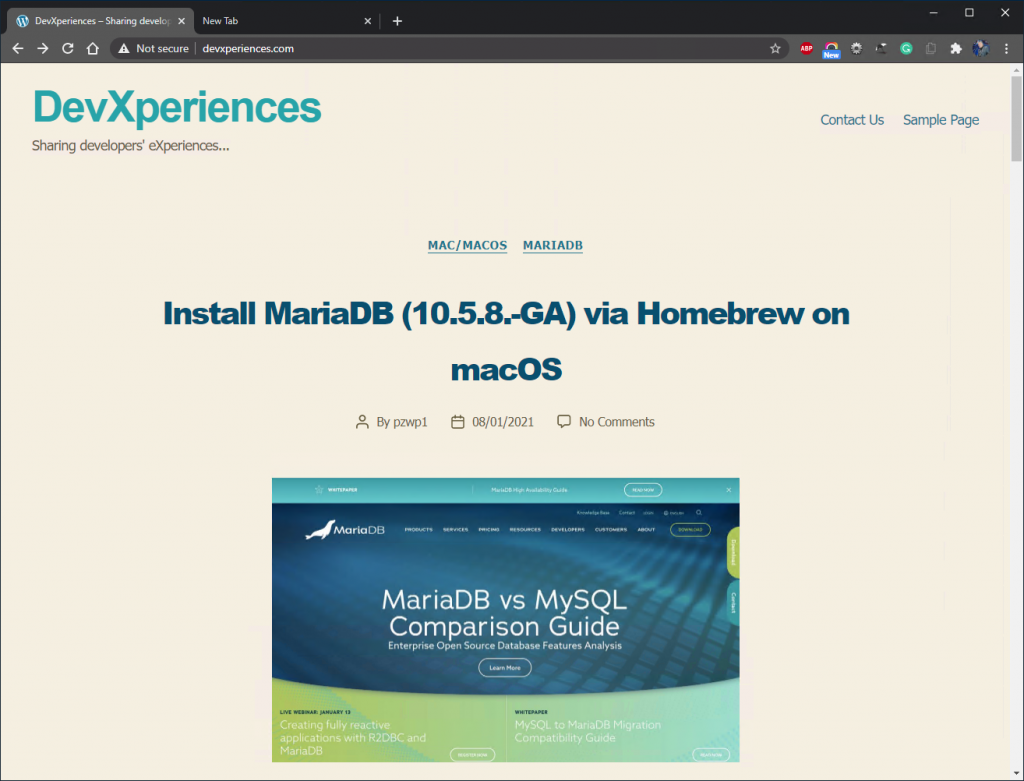
Now, you can also try to login and check your Dashboard, Settings, Plugins, etc.:
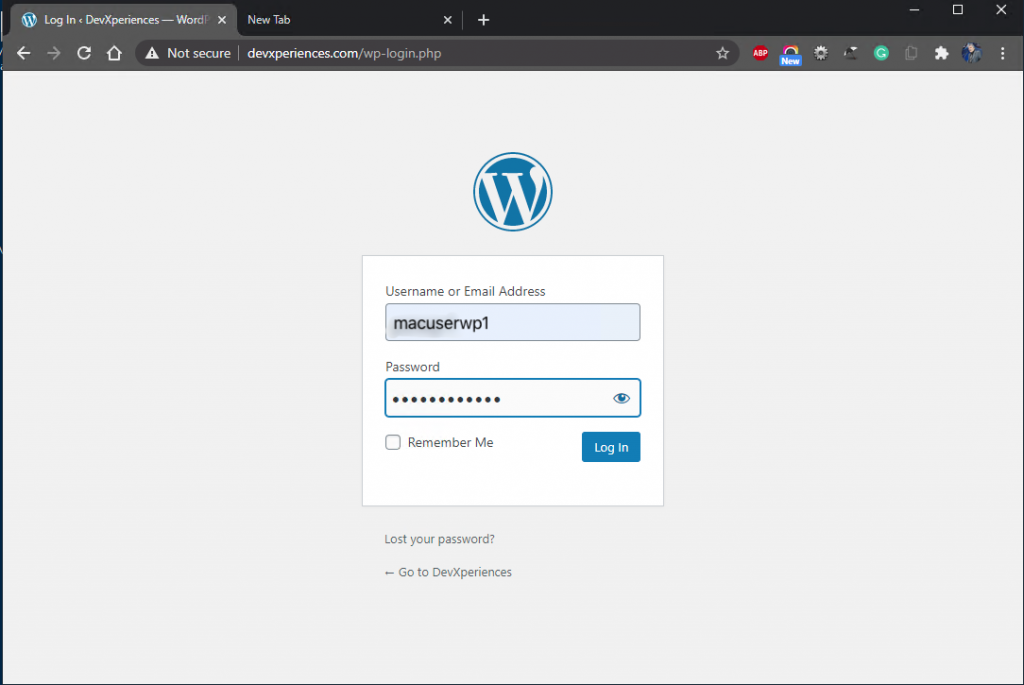
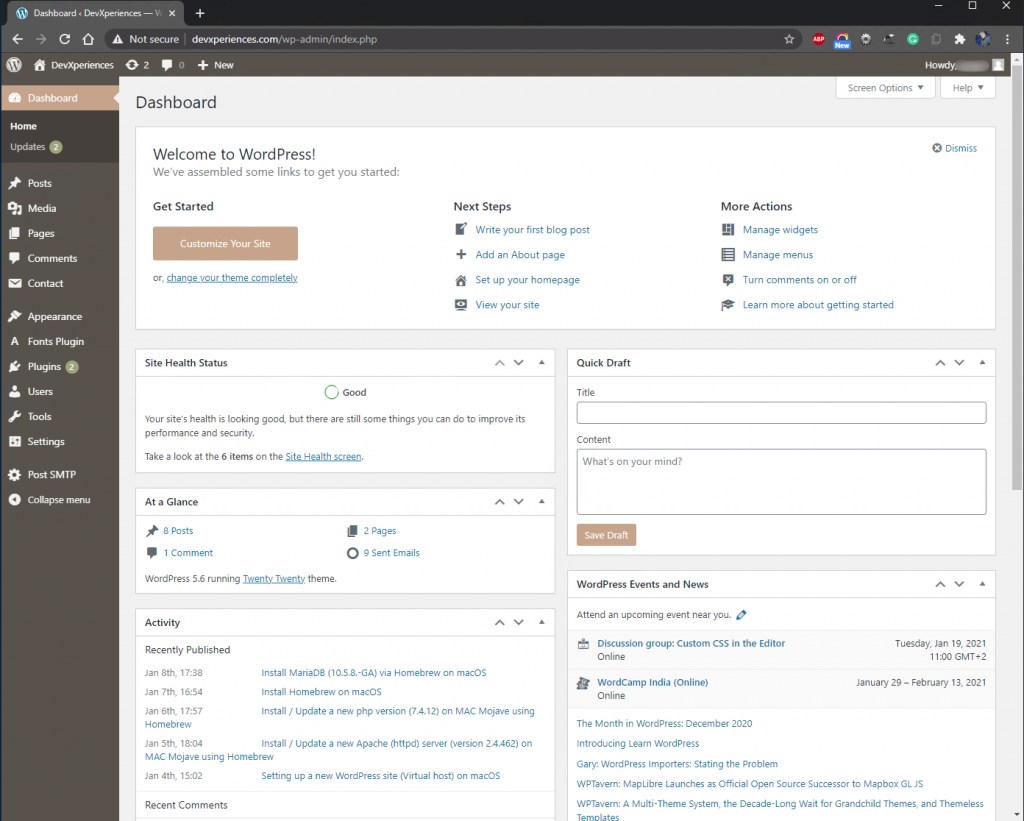
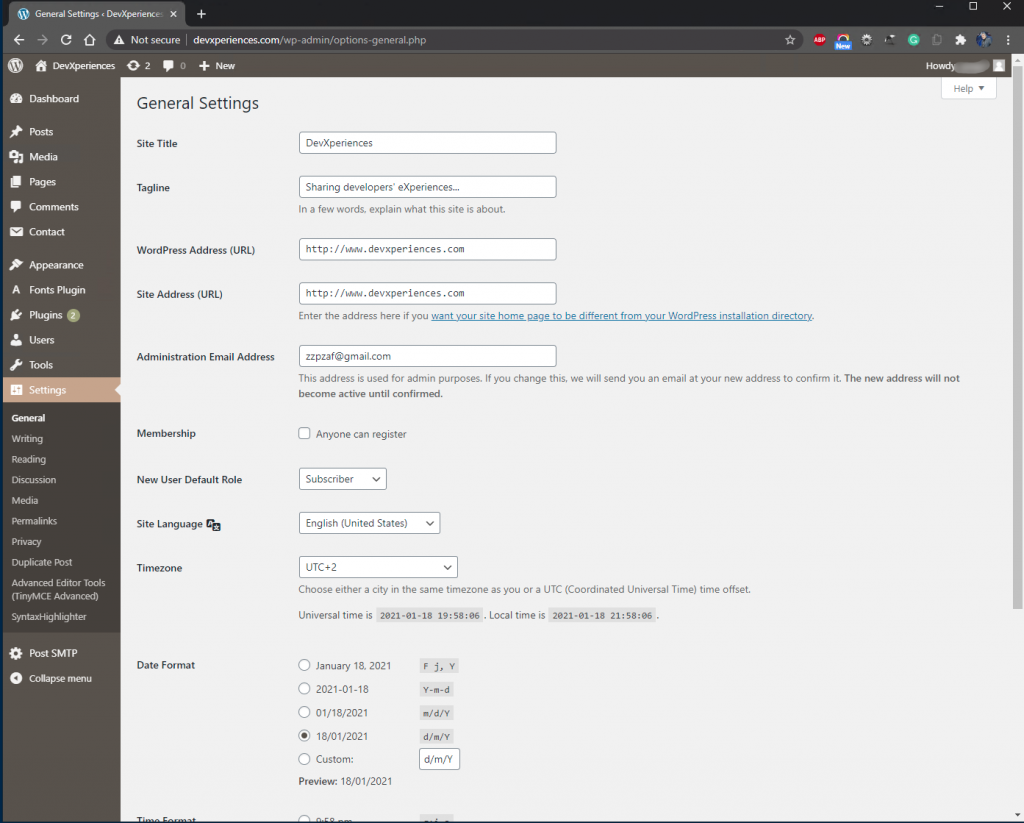
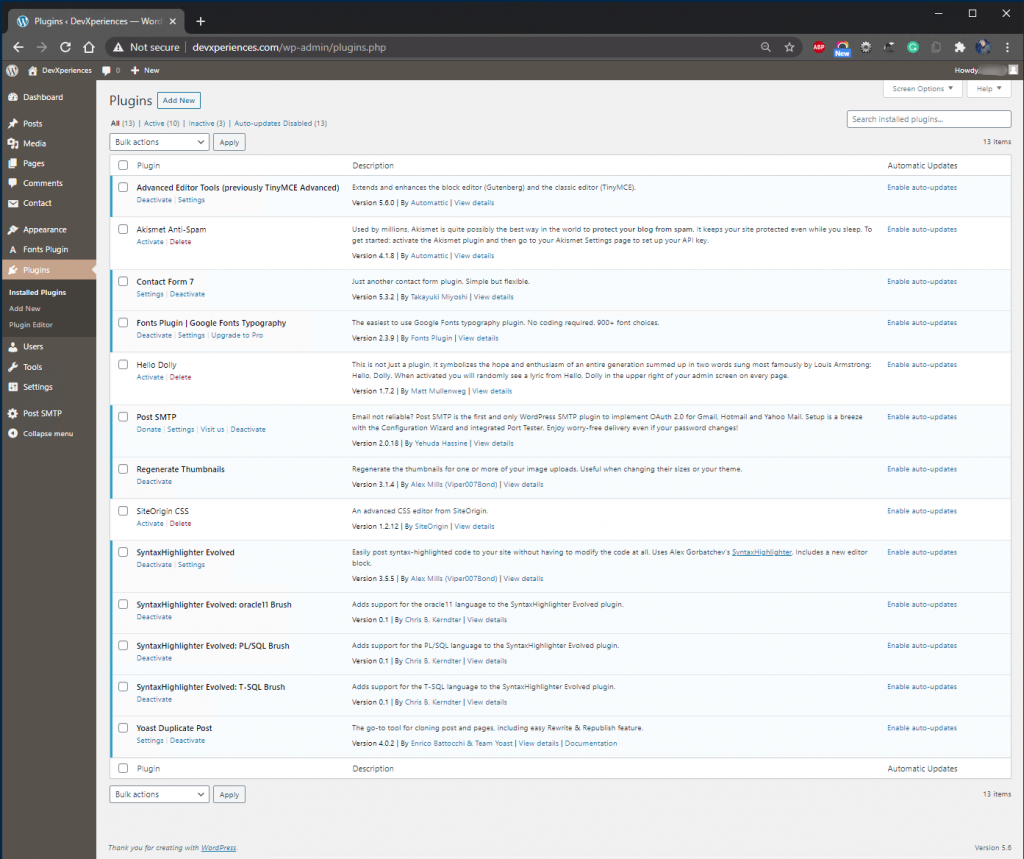
As a next step, you can take your site ‘on-air’, to the real world! Since we have defined more than one virtual host in our server, we have to use a proxy server. The main role of a proxy server is to handle all web/internet requests targeting www.devxperiences.com, and to redirect them to the appropriate virtual host we defined in our NAS server.
You can read more on that, in the following post. Also, you might find useful the following related posts:
[tbu].
That’s it!
Thank you for reading!
